Rehabilitation of a Full Arch Utilizing All-on-4™ Treatment Concept, Part 3
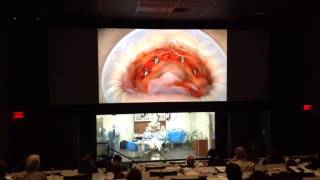
Operative transcript of a full-arch dental rehabilitation using the All-on-4 treatment concept (immediate implants and provisional prosthesis). The clip documents intraoperative steps: seating surgical guide, placing implants and multi-unit abutments, suturing flaps, marking and adjusting a provisional denture, and fitting temporary sleeves for immediate loading. The speaker (operating clinician) narrates clinical reasoning about torque, tissue management, and primary stability thresholds.
Chapters
Okay, See what that does. I need a better light. Okay, I think we should be good here. Let's screw this down. Go ahead and hold it. Yes, that would be much better. Ana Maria, turn your head a little bit for me. Marina, my dear. Thank you. The hardest part here, let me try to get underneath. Let's use a handpiece instead. I'm just going to go to five right now because I want to try this on and see how it looks on the prosthesis. Just gently hold. Okay, let's try prosthesis that. Surgical guide. Open my ear. Thank you. Okay, so we're gonna seat this. Okay, so we're seated and it's coming out right on the ridge here. Okay. So we are in good shape with that because again, I want to make sure I'm coming in that opening, the exit here for the multi unit so that if it's too lingual, makes the prosthesis too thick. Okay, we've got two more to place. Yeah. If it's too buccal, it's anesthetic. Absolutely. Okay, one more for the posterior. Let's do that one first. I want to make sure that 30°. Yeah, there's no bone here in the way. It looks like there might be. So let me have a. Yes. If there's bone in the way here, it won't allow me to see. Multi unit. Go ahead and suction that. Very good. 4x4 gauze at the back. You can use a bone mill. I just feel I have more control, especially when the bone is so thin. With the runger. With the small runger. Okay, two lingual. Let's try another spot. Okay, this is probably what we want here. Hold. I'm going to retract this flap a little bit better. So I want to make sure I'm in the excess hole. Okay, Guide again. I'm gonna take these out here on this side. Okay, so we're right here on the ridge. Let's make sure I'm seated here with a gauze. You'll leave it there? Leave it there. Okay. Okay, good. Right on the ridge. So one more in the anterior straight. I need one more straight multi unit. Yes, please. Okay, so we're going to torque these down a little bit. Anterior multi unit. Perfect. All right, so I think we can torque them down to. We have really good stability on these implants, so I'm not worried about loosening implants at all. Okay, good. And we're probably going to go more here on the posterior as well. Okay, good. One more on the other side. Excellent. So next step would be to place the cylinders here, and I like to do that before I suture, just to make sure they're seated. So we can at least start marking or should we mark the denture? Greg, you want to mark the denture first? The blue mousse first. Okay, awesome. Let's put some healing caps. Sounds great. So we're going to put some white healing caps for now and we're going to suture and mark the denture so we could make some access holes. Doctor, real quick. Yes. Now why would you not torque those multi unit abundance to 35? Because in case we need to change them later on. So 50 Newton centimeters is fine for the temporary. Okay. So if the tissue heals or retracts, it's better not to have these torqued down all the way, just better to remove them that way. So usually when I work with a lot of my prosthetics colleagues, they actually just finger tighten. Oftentimes the multi unit abutment at the temporary stage. Okay. Because we're at the temporary stage right now. But later on definitely we can, once we decide on a multi unit final abutment, we can tighten them to the required specifications, especially in the anterior. My guess is that in the future we might go to a 1.5 millimeter collar. Right now it's 2.5. And yes, the tissue swell. After the procedure, they're going to shrink back and oftentimes we need to change the anterior multi unit. Okay, let's suture. I can definitely mark if you're ready. Yeah. Okay. Awesome. Here we have. These are the white caps. You can see them there on the screen. And basically just to hold the tissue from covering the implants as I'm suturing. Bite down, my dear. Bite, bite, bite. Okay, these are okay. That's good. Open. Yes, that would be great. So we're just putting some blue mousse over here so we can mark the spots of the implants here, bite down. Let me make sure your bite is right. Bite, bite, bite, bite together. There we go. Yeah. So the blue mousse is going to mark the location where Greg will open up the access holes in the denture so we can pick up the abutments. Almost there. Almost. Go ahead and open for me. Open it. Open my gift. There we go. So you can see that the location of the four implants. So Greg is going to get busy in the lab while we suture here. Always make sure that there's no blue mousse left behind. There isn't. And I'm going to Use a chromic gut suture. A4,0 tissue points. And I'm going to start from the midline. Okay. Very important because oftentimes if you start in the posterior, you can switch off the midline, and we don't want to do that. Okay. So here's my first suture. Closing up the front. And now at this point, I'm going to take a look at the tissue and I'm going to make some adjustments. Because you can see here on the palatal side, it's going to become too thick. Okay. So I'm definitely going to trim this off before I finish suturing here. On the anterior, it's absolutely fine, no problems. But on the lingual, we need to do some adjustment. 15C. Okay, so I'm holding the tissue in place. Very important at this far to make sure you have a sharp blade. See? Much better. You can see here how I trimmed it. You can see the shape. And then it adapts much better around the abutment. Same in the posterior. You can see here, it's thicker. Any pain, my dear? No. Good. Okay, very good. See, I like that. Let's go to the other side. Little bit of adjustment right here. All right. And on the other abutment, typically on the palatal area, I always have to adjust, always have to adjust the tissue height. On the buccal, not so much because we're always lacking keratinized tissue. So you don't want to overdo it. On the buccal, maybe a little bit we can do the posterior. But for now I'm going to start suturing and I'll leave it where it's at. Okay. A lot of times I do a continuous suturing per quadrant. So we're going to start with a posterior first. I just want to. Once you secure the midline, I like to go posterior just to make sure the flap is approximated properly, you know, and we're not short anywhere. Okay. So we just got one end and we're going to do a continuous suture. So here on the back of this abutment, I'm actually going to turn around and go the other way just so I don't get any sutures over the top of the abutment. Okay. Just gonna go around. You can see here just with one suture, this part of the ridge already closed on its own. Very important to have passive closure of the flap. You don't want to pull and tug and do any of that because it creates extra stress on the area. And if you have flap die back, that could be very Painful. So here I cannot go through both at the same time, both sides of the flap. So I'm just going to do one side at a time because you want to make sure that you have a big bite from the edge of the flap to the entrance point of the needle. Okay. Going through the back here. And I'm going to continue with in single sutures. Okay, that looks good there. We're going to skip. Go to the other side. Okay. Obviously, why do we do continuous retrieving? Just for the mere fact that you're saving some time here. You don't have to do a lot of knotting. And also, if you have all those suture ends, what happens is they can get stuck in your prosthesis when you're picking up the abutment. So I prefer continuous suturing for cases like this. The suture is getting a little bit dry, so go ahead. We're going to wet this a little bit. You can use any other kind of suture. I prefer a resorbable stitch in this case because I don't have to remove the prosthesis to remove the sutures. If you decide to use something non resorbable, just know that one week post up, you have to remove the prosthesis just to ensure that all the stitches are out. It. Okay, almost done here with the suture. So I'm going to show you how I tie this. So essentially. Right. I don't have an end that I do. So we'll create one. I need to wet the suture first, please. Actually, while Holder is doing that, let's check the prosthesis. So you see what Greg did here created four access holes. So we're going to seat it and see how it looks. Bite again. Bite open. Yes. We definitely want to move them a little bit forward here in the anterior. And also. Greg. Yeah, yeah. So I would say a little bit more anterior. This one a little bit too. And this one needs to go more anterior. Just more anterior to the. Yeah, right there. That one looks good. Let's check. Probably a little more buccal. That one. Okay. All right, so let's close up my flap here. Okay. So here we have. I'm gonna. I'm gonna go back on the same entrance or close to it where I. Where I just finished the last suture and I am not going to go all the way through. Okay. I'm gonna keep a suture end like this and I could use that as. Okay, one more knot on this one. Very good. Here we go. So we're able to Achieve closure. Let's do some anesthetic. I have to close the vertical still. Just want to make sure she's still not back here. Put a little gauze on your glasses so they can all keep. This is hitting your eyelashes there. Okay, let's have some more suture. To finish the right side. I need a small needle. You see here, there's a little bit of excess tissue on the implant on number seven. It's certainly something that, you know, we can correct. Just hold it down just a little bit. Okay. You could tell I'm a periodontist. Okay. Yes. I could bring her up a little bit. You're welcome. I need to lower you just a little bit. Doing okay. Awesome. Hey, Greg. And here we are. It looks good. Yeah. Is it? Let me get a mirror so we can see. It's looking pretty good to me. Okay, but this one looks good. Yeah, yeah. Maybe a little bit. That one almost there. Need to lower you just a little more. Okay. What's on short for? Thank you. Just for the vertical incisions. I like to use a shorter needle than a C6 just for better dexterity. There it. Okay, again, I'm using a continuous suture here. Let's see. Suction. Holder on the buckle to make sure that this is properly closed. Good. Okay, one more on the other side. And of course, I'm going to check on the top here just to make sure I have no openings. No, looking good. Just some of those. Suction right there. Suction. See, I want to see how long that vertical is. Okay. Put a cross suture right here. It good. Hemostat with the gauze. Great. I want to just put a little bit of pressure back here and on the flap in general. Take the time to approximate the flap to ensure that most of the bleeding has stopped before we pick up the abutments. Excellent. Let's wipe off the palette and take a photo. Palatal side. Is this wet? Yeah. Open a little bit down here. Good. Yeah. Let's take a good. You can close and rest. The next thing, what we're going to do is open the sleeves, the temporary sleeves. We have four of them. Okay. Okay, perfect. So we can open those up so we can try them on? Yep. Okay, Maria, open big. Going to take one photo here. Turn towards elder a little. Okay. Straighten out your head. Perfect, Perfect. Okay, Sounds good. You're just a perfect patient today. It makes it a lot easier when our patient is ready for this treatment. You know, she's excited about it and. Yes, it. But we need the sleeves, Doctor. Yes. What is your metrics for loading? I don't do ISQ typically for implants that anchor above 35 newtons centimeters. I do use the ISQ occasionally, mostly for single implants, but for all on port typically with the Noble active. As long as we're 25 Newton centimeters or more, I feel comfortable. Because remember we have the cross arch stabilization which also allows us to, you know, secure the implants better. It's much better, let's say if you have soft bone to secure, secure the implants cross arch than to put a denture over the top which can actually loosen the implants. And we have plenty of studies that have shown this. So 25 centimeters or more, I would splint them together. An immediate function. Let's say the bone is really soft. We have a type 4 bone that then what happens is I just maybe use the number two twist drill, the 2 millimeter twist drill and I just go ahead and place the implant. Because you're getting that lateral condensation of bone as you're placing the implant to allow us to secure that implant so tightly. And then the second thing I'm looking for is the cortical stabilization. So I'm going to look for a cortical plate, either crestal on the crest of the ridge or apical of the ridge, base of the nose, sinus floor. We're looking for very, very hard bones. And that's why this procedure is so successful. Because when you look for those hard areas of the bone, it'll anchor the implant sufficiently. But if you're not, if you don't have those areas, let's say you put all on four and you're not connecting the implant, it's all in soft bone, then that's when you see failure. So this is a critical point in anchoring the implant. This is finding that hard bone. Okay, so here we have sleeves. So we are actually going to put these on. That would be the next step. Okay, connect them. I'm going to remove the white caps and put these temporary sleeves on to be able to. These will actually engage into the prosthesis to connect it to the implants. 4x4 gauze first. Fantastic. Great, great. Okay, so Greg prepared here. Everything. Unscrew the white caps. We're going to start with a posterior first and I'm going to do one at a time here because I don't want the tissue collapsing while I'm putting these on. Remove the posterior first. Okay, it's attached. Still a little bit of bleeding. There's one. We go to posterior on the other side. And if you leave these white caps off for too long, you're going to see that tissue will collapse pretty quickly here. So that's why I remove them one at a time. Here. We have two back there. Remove the anterior. Okay. Yeah. Really tiny screws inside of these, so make sure we don't lose any. We always put a thread pack in the back. I have one more to attach. Okay. So here we have all four of them in place. Let's check. We're going to need to trim some here before we pick up the denture. Let's see. Yeah, it needs a little bit more. Greg, if you could open this up a little bit more here just so I could see these a little bit better. Yeah, if you give me a pen, I'll mark it, and then I'll change my gloves. So we want to make sure at this point, the denture is fully seated. And I'm still getting a little catch there on one of the abutments. Okay, let's see. I would open that up a little bit right there, a little bit. Okay.