Rehabilitation of a Full Arch Utilizing All-on-4™ Treatment Concept, Part 1
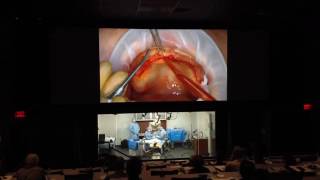
Dr. Sanda Moldovan performs a full-arch All-on-4 implant surgery on patient Ana Maria. The procedure covers CT review, handling fibrotic tissue from long-term denture use, and bone reduction using surgical guides. Part 1 shows incision through implant site marking.
Chapters
Types of procedures onto external implants and integrative nutrition. She's a diplomat of the American Board of Periodontology. She practices again in Beverly Hills in Manhattan, New York with an emphasis on full arch immediate load prostheses. She received her certificate in periodontics and an Ms. In Oral Biology from the UCLA School of Dentistry and a certificate in nutrition from cbns. She is an internationally recognized speaker who continues to inform the public and and dentists about the advancements in dental implants and nutrition on different platforms such as radio, TV and social media. She has taught courses such as Implants A to Z at UCLA School of Dentistry since 2005. She is a faculty of Global Institute for Dental Education which is the guide institute located in Los Angeles where she also performs live surgeries and hands on courses. So it is my great pleasure to have Steve open up the drapes and we will include and begin the surgery. Dr. Moldovan, welcome to our group.
Thank you very much. Hi everybody. I'm going to come and say a proper hello a little bit later on and I'm here with Greg from Calcerant from Da Vinci now. And then we have Helder, my assistant for 10 years and our beautiful patient here, Ana Maria. And she's ready to go. She took a little bit of a sedative, some halcyon, which is a great sedative for these procedures for the patients. It doesn't have to be with IV sedation. And I want to talk to you a little bit first about what we're going to be doing. So you see up there on the screen we have a CT scan of the patient which is now the standard of care for these procedures. On the panoramic image we could see that I took some measurements there. So we have plenty of bone. The sinuses come far back enough posterior so they're not a problem. Sometimes we see the sinuses coursing all the way up to the canine and you can see hers are actually probably around the second premolar. She has good vertical dimension there. So the thickness that you see on the slices there. And I'll go over the CT scan on how to read that a little bit later on. Good quality of bone as well, not just the quantity. So these are things that we get from the CT scan. So let's look here intraorally for her. She lost her teeth a couple of years ago. Probe and mirror please. And she's been wearing a denture since. And if you notice here that her tissues because of wearing the denture they have become quite fibrotic and you actually see this epilisk right here. Sometimes this kind of ridge can create a problem when reflecting because it's very fibrotic and it's easy to tear this kind of flap. So overall though, I'm looking at the quality of her keratinized tissue and I do like that she has nice thick tissue which is required for long term success of any dental implant therapy. Okay, so we will get started. I'm going to show you what Greg from da Vinci made for me, some surgical guides. They are a must. So we are starting with a clear replica of the denture you see right here. Can you move the light helder? Thank you very much. Oh, move it out of the way. Yeah. Okay, so just move it back to the middle a little bit. The light. Okay, so you see here I have quite a wide slot that is cut on the ridge of the denture there so I can get an idea where the implants need to come out. Okay. So I like a clear replica of the dentist just so I could see underneath when I place the implant, what's going on. Okay. The other guide that I sometimes have is a bone reduction guide in her case with a fourth smile. She doesn't show any tissue, but we want to make sure that the bone is clear up to this line so that the connection of the implants is not showing up in her smile line. So we will be trying this one on as well. And then of course, we have the denture that has already been made for.
Her.
And which will retrofit right after implant placement. Okay, so let's get started. Feel anything? Just raise your left hand. I can hear you. Okay. Okay. All right, so we're going to start reflecting the flap here and making an incision. Let's have some light. Okay, so I usually like to start in the posterior side and just gently go across the ridge here. I'm going to make a slight vertical here to see how far I need to go. And actually, by trying the surgical guide, I'll be able to tell where about the second premolar is. So let's see here. So you can see there my incision, I want to make it pretty much at the end of this slot that's in the. That's actually at the first molar site. Okay. So obviously when we have somebody dentureless like this, it was hard to tell where that first molar position would be unless you have a surgical guide. So very important for those of you who are planning on doing these surgeries to have a good surgical guide. But, you know, Greg and I have been working together now for, what is it, Greg, 10 years, four or five years, something like that. So I think I've been doing all on four procedures now for about six years. And you see here, I'm stabilizing my blade. Very, very important. Any way that you can stabilize your blade when you're making these incisions becomes very, very important. Okay, let me have the surgical guide one more time. I'm gonna put a little bit of gauze back there just for bleeding, but we should still be able to see the denture here. Let's see suction there. Yeah. Okay, so I'm good here on this side with my incision. Okay. And if you notice, I have this lip retractor here, which I love to use anytime I'm doing full arch cases, whether it's restorative or surgical, I like to have this on. It's a great lip retractor. So one less thing to worry about. I'm going to go back through my incision here. I want to make sure I'm all the way to the bone. Very, very important. Before I even start reflecting here, you see here, this incisive papilla. It's quite thick here in the middle. This I'm going to trim down. Oftentimes this interferes with the fabrication of the final prosthesis. We have to thin that out in that spot. And what I hear from my restorative colleagues, typically they do not like to see this right here. They want me to take it down and reduce it the flatter the ridge underneath the prosthesis. The final prosthesis. The easiest it's going to be for the patient to clean at home. Okay. So we're going to start with the posterior here and reflect the flap. Your canoe. Good. We have an amazing patient today. You see here, it's quite a bit fibrotic. So it's good to clean this fibrous tissue as we go along. It's going to get a little more difficult as I get anterior here. Small elevator. I like to use something a little bit sharper. This is a chisel. The reason is something smaller that I can have more control. And the edge of this chisel is actually a little bit sharper here. So you see, I can have more control when I'm reflecting flaps, these come in different sizes, so this one's probably 3 millimeters wide. But you can certainly pick one that's a little bit wider. Just depends on your preference. Okay. Very important to hold the flap and have a good Tissue plier in the other hand, I don't like to use something with teeth. The tissue pliers come with teeth or without teeth. This one I like best because it's wide and it doesn't create as much damage to the tissue as I'm holding it. The pliers with teeth, yes, they hold the tissue better, but just additional damage that we can create there in the tissue. Okay. I'm also using the back of that chisel to push the flap. This is our fibrotic part that I was telling you about. I'll make sure we remove it. Okay, so let's see. We have this vertical here. Could be a little bit higher. Give me the larger elevator. So I'm going to reflect this a little bit more here. Sometimes when I reflect the posterior enough, you'll be able to see the shadow of the sinus. So we know to avoid it, especially when the bone is thinner. You'll be able to see a window right here where the sinus would be. Okay, here we are moving across to the other side. This side I like. I can see the ridge. You can see here. Good thickness. She hasn't lost too much bone in the last two years since she lost her teeth. But what happens, of course, if she would have carried this denture, I mean, she's 39 years old now, so if she would have had this denture for years and years, she would have completely lost this entire bone here. So great advantage of doing this procedure now is to maintain the bone that we do have and the facial structures. Okay, almost there. One more part right over the canine eminence here. I'm trying to keep the periosteum intact here. So far, we've been successful. The reason being the periosteum protects all the vital structures, nerves, arteries, veins that are in the tissue in the flap itself. So keeping the periosteum intact will get better healing. Okay. Okay, so here we have. We have good reflection of this flap. Very important. I want to see the apical part of the implant. Why am I reflecting this flap? Because I want to see what's going on apically. Especially for those of you that are first starting with this procedure, you want to make sure that you see where this implant is going. So it's not going in open space or in the side of the cheek there, outside of the bone. Okay, perfect. Let's do a little bit of a rinse or a little bit of water. Okay, Little water. I'm gonna be careful with the water here. As she took a little sedative, her reflexes a little bit delayed. Okay, so let's try the surgical guide and see what we have. And at this point, what I'm checking for is to see where the bone is in relation to the surgical guide. I actually have a good view there. The bone is exactly where the ridge is. A little bit atrophied in the front. So probably we will end up with straight abutments there. But one way to check for sure, to make sure that the guide is in place. Go ahead and bite down. Close your teeth together. Perfect. Okay, so I know here that the denture is in the right place. Open again. Yeah. So I'm seeing basically about a 3,5 millimeter difference here from the flange to the ridge. So I know how to angle these, you know, these implants because we don't want too big of a, too thick of a prosthesis in the anterior. It's going to make it difficult for her to talk if we place these implants too lingual. But on the sides, I'm good. You can probably see the bone right in there. Okay, so now that I know I have a mental image of where that should be, we're gonna prepare for to place the all on four guide. Is this ready to go? Okay. The all on four guide. I was asking you for it earlier. You said it's in the water. Let me have the drill kit. Okay, let's try our. Let's check the bone reduction guide as well. All right, Greg, let's take a look. So here in the front is right where it should be. Maybe a little bit. I could reduce on the left on the cane. Yeah, I will just flatten it out. Okay, Amadia, tilt your chin down a little bit. Tilt your chin in. Huh? Perfect. Yeah. See? So basically, yeah, maybe just a millimeter or two over. So I need to reduce the bone with a ronge or typically. Okay. Yeah. So this Greg is telling me this is measured at 15 millimeters. That's the thickness or the height of the prosthesis that we would like to have. Okay. Okay, very good. So we're going to use the surgical guide. Okay. So I'm going to mark a little bit the entrance. Go ahead and hold this guide for me. The first drill I like to use, it's a precision drill. And the reason why I like it is because it has a sharp point at the end and it allows me to secure it on the ridge itself. Okay. So it doesn't skip around. Usually round burrs can skip. Or if you go straight to the 2 millimeter twist drill, it Would certainly skip around on the surface area. Especially the bone is not fully regular on that side. So let me mark the spot here where I want to. So I would go for her probably on the second premolar. We don't need to go back so far at the. But I can angle it right through there. A little bit of water, my dear. So we're gonna mark that. I'm gonna decrease the water a little bit here. Let's see if we can see the. There it is right here. Okay. I could probably go even a little bit more posterior than that. Again for this procedure. It really doesn't matter that we're right on the tooth position. It could be in our proximal because the whole prosthesis is leaning on top of it. So that's not really what I'm looking for. I just want to make sure I'm in a spot where we can fabricate a good prosthesis for her. Okay, good. Let's mark the other side. Just to get an idea. Turn towards me a little bit. Turn my way. Good. All right. Same thing here. Okay, so here we are. We have two points here that I always start with the most posterior implant. Let me have a probe. One here. You can trickle your head back. Perfect section here and one here. Okay, looks good. Did we find a guide suction here on the top section? Okay, let me have the rongeur. Let's reduce some of this bone. So I always like to save it. See right here? This is a point that's sticking out. And typically the maxilla is pretty soft bone, so it's easily removed with the Roger. Of course, you can do it many different ways. You can use rotary instruments to remove this, to shave it down. I just find that it's a little bit less. Less of a mess doing it this. You're doing great, my dear. See right here in the front. Disappointed. I also don't like. We'll just remove that. There's some soft tissue there. If you have any questions, you're welcome to ask while I'm doing this. I'd be happy to answer them before, like, during or after. Okay.
So if anybody has a question, please just raise your hand. We'll bring a mic to you.
All right. I have a little bit of a sharp point on the other side.
Hey, Doc, it's Dr. Nessen.
How are you? I'm great. How are you? I'm doing good.
On your two posterior locations. Is it important that they are in the same relative position on the ridge for stability, or doesn't.
That'S a good question. It really, sometimes, it depends. Not everybody's sinus is symmetrical. So we just go at the distal most, posterior part where we don't penetrate the sinus. I try to get it symmetrical as much as I can just because I like symmetry and I think as human beings we like symmetrical things. But it's certainly not necessary. It just depends the bone available. Okay, so we collected a little bit of bone. I don't think we'll need it in her case. I'll show you here what we typically collect. We're going to keep it moist. So if you have to graft, usually the all on four procedures, there's plenty of bone. You don't need any kind of outside, let's say outside bone graft. If you have a dehiscence, let's say on the anterior implant, you can always use autogenous bone, which is really the gold standard for grafting. Okay, so we're going to get ready to place the all on four guide. So for that, what is the all on four guide? And I'll show you why I like to use these. So essentially right here. Okay, perfect. Okay, so basically we're going to secure this in the midline so it tells me where the midline is. Because oftentimes when I'm in surgery, I need a good location. And then we have lines here, parallel lines, and we have the angle between these two lines, which is 30 degrees in a diagonal. Or we can do 45 degrees between two lines. So it really gives me a guide for how angulated I can place the most posterior implants. Okay. And typically that guide ends around the second premolar, so I know not to go too far back. Alright, so let's place this. I'm going to use a 2 millimeter twist drill right in the midline. These glasses a little hanging on your eyes. Okay, I'm gonna need a little bit of water. Okay. I need a little more water than this. Especially when somebody's sedated, you don't want to have too much water, but not too little because that could burn the bone. So here we go. I like that. Every detail counts with implant surgery. Okay, so we're going to go here, right in the midline for her. Now see how this is skipping. So this is a good time to stop and pick up the precision drill. So I have a more precise point. You'll see the difference here in a minute. Okay. As soon as I put this on, it'll stay exactly where I'm drilling with it. Okay. And this again, it's right in the midline. So I could put on my surgical Guide or the On4Guide. Okay, so now they created an entrance. I can go back to the 2 millimeter twist drill and see my drill doesn't skip anymore. Okay, let's put the On4guide there. Open a little. You're getting a little bit sleepy. Hi. Okay, here we are. Okay, so this is the lymphor guy. The other thing that it does, you can actually pinch the guide and it could also hold the palatal flap away from the ridge so that I could see better. Okay, perfect. We can get a good view on that. Okay, so I'm checking again. This is right in the midline. Stable. Then again, you can pinch the sides to be able to see to see the ridge. So we're going to start on the right side with the distal most implant. I'm going to start again. I already started my point there. I'm going to turn your head a little bit this way. Okay, perfect. So right there, that's the entrance. So it's right. Actually happened to match exactly with the line on the On4 guide. And I remember from checking in the guide, the clear guide, the replica, the denture, that this is a good position for that. I'm looking back here at my. Greg, can you press the button here? Let me see. I want to look back just to get my panoramic X ray here back up. Perfect. To make sure I'm in the right spot. Excellent.