I Made The Best Lightroom Presets For Fujifilm Cameras!
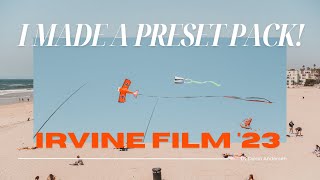
Dylan Andersen demos Irvine Film 23, a new Lightroom preset pack with four presets built for Fujifilm cameras. He edits seven photos to show how each preset works on RAF files, explains his full workflow from auto-tone through upright correction, and stresses that presets are a starting point, not a one-click fix.
Chapters
So a couple weeks ago I put together four presets that I've been working on for quite some time and I uploaded them and they're available now. And I kind of want to demo real quick with a series of images on how to use them, what they're for and why would I release a set of presets. So let's get into it. Alright, so we're going to look at a series of seven images that I took today. These are pretty standard street images. There's nothing special about the images, let me get that out of the way initially. But these presets that I've released will work really well for kind of general daylight images. They work pretty nicely for indoor images as well. But they're really meant to shine in sort of these kind of California style blue and yellow warm tones. I think they work really well for those. So I want to show you these images. But first before we go in and actually edit these, I want to hop over to my Gumroad site, which you can see here, it's dillanderson.gumroad.com I'll link it down below. So here's the pack that I released a couple weeks ago. It's called Irvine Film 23 and on here there's four presets. One is called Irvine Film 23, Alton Parkway, Yellowtail and Spectrum Center. And you can kind of see some examples on the site of these. I kind of put together just some before and afters of just a couple of them. Still kind of working on this. It's still kind of like a soft launch, but I had a couple people purchase it already and they really liked it. So I want to put together this video. So let's get right into the editing. So first we have just a very kind of boring image here. And walking you through my editing process, what I typically do is I'll look at these images and say, okay, you know, what does it need? And a lot of times I know people hate it, but I will hit it with auto right just to get it to a point where I'm kind of happy with it. My favorite preset is actually Alton Parkway. It really does well for the kind of colors that come out of Fujifilm cameras. So just with one click and again, this is just a base picture, you get a really nice image. Yeah, it's a little bit too dark. Maybe you're not a fan of the blues and the reds, but you can tweak all that. And before we go any further, let's be clear. Presets are not a one click solution. Right. Presets, you do have to spend time, you do have to tweak, you do have to edit your white balance. Because what's in here in this preset is not going to work exactly for your photo. But I think that's a great example of how that one click can do pretty well. So probably I'll warm up this image a little bit, play with the exposure. And this is all the good stuff that photographers do, right? We play with the whites, we pull down the blacks, we get it to somewhere that we're kind of happy. You'll see kind of the S curve here is pretty standard, nothing crazy. Let's take a look here at some of the colors you can see. Kind of happy with everything. One thing you'll see here is that again, these are made because I'm a Fujifilm shooter. I've actually set these to have the masking somewhere towards the middle of the frame. And you can kind of see what that does by holding down the alt key. So what I'm doing is I'm just kind of adjusting, sharpening for the actual things that are kind of in focus. The sky you'll see is not affected here. The reason is because there are still worms in Fujifilm and Lightroom. But this is a really easy way to alleviate those just by only sharpening the pieces that you want. You can pull down the detail, you can pull down the radius if you feel like you're seeing a lot of worms. But I typically don't. All the typical profile correction stuff on this image. I may actually do an automatic upright. Maybe I like it better, maybe I don't. Right. We're losing some things here, but we'll keep it as it is for now. Grain is at 15 on these. You'll see it kind of ranges. So you can kind of play with that and see what you think. I think, you know, also on here, the calibration is really important, right. And so you'll see some of these, these colors that I've kind of settled on. But that kind of gives it the image. And if you feel like, oh man, the red maybe is too, you know, orangey, you can pull it back towards this way or you can actually go more orange. But we're going to keep it the way it was. So again, a really nice image here right off the bat. And I think this kind of shows you that these presets, I'm very proud of them. I think they do a really good job even with one click. One thing before we Move on. I will point out is that the profile for this particular preset, Alton Parkway is set to Adobe standard. I think if you're on Fujifilm, you can jump over to Provia and you can see a really nice difference there. It really kind of makes it more Fujifilmy in a way. In my opinion, it's a little bit much. So I'm going to keep this particular one at Adobe standard. But I usually will play around and see which one works the best. Second image here, my wife, she has a Mamiya RB67. We were out shooting today. This shirt actually is from her. I'll link down below. Her site makes awesome T shirts. This is of a Fujicolor film stock. Love this. So shout out to my wife, little plug for her. But yeah, so on this image we can kind of go through these four presets and I think just from right there, like I love that. Right. Alton Parkway I'm really proud of and I think it does a really good job there. This Irvine film one, this is kind of the stock one. This one is really nice. It's going to give you more of a cool tone. Even though I'm keeping the same white balance, but I'm not as heavy on the oranges and the reds here we're, you know, warming it up a little bit. You'll see some of the colors will bleed depending on your image and the way to kind of fix that is to go down here to the luminance and kind of set everything to zero. I've kind of pulled them down a certain amount and you can see that's kind of fixed that up quite a bit. If I try Spectrum center here, this is going to give you a more kind of faded feel. It's going to be a little bit warmer. You can change this one. It's automatically going to be pretty warm. You can make it cooler, you can really play with it. And then yellowtail. This one works really well with Astia Soft. This is one that is not going to be a one click solution. You're going to have to spend some time playing with this one. So I can make this one a little bit cooler and you automatically see, wow, that's actually a lot better. So there are some subtle differences between them. Like I said, most of these are going to be built for Fujifilm and you can see you won't be able to use this profile unless you have a Fujifilm RAF file. But if you don't have a Fujifilm RAF file, you can hop over to Adobe standard. And I think it still looks pretty good, but you'll have to do some color grading on your own. So that's that image. So here we have an image of the beach. It's a little bit underexposed. I typically shoot underexposed when I'm on Fuji. I think the reason I do that for a multitude of reasons, but I do that to hopefully get a sharper image, right. With a higher shutter speed, you know, stop down a little bit so I get a little bit more detail and depth of field. But this one, you know, I'll go ahead and take my. My favorite one here, Alton Parkway. I'm shooting on the X H2. These are all with the XF23 millimeter, the new one. So one click. Pretty good. Kind of. Kind of lifeless, though, right? It's not a ton of color. Nothing's really popping. I'm kind of playing with the exposure here. Warm it up a little bit. Make it green, make it more. A little bit more magenta. That may work. This is, again, photography, right? You're playing around like what works best. We all have different artistic tastes. So you may be watching me do this, say, this is terrible. And that's totally fine because again, our opinions are going to vary quite a bit. I'm going to pull the blues here, and we'll pull the blues up quite a bit because I think the blue sky kind of got taken out with that initial tap there. Maybe grab the red of the lifeguard tower, make that more saturated. Everything else, I'll keep about the same. I do want to play with the sharpening a little bit. I think, because this image is a little bit further out. There's a lot of detail and depth of field. We're shot at F4. I think I am going to increase the sharpening to about 60, which is definitely a faux pas on Fuji. So that's that image. Pretty happy with that. Again, I can spend hours on these and play with them, but for the purposes of this video, I really just want to get. You have a general idea. So this is a cool street image. Went behind this guy. He was struggling with his cell phone, and I said, I gotta take a photo of him here. Actually, I'll throw yellowtail on this, and immediately you get this really cool. Excuse me. Warm tone. You've lost the kind of blue in the sea. What I'll do is I'll kind of bring it back a little bit and you'll see some of the life return here. But one thing I'm noticing is that her shirt here is way too Blue. It's a white shirt. But because we're cooling off the image that's happening also. Another thing I want to do is since I'm doing some street shots here, I wasn't perfectly aligned and you'll see boom. Now we have a straight horizon and some straight lines. This is why I use Lightroom over capture one for some of these AI masking tools and some of these awesome adjustments. So I'm going to. I'm going to key out her shirt. I'm going to warm it up. Looks better. I'm actually going to desaturate her a little bit just to keep that white kind of color and some of the skin tone there. And I think that alleviates my blue problem. Where initially it was really lifeless with the blue, but I was able to to bring it back with the coolness if I wanted to. I can actually select that blue and kind of pump it up a little bit. And you see that just enough right there. It does a really good job. Next image I'm actually going to do, let's try the Irvine film preset here. This is a very kind of standard preset in my mind. This is sort of like what I like to see Provia do. Again, if you don't have a Fujifilm camera, keep this on Adobe standard. But if you do a Fujifilm camera, you'll get a little Fuji bump. With Provia here, you can see the reds kind of faded out a little bit and went a little bit more high key. The green here changed a little bit. Pretty cool image. I think I'm going to keep this, but I am going to click Q on my keyboard and I'm going to stamp that out with the content Aware fill, which has just been amazing. So, yeah, much better image. Now, for the purposes, we're running long here. I do want to copy paste Alton Parkway in here. So you'll see a copy paste here. Really high key. This is actually modified. I did this before, but I achieved kind of a fun look here with this image. I'm taking Alton Parkway and I'm basically pulling down the dehaze, playing with the highlights, playing with the contrast, you know, really trying to make something of this again. This is the before, after, before, after. So Alton Parkway gives me this kind of warm look with some shifted colors here. I'm not super happy with the blues, my style. I would want more blue here. So I'm going to pull that up and you'll see automatically, maybe we get a lot more blue. Got a little bit of vignetting and the gradient in the sky. So if I really wanted to head down here and just pump the vignette all the way up and it looks like a much brighter image. So super happy with that as well. This is a fun image. Again, this shows. This is the last image I'll do. This kind of shows how I underexpose images on purpose because I want a little bit more to play with. I shot at 17, went over 1700 F4 low ISO on the XH2 at 125, and I really enjoy it. If I go ahead and copy paste that same kind of preset into there of what I was working with with Alton Parkway, just for the purposes of time, I can really get something I'm pretty happy with here. I'm a big guy of taking highlights to zero or, excuse me, negative 100. And I think that's. That's. You know, a lot of people may say that's a stupid thing to do, but I'm pretty happy with that. I do enjoy doing that. It kind of flattens out the image and lets me play with dehaze and things like that. I'll bring up the sharpness here. And you see, the oranges are super punchy. I mean, you can really play with these and really get it. Kind of a cool look there. But, yeah, that's. I'm happy with that image. You know, I'd probably mask a couple things and maybe lighten this up a little bit, maybe get rid of some of the power lines. But again, happy with the image, and I think it's really fun. So, again, just popping back over to the browser. You know, this is out now. You can pick it up. I put a link down below. Let me know if you have any questions. If you hate it, tell me why you hate it. If you love it, tell me why you love it. And if you can't afford it, definitely reach out to me. I'll set something up with you where I can get you a couple of presets with no charge. Let me know. I know times are tough, but, yeah, I put a lot of work into these, and I've been working with this for about a year or two years now. So if you go to my Flickr, you look at any of the photos I've been doing, I've been using these presets. So super excited to launch these. I know it's really cheesy for people on YouTube and people that do photograph to launch presets, but I look at presets as a base. I don't look at it as a one click solution. Although we saw a couple one click examples tonight. But yeah, thanks for watching. Really appreciate it. Thanks for supporting the channel. I've got a lot of new subscribers over the past month. Please subscribe if you haven't already. Would love to see you in another video. Thanks and have a great day.