Learn how to copy a home profile in HomeZada Professional and transfer it to a client's account. The process takes minutes: select the property, use Transfer to Customer, and the client gets an invitation email with all the home data, photos, and documents. You keep a read-only copy for your records.
Chapters
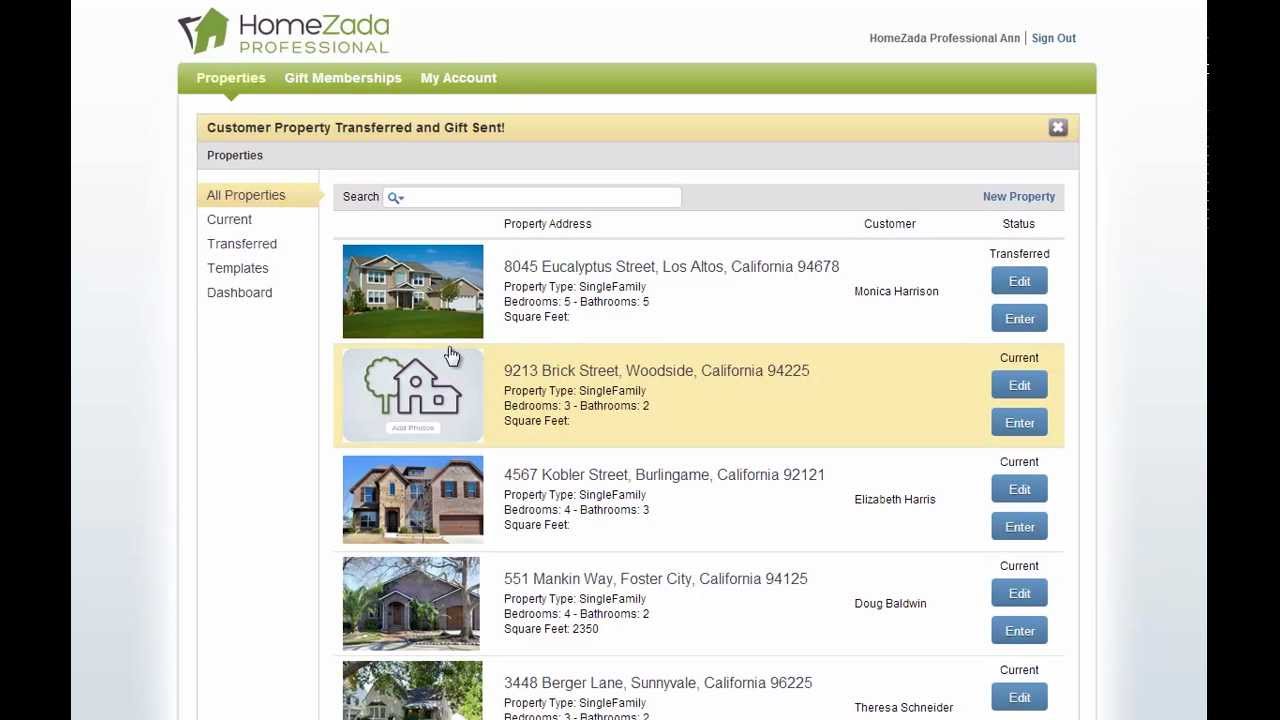
Now that we've created a digital home profile for our customer, let's copy and transfer this so that our customer has their own account with their own copy of all this information that we created for them. All you have to do is click on the property that you want to transfer, our Eucalyptus Street example, and then click on Transfer to Customer, where you would enter in your unique customer's email address, and then you would rekey that information in to confirm you've got the right email address. And then all you have to do is select the button here that says make a copy of the property for the customer. Now what HomeZada is now doing is actually taking and creating its own digital copy and making that available for our customer to have their own account and retaining a copy for our own individual records. Also what's important is if I click on the dashboard, this is for you as a professional. You can see that I've transferred the Eucalyptus Street property to Monica Harrison on March 29th. And it's currently in pending, which means Monica has not actually redeemed her account and started using the product yet, which gives me the ability to call and remind Monica that I've just sent this to her so that she can create her own account. Now let's go look at— see what the customer's experience is when they accept your invitation and create their own account. This is the email that your customer will get. The email will be from HomeZada, but the subject matter will say, your property profile From the name of the professional, Ann Hopkins in this case. And you can see here that in the actual email, we've got information describing what the customer is getting, as well as the co-branding information on the right. And then down at the bottom of the email, there is a link, a unique link for the customer to actually accept their account and gain access to all the home digital profile that you created for them. So all they have to do is click on the Accept My Link. Now your customer gets the ability to enter in their own password for their own personal account, for their own security purposes. And again, this is your customer creating their own unique HomeZada account with a copy of all the information that you've created for them. Now your customer is in their own account accessing all the data that you already created for them. If you look in the upper right-hand corner, there's your branding information based on the branding profile that you created, and down below that is a picture of the property where if you click on the individual photo there, you can take and go to the other photos that, if you remember, we uploaded on behalf of our customer. And if we click on the documents, here are the other documents that we actually had uploaded and created for our customer. If we go to the inventory menu, you can see here that based on our previous examples, we had uploaded a series of photos to the individual property. Those photos are already there for the customer. As well as if we now go to the to-dos, if you recall, we actually created a property checklist for our customer. The customer sees those exact same property checklists that we created both in the list here as well as on the calendar. If you also recall, we created a home improvement project because we knew this customer wanted to do a bathroom remodel. So now you can see that here's the project that we created, and if the customer even goes to their premium account and selects Contacts. Here's that list of directories that we started to build for our customer. And now you can see how easy it is to create a Home Digital Profile for your customer, copy and transfer it to them. Now let's go back and look at your read-only copy. Now that we're back at HomeZada Professional, if we go back to the dashboard, now you can see that on that Eucalyptus Street property that it's actually been redeemed because we've got the sign-up date and the expiration expiration date, which is 1 year as it relates to your customer being entitled to use the HomeZada Professional. If we go back to All Properties and drill into the specific property that you created and hit Enter Property, one of the first things you'll notice is this message at the top that says that this property has already been transferred. So all the data that you created for your customer, you still have access to, but it's set to read-only, which allows HomeZada Professional to keep a copy of all the profiles that you create and transfer for your own records in case there's ever a dispute between you and your customer in the future. And that's how great and easy Homes Auto Professional it is to create your digital home profiles for your customer.