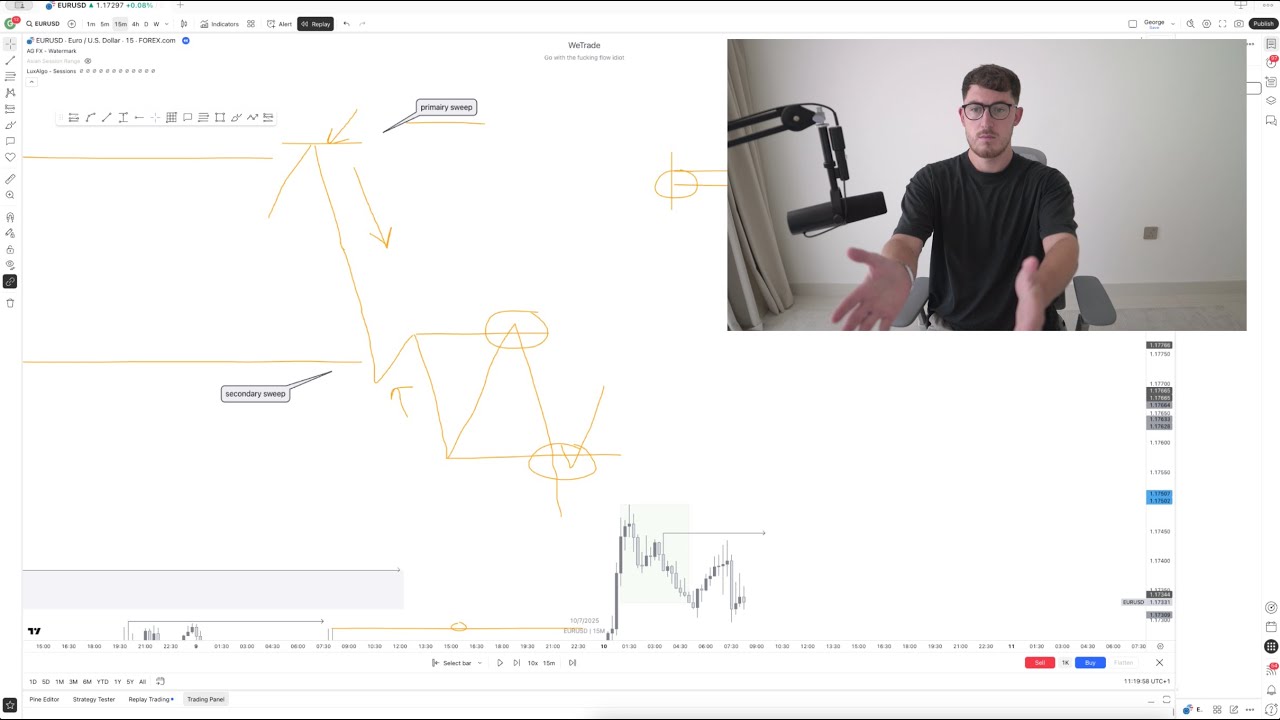
In this video, trader George Linfield provides a detailed, step‑by‑step breakdown of a NZD/CAD trade that generated just under £33,000 profit over 13 days and 20 hours. He begins by explaining how he identified a large liquidity zone on the daily chart that had produced multiple strong swings, suggesting a high probability of another substantial move. Using higher‑timeframe analysis he pinpointed a double‑top formation and its neckline, then moved to lower timeframes to find a confirming shooting‑star candle that served as his entry trigger. Linfield discusses his stop‑loss philosophy, opting for “breathing room” by placing the stop above recent resistance rather than a tight stop above the candle, to avoid being stopped out by typical retail stop‑loss hunting. He outlines his initial 1:7 risk‑to‑reward target based on weekly support levels, then narrates the trade’s progression: rapid downside movement, consolidation zones, and his dynamic trailing‑stop adjustments to lock in profit while staying in the trade. As the price approached a daily support level, he tightened stops aggressively, eventually exiting at 87.13 after securing a 5R return. The video concludes with a summary of the £32,826.66 profit, reflections on risk management, and a promotional call‑to‑action for viewers to join his trading program.
Chapters
Hello people, welcome back to another video. Um, so you've had a really, really good week on the markets this week. I have actually just closed, or last night one of my positions closed, one of my longer term trades I've actually been holding for about 2 weeks now. That position is just closed. I did a little breakdown of that on, um, on Instagram last night, but I had a ton of messages asking for a full breakdown on the position, um, why I entered it, um, how I spotted it, my thought process behind the trade as it was moving into profit, um, and how I managed that trade into what ended up being a, uh, just shy of $33,000 profit, which you should be able to see just there. Um, so yeah, I'm going to do a little breakdown on that position, um, to give you a little explanation. The first thing, or sort of pre-trade this is what I was looking at, okay? So I had identified first and foremost a key area of liquidity here, okay? It's a fairly large area, um, but within this area we've seen a number of very, very substantial swings within the market, okay? So we can see here we spiked into this area of liquidity and we had a big push to the downside. Um, we spiked up and broke above, we came back to retest this area of liquidity and we had a sharp move to the upside. We had the same here. Again, we broke back below this level with sort of— again, well, we had a huge move to the downside here, so it took a lot of, um, it took a lot of volume in the market to really break through that level and actually surpass it. And we did eventually come back to retest. Again, we started another substantial move to the downside. Okay, so from this region, we're seeing some huge swings in the markets. Okay, so we know that the market repeats itself, so If it's done this a number of times before, there's a fairly high probability that when we come into this level again, we're going to see a fairly substantial swing from this level. So as we were approaching this level, this is of course on the daily timeframe, but can you always start from the top down? As we came into this level, I knew that if I could find some form of reversal price action on the lower timeframes, I would then potentially be looking to try and grab a nice high entry. To try and sell nice and high, to try and find one of these big, nice substantial swings within the market. Okay, so did my higher time frame analysis, and then what I'm doing is I'm looking on the lower time frames to try and work out and try and find a way of entering this position. So I won't make it go too quick, but if we fast forward it now again, so we've come into this level now. So what I'm thinking here is I'm, I'm looking for something that's giving me the indication that the market is going to turn. Okay, I'm looking for price action that's indicating that we've hit a ceiling and we're going to be potentially looking to— that's a bit of annoying hair there— we've hit a ceiling and we're potentially going to be peeling off and moving back towards the downside. Okay, so at this point here, there's really no indication for me to go short. Okay, of course we've had a bit of a rejection, there's no reversal price action there. Okay, so we're still very much within that bullish move. Okay, so there's no, no reason for me to trigger a sell here just yet. Yet. Okay, again, no real reason, no real reason. Now this is really where it starts to get a little bit interesting, okay, because what you can see here is we've had one test of this level of resistance essentially, okay. We've had one test into this area of liquidity, we've came back down, we've found some form of support there, and we've gone for another test into that area of liquidity again, forming two equal-sized peaks, okay? So we've got one peak here and we've got one peak here, which is essentially forming a double top pattern, okay, which is a reversal, reversal pattern. It gives us the indication that we are potentially— okay, it doesn't always mean we're going to see a reversal, but potentially going to see a reversal within the market, okay? So what this has essentially done is we've gone, tested that level once, we've fallen away, we've we've tested that level once again and we've fallen away again. Okay, so seeing this sort of price action in the market gives sellers that indication to potentially look to jump in. Okay, so can I slow it down a little bit so we can take this sort of step by step? So when we see these, when we see a double top or a double bottom, what we need to do is we need to try and identify the neckline. Okay, so now the neckline is essentially the level of support that's holding up that that move, okay? So where you see the peak, the trough, the peak, the trough, you want to find that, um, that level of support that's essentially holding up, um, holding support on the pair, okay? So we can see there was clearly, um, a bit of a ceiling here, okay? Clearly a bit of resistance. We can also then see there was clearly— that level was tested once again as a level of support, okay? So that's really what I'm looking at here as my neckline, okay? So now as the market begins to break towards the downside Okay, we can see we've clearly broken towards the downside, which is that indication that this reversal is potentially going to play out. Now what I'm doing is I'm looking for the market to push its way down, come back up in its first phase of exhaustion. I'm looking for my confirmation, and then I'm looking to jump into the market on the way back down. Okay, now one key thing also to take into consideration here is we were previously trading above the moving average. We've now broken below that moving average now, okay, which is another indication that the market has gone from bullish to bearish, okay. So again, like I said, we're looking for that retest, okay. So the market's pushed to the downside, right, okay. So let me zoom in a little bit here so we can see in a little bit more detail, because this ultimately was where I looked, or where I did trigger the trade. Okay, so what we can see is the market pushed towards the downside here, we found a level of support here, we then came back up for the retest, and we had this beautiful shooting star candle that not only rejected away from this level of resistance, or the neckline if you want to call it, we also rejected away from that moving average as well. Okay, so two areas of rejection. Okay, so that's two confluences, and then we've got that shooting star candle as our final confirmation to get into this trade. Okay, so that candle there was my trigger. Okay, obviously I'm speeding things up a lot here, so I would have had a lot more time to get into this. So once that candle would close, that was my, that was my trigger to get into the trade. Okay, so what I was doing there was, as that candle closed, I would have put my entry just there. Now, where would I put my stop loss and where did I put my take profit? So A lot of people, what they would have done is they'd have had a really, really tight stop loss there, just above the top of that candle and just above that moving average. Now, one thing that I teach all of my students in my program is to give your trades breathing room, okay? Because what can happen is, for example, if you were to enter here, we don't want the market to come back up to go and test those highs of this candle because there's obviously a lot of liquidity there. Where again a lot of retail traders are just going to be trading those candles. They're going to do exactly this. It's just so easy to read. We don't want the market to come spike up into this, into these stop losses here, and then make its way back down like that. Okay, so what we're doing there, that's pretty annoying. So what we don't want to happen is we don't get stopped out. Okay, so what I do is I like to give my trades a little bit more breathing room, okay? So as opposed to putting my stop loss really, really tight there and potentially facing a stop loss, I put my stop loss just above this previous resistance here, giving my— give my trade a nice bit of breathing room there, okay? So if, for example, the market was to come and retest the highs of this candle, I would have enough room there so I didn't get stopped out, and then the market would just come back and plummet down and go into— I want to essentially make me profit. Okay, so now we know where we're entering, we know why we've set our stop loss where it is. Now let's have a little look at our targets then. So I knew that we could see a fairly substantial move away from this region, so what I wanted to do was I just went to my higher time frame key levels to really try and understand where we could potentially be looking to trade into. Now I did identify this weekly level of support here, okay, where we can see that a clear low was made. Again, we've seen another touch here, another touch here, and so on and so forth. It goes sort of back historically as well, but again, that doesn't matter too much. We can see that this was a clear, um, a clear weekly level of support. So initially, that was ultimately my longer-term target here, okay. When we sort of see a little bit more development, let me go down to the lower time frames to understand really why I didn't hold the trade all of that way, um, but that was my initial target to start with. Okay, so the initial projection here was a 1:7 risk to reward, um, which is good in anyone's books essentially. So I took that trade, executed that trade, and now it was just a case of being patient. So let's go down to the lower time frames again and let's see how things started to play out, and I can talk you through really what my thought process was during this process. So let's hit play on that. So of course we moved straight into profit, which was, which was nice. Really, we saw a nice big strong push away. Now the first area of concern for me was of course, was of course this level of resistance here, which has been tested as a level of support here. So this is this is clearly a key swing point in the markets, okay? So I was monitoring this rejection here, okay? If we saw a nice break below, then fantastic, we were— we, we should have then been on, um, for a nice move to the downside. But if we did see some form of rejection or this was clearly causing some problems, then I would have potentially been looking to amend the position, um, potentially looking to get out, maybe securing some profit, um, but If we press play, we'll see how that went. It didn't really cause too many problems. We didn't really see much there. We broke below that level fairly easily. We did see a small bit of consolidation, but that was probably just the volume coming out of the market because again, people are still going to be thinking the same thing as you. So a lot of people would have been getting out of their positions at that level of support, which is of course going to slow the market down a little bit, um, as people draw their positions out of the market. But again, we can see if we zoom in just a little bit that the market— again, we had huge volume here, the market was just plummeting towards, um, towards our sort of targets here. We had a really, really strong move to the downside, which was exactly what we had expected, um, pretty much a parabolic move. So, um, again, I've got the box still on there, but we'll get to that in a minute. But Again, we were continuing to move quite nicely, so it wasn't really too much for me to do. Um, during this process, I was just trailing my stop loss down, just securing profit as we go. I think at this point I had my stop loss just above this level of support/resistance here. We're just letting the market sort of do its thing. But this is sort of where that first moment where I had to really do something in, in the trade was, was when we began to form this consolidation area. Okay, so what I'll do is I'll let this develop for just a second and then I'll hop down to the 1-hour timeframe so we can really see how I was able to manage this position. Okay, so we can see there that the market is beginning to consolidate to some form. So let me jump down here, right? So let me just make this a little bit easier to see. We send that to the back. So we can see here the market came into this region and we began to consolidate, okay? We began to move sideways and the market just began to slow, okay? We didn't really see a trend. Now, I wasn't overly concerned about this because then this is just part of the market cycle after a big bout of volume in the market. Once we see these really, really strong moves about of consolidation is, is very, very likely. Okay, a lot of people would have been riding this big wave in the market, and then they would have found some form of level of support, um, so they would have taken their profits out. As that volume reduces, we start to see that move to the side. So I wasn't overly concerned about this because we did have such heavy bearish pressure, such heavy selling pressure here. I was still fairly confident that we were going to see the market continue to the downside. Okay, but let's see how this this developed here. Now one thing I will add to this actually is once we began to really form this very, very clear, um, sort of consolidation zone, what I did was I moved my stop loss to secure a fair chunk of my profits and put my stop loss just above, um, this consolidation zone here. Okay, so if for example the market was to break above here, um, and we were going to see a reversal, I would have been taken out of my trade um, with a large majority of the profit that I'd already, um, sort of gathered from this position, I would have been taken out and been able to bank a fair sum of my profits. I wouldn't be giving too much back to the market on this reversal. Okay, so stops were brought just above this consolidation zone whilst you let this move play out. Again, we'll keep fast forwarding here. We didn't really see a great deal of, um, consolidation. It wasn't for too long really, um, because of that big selling pressure and there was so much bearish momentum, it didn't last really too long. So you'll see in just a minute, we did end up breaking to the downside. There we go. So we saw a bit of volume in the market there, lots of selling pressure at that level of support. And then as you can see, we ended up breaking that level of support there. So now this was where I paid a little bit more attention to the market because I I knew I was getting fairly close to where I was wanting to, to sort of get a little bit tighter with my stop losses, and I was getting a little bit more cautious as to potential reversals hitting the market. So you'll see a nice retest into the, into the bottom of this consolidation zone, which is where I managed that trade further once again. So let me zoom in a little bit here. So we can see we'd broken out the bottom of this consolidation zone. I'm actually going to remove that for now. We actually broke out the bottom of that consolidation zone there. As we saw that retest and the push away, I moved my stop loss into this region here, okay, because we've essentially formed a new, uh, lower high in this bearish move. So this was a key swing point for me, and I knew that if the market was to come back up into this position here again we had a fairly likely chance of seeing some form of a corrective move, um, and I didn't really want to be holding that position. I didn't want to have to sort of sacrifice any more of my profit, so I'd rather be taken out this position if there was going to be a corrective move than hold that. So stops were now brought just above this level. So as you can see, we had banked a substantial amount of our profit here. So we actually had around— can we enter just above here? So at this point, we actually secured around 210 pips profit, um, 100% guaranteed in the bag. So if the trade was to reverse, we'd have been taken out for at least 210 pips here. So at this point, I was very, very happy with the profit I'd made. Um, so it was now just a case for me to really just manage this trade and keep trailing my stop loss, um, ultimately until it ended up getting hit. So let's continue fast forwarding here. See what we saw. Speed up a little bit. Let's keep an eye on it. So again, this was where I started to get a little bit cautious as to what was really going on, okay? Because we started to again form another floor very, very close to where, um, that consolidation zone had ended. So at this point here, I was managing quite aggressively. I didn't want to get caught out if we were to see a big engulfing candle. We just saw we were to see a lot of liquidity to the upside, and we saw a big blast of sort of parabolic move to the upside here. I didn't want to be caught out, I didn't want to give too much profit back. So at this point, I got fairly aggressive with my risk management and trailing my stop loss here. We were also getting fairly late in the day, towards the end of, of our trading day, so I didn't really want to leave too much on the table whilst I was, of course, um, sleeping essentially. So again, I'd move my stop loss just from this position here to this position here. So as the market has sort of kept swinging, I'll just move my stop loss to the next swing point. Okay, so my stop loss was just above here. Um, let me just check quickly. I got taken out at, uh, 87.13. So if I put a— I put a mark where I got actually taken out of the trade, 87.13. So that was my— that was my 8713. Yeah, 8713. So that was actually where my trade got taken out. So you can see how aggressive I got there with the management of that trade. So we zoom in. I assume I was probably taken out about this point. Again, I was not actually awake when I got taken out, so my trade would have closed automatically at this point here. Now, why did I get so aggressive with my, with my risk management on this position at this point? It's because of this daily level of support that we are running into. Okay, so we can see this move here. Now, the reason why I was, I was fairly concerned about a potential reversal was ultimately because we had this huge move to the downside with little to no exhaustion or little to no pullbacks. Okay, so I knew that when we came into a fairly significant level of support, there was a high probability that we were going to see some form of rejection. Um, so I identified this daily level of support. Of course, it was, it was slightly higher than my overall target, which was these weekly lows. Okay, but again, I didn't want to give too much of my profit back. I'd banked a huge amount of money in a very, very short period of time sort of relative to what I was doing. So I got quite tight with my risk management just in case we did end up seeing a reversal from this level. So again, we'll jump— we'll stick the little chart back on there just quickly. So as you can see there, clear level of support. You can see why I sort of got fairly close with my risk management. The swings in the market began, began to sort of get a little bit smaller. We began to see, saw a lot more sort of rejection from the markets there. Um, so I pulled my stops in nice and tight, so any, any sign of pullback really, um, I would get taken out and my profit would, would be banked. Okay, so I ended up closing that position for around 5 or so percent. So again, stops were just above this high here. Um, original targets, like we said at the beginning of the video, were those previous lows just in this region here. Okay, but of course we managed our position and we ended up getting taken out just on that blue line just there for just over 5R return. So I was super, super happy with this position. Again, we were so far in and I've made so much money in such a short period of time but I didn't want to give too much back. So overall, it was— taking away swap fees, ended up being £32,826.66 in, I think it was pretty much exactly— I think it was exactly, exactly 2 weeks essentially. Okay, so 13 days and 20 hours with pretty much little to no management of this trade. Okay, so as soon as I entered it we had a big strong push to the downside. So there really wasn't a great deal for me to do. It's only really over the last few days I've actually had to sort of actively manage this position. But yeah, got taken out last night for a nice sum of profit. I think we have now actually, um, I think you can see now we are sort of beginning to break or show signs of breaking below this level. So there is potential of us going down and hitting those weekly lows. Um, but for the sake of, of essentially the amount of money that I made in such a short period of time, I was happy to get out of this position. Um, because the further you get down this, this big strong parabolic move, um, with no pullbacks, the higher the probability of seeing a pretty substantial pullback is. Okay, and I don't want to, I don't want to sacrifice all of this profit here just to take a tiny little bit more profit there, okay? Because again, we could end up reversing all the way up into this region here before we end up seeing that move to the downside, okay? So for the sake of just this tiny little bit of profit here, um, or holding this whole retracement, I'd much rather just jump out of the trade. So yeah, that is it. That is my NZD/CAD position that netted me just shy of $33,000 profit. Um, I hope you've taken something from this. I hope that's explained things. Um, I know I had a few questions of people wanting to see my analysis before jumping onto the program. So again, I hope that's some questions answered for you. If you are interested in getting a little bit more help from me and you would like to see more of these breakdowns and potentially become one of my students and learn how you can break down the markets just like I have here, then there'll be information in the description as to how you can get information on that, how you can get in contact with me. But that is it from me today. I hope you've enjoyed the video and we'll speak very, very soon.