
Back Spasms: Gentle Yoga Series to Prevent Back Pain and Flares
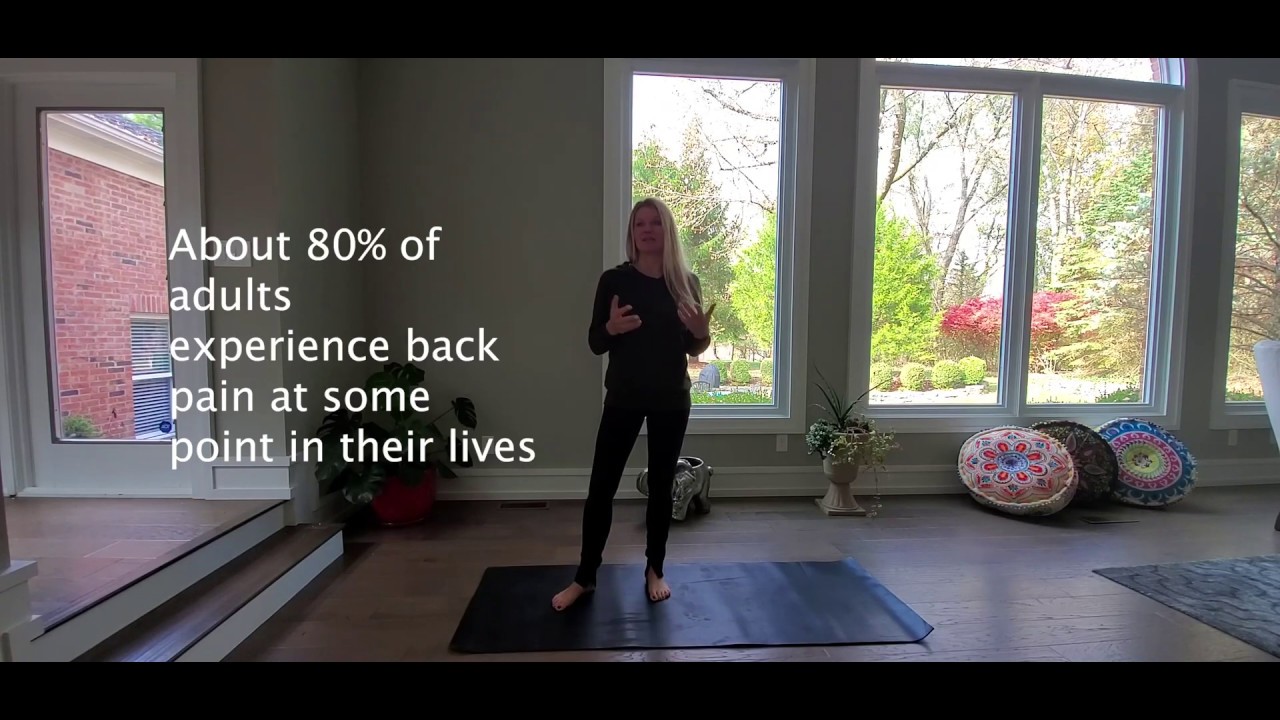
In this instructional video, yoga teacher Cheryl McColgan shares a gentle, floor‑based yoga routine designed for people experiencing low‑back or sacroiliac (SI) joint flare‑ups. She begins by explaining why back pain is common and emphasizes the importance of only moving when the initial seizing sensation has subsided. She then walks through a step‑by‑step sequence that starts with careful floor entry, alternating knee‑to‑chest stretches, windshield‑wiper knee movements, deep diaphragmatic breathing, side‑lying hip stretches, Child’s Pose variations, optional cat‑cow and rabbit poses, and a Malasana‑style squat. Throughout, she repeatedly reminds viewers to listen to their bodies, stop if any pain or seizing occurs, and move slowly with breath. The video ends with a reminder that lying flat with knees bent is a comfortable fallback position and an invitation to ask questions.
Chapters
Hi everyone, I'm Cheryl McColgan, founder of Heal, Nourish, Grow. Today I wanted to talk to you about some back issues. So I have this friend on Instagram that was telling me that she had some ongoing SI issues and low back pain, and I've struggled with that for myself on and off for years and years. I have been practicing yoga for, oh my gosh, like 25 years now and teaching for about 10, so back problems are pretty common in just general daily life, whether you're a yoga student, you play golf, you're just active, you're sedentary, everybody struggles with back problems at some point. But the thing I wanted to show you today, it actually is funny because it happened at an interesting time. I was showing her some sort of something like once your back is starting to recover but can still be flared up, and that's actually right where my back is at this moment, unfortunately. And I woke up this morning and had one of those, um, feelings. And if you've ever had back problems, you'll understand this. Almost feels like your back's going to seize up and then you won't be able to move. So it's very difficult when you're first getting out of bed. The muscles have, you know, done something during the night that's created an issue, and then now you're stuck with kind of very slowly moving for the first part. So I'm— when you're in that moment of super flare, just don't do anything to aggravate it. Don't start to do anything now that it's calming down, you know, I can stand relatively comfortably, it's not feeling like it's going to seize anymore, then this is the right time to do something like this routine. So the first thing is it's all going to be on the floor. So whenever your back is flared up, it can be a challenge to get down to the floor, as sad as that sounds, but you just want to be very careful. So how I usually like to go is just kind of support my back a little bit with my hand and then kneel and then pause for a moment And then if that's going well, then I'll go ahead and come down to my seat. So that's a little sore right there. And then eventually you're just going to make your way all the way flat on your back. See, even as I was getting down on the floor right now, I could feel that kind of starting to seize again. So you don't want to do anything that's going to make it worse. But quite often, once your back is seized up, this is the position you end up in on the floor because it's the only way that feels comfortable. Okay, so once you're here, go ahead and pull your right knee into your chest and just keep your left foot flat on the floor. So just some gentle pressure here, pulling your knee into your chest. And as you're doing that, press down on your shin so that you can feel your SI joint, your low back, kind of becoming more contact with the floor. Always stop if anything's making anything worse or making it feel bad. This is not meant to make things worse. We're just trying to loosen things up a little bit so that that feeling like it's going to seize up goes away. And then put your right foot down on the floor, pull your left foot into your chest. So start gently, see how that's feeling. As long as that's feeling okay, then press down on your shin and feel your left part of your low back press further into the floor. And be more supported there. And then release left foot to the floor. Pause for a moment and just let your back totally melt into the floor and relax. And then pull both knees into your chest. And again, gentle squeeze in towards the chest first, and then as long as that's feeling good— and you can even kind of rock around a little bit on your low back if that feels nice— but then press down a little stronger so that both sides of your low back move into the floor. And then gently release both feet back on your mat. Now take your feet the width of the mat, so your feet are wide, they're about a foot to 2 feet apart. And now you just want to start with some gentle— now when your back is flared, you don't want to be super aggressive with this to start with. You're just windshield wipering your knees back and forth, so both knees go to the left, both knees go to the right. And you want to start to bring your breath to this movement. So you exhale as you press your knees to the left, inhale as you bring them back to center, exhale as you take your knees to the right, inhale center. And as long as this is still feeling good— moving slowly here— but as long as it's still feeling good, and maybe eventually your knees start going farther to one direction or the other. And this is just kind of slowly loosening up your low back. Again, stopping if you're feeling at any time like it's going to seize up or if there's any pain at all. But you can see now I'm starting to get a little bit more range of motion. I'm doing this in the morning before I really, I haven't really done anything yet today, partially because my back is like this, but also just because I haven't been on my walk or anything yet this morning. So everything's still— you know, a little tight just after being in your bed for hopefully at least 8 hours. Okay, so now you can see this is more range of motion here. Now just go into the point where this is feeling good for you, continuing to move slowly. But if at some point your knees are almost touching the floor, I'm going to go ahead and let my knees go to the left here and now adjust my body so that my left leg is touching the floor. So this all depends on how your level of flexibility— this might not happen for you, but if this is comfortable and it's feeling good, the right side of your back is off the mat. The left side of your low back is pressing into the mat with your left hip. And then I'm not nearly, uh, flexible or warmed up enough this today, but if this wasn't feeling much to you and your back is still feeling good, you could put your left foot on top of your right thigh and press down more. I'm, I'm not there today, so this is feeling fine. Back's feeling good, so just stay here and take 5 deep breaths, just letting this Whole lower part of your body relax. Inhale deeply, stomach expands. Exhale, press the air out of your stomach. 4 more like that. And when you're doing this, I even like to prep, put my hands on my low belly so I can really feel my lungs fully expand. Expand. And once you're 5, come back to center. Pause for a moment, let your back even out, maybe even lift up the hips if that feels good to you, and kind of like reset so that your back is really touching the mat fully. And then take your legs over to the other side. You did on one side. Now this side, it's mostly the left side of my back that's flaring up right now, so as I'm letting my legs go to the right I can let my right leg come all the way to the mat, but I can feel I'm at a limit with this left leg, and I'm feeling nothing bad here, but I am feeling some stretch and pressure. Kind of feels good, actually, but I can tell this whole kind of side of my back is very tight, so I'm just letting this leg hang out here and stretch. When, when you start feeling a stretch that's a little more intense like this, what I recommend is come out of it a bit. So lift your left leg a little bit more up, if that were the case for you. And then as you exhale, let it come back down again, reaching that point where you can feel the stretch but you're not aggravating anything. And then again, take those 5 deep breaths, inhaling deeply so that your full lungs expand. You feel your lower belly press up, and then exhale, press the air out. 4, 3, 2, and 1. And bring your legs back to center again. Maybe lift the hips for a moment, let things even out, and just pause for a moment. The pausing in between is very important, kind of just lets everything relax again. And if you do anything too quickly, you're likely to go into a flare. If you've had back problems for a while, you already know this. So you're moving everything slowly. Bring both knees into your chest and then a gentle rock on the low back from side to side. I actually like to take this in a circular motion. Again, this is as long as you tolerate it, but you can take your knees In a circle, and then take it the other direction. Okay, pause in the middle, hugging back in. Okay, bring your feet back to the mat. Now we're going to roll over onto either side. So I'm feeling like, just because of how mine is flared at the moment, that rolling onto my left side would feel better. So I'm going to lift my hips, shift them over to the right. So this is already getting me leaning in that direction. This is just so that you don't make anything go crazy flare. Turn onto your left side and then use your right hand to press yourself up. So you're using the strength of your upper body to help you And then come on to your knees and make them knees wide to the edges of your mat, feet together. And then you're going to start to come down towards the floor, letting your hips release back towards your feet. So if you're familiar with yoga, this is Child's Pose. And depending on, you know, how your back is feeling, you might extend it more. This is feeling okay for me, so I'm going to let my hands walk out towards the edge of the mat and bring my head down. But you could stop anywhere in between. You can be on your forearms, you can be wherever is making things comfortable. This is just bringing some extra stretch to your hips and lengthening out the lower back. If you press back, if it's feeling okay for you, you can even press into your hands as you press back. So right now I feel that stretch just right here in my lower back, which is this, again, it's the left side that's mostly flared, but that's actually feeling really good to my back at the moment. Again, if it doesn't feel good to your back, don't do it. Okay, and then slowly come back out of that, coming up to all fours. Now, a thing that people like to do here is flex the back, back and forth, in a thing called cat-cow. Um, I am feeling like my back at this moment is warmed up enough for that, that I could do that, but sometimes that doesn't feel great to me when my back is flared. That's just experience over time. So, if you know that that's something that feels good to you, this would be a point that you could do that. I'm actually going to do a pose that's a little bit less known called Rabbit. It kind of gets into your low back. So, you bring your knees together and then you're going to sit down on your heels. Now, if you have really bad knees and this is uncomfortable for you, don't do this one. You might already put a bolster or some padding under your knees if that helps. If that's uncomfortable to start with, like, don't— we're not even talking about your back. If your knees don't like this, then don't do this. But we're not here for super long. And then you're going to bring the crown of your head to the mat. Okay, so you can see that the top of my head is actually on the mat. And then take your hands, grab your heels, and then you're going to press slowly forward so that you're coming onto the top of your head and pulling on your heels at the same time. So this creates a little stretch here in the low back. Take 3 or 4 breaths here and relax your hips back down. Come back up, just pause for a moment. I'm actually feeling like I just want to do that one more time. So again, it's top of your head comes to mat, you're grabbing onto your heels and you're pulling so that you're making some traction, and then you're getting that stretch in the low back. So we'll walk through it again. Head comes down to the mat. Hands come onto the heels, and then we're lifting our seat up so that your bum comes off the floor. You come onto the top of your head and you're pulling on your feet, kind of create some traction. You're getting a little stretch right here in the lower back. It's not a severe stretch, but that's okay because when it's flared, we don't want to do anything too crazy. Hey, come back up. And then again, getting back up is actually feeling a lot better now, so that's good. I'm thankful for that. But then to come back up to standing, you just want to be very careful. You use the strength of your hands. If you're feeling really good right here, there's one more that I can show you. There's a squat called Malasana squat, and I actually like to do two variations. One's not really called Malasana, one's just something that I've done over time that I think feels on my good back and feels good to me. So I'll turn this way so you can see a little better. You're basically, you're up on your toes. Toes are close together. This requires a little bit of balance. So you might want to keep your hands down. But as long as this is all feeling fine to you, then again, it's kind of like going through a process of stretching down and seeing where it feels okay for your back, where it feels okay for your hips, everything. You might come down to your forearms. And for some really bendy people, maybe their head comes to the floor. So that's one variation. And then Malasana, I'm gonna go ahead and just bend my knees a lot to come back up. That's much better, it's feeling— that's pretty amazing. Bend my knees to come back up to show you the setup for the next one. But you could stay down on the ground like you were already, but I just wanted to stand so you can see how the width of the feet are. So the width of your feet are pretty wide for this pose. And then, um, See, actually I'll just go ahead and come back down, so I'm being careful still, but feet are wide. Okay, and then you're coming into this squatting position. If you're very, very tight, big pillow, couch pillow under the bum. But what happens here, if you, you can press your hands together and kind of press the thighs out a little bit, but you should feel just an elongation here in the lower back. And then just take a few deep breaths in and out through your nose. This one's actually much more uncomfortable on my knees and hips this morning than it is on my back. I was feeling pretty good on the back. And then to come out of this, again, you're using the strength of your hands, so lean forward, keep your knees bent, bent a lot, and then toe heel your feet back together. Keep the knees bent a lot. If this was all too much getting back up, go all the way back down to the ground and then just go through that process of turning to your side. And then eventually come all the way back up to standing. So this is actually awesome because I'm actually feeling like my back is not going to seize up anymore. I'm feeling like I can move a little bit. So anyway, I hope that was helpful. The main thing with this is if anything starts to seize up or if anything causes any pain, don't do it. It's that simple. Um, again, when your back is flared, sometimes the most comfortable position is just on a hard surface Lying flat on your back with your knees bent, you can keep your feet out wide, let your knees fall in towards center. That's usually fairly comfortable for people. Um, but yeah, good luck. If you have any questions, definitely let me know, and I hope that your back pain struggles go away and that whenever you do have a little flare or feel it coming on, you can use this little routine. Hopefully it helps you prevent it. So anyway, take care and have a great day.
More from Cheryl






30 Day Challenge Series, Day 30: Choose Your Three Habits to Continue for 90 Days

30 Day Challenge Series, Day 28: Schedule Connection (Put It on the Calendar)