2016 Lightroom Tips for the PSSA HCPS KZN Congress 2016 Houghton Photography HD
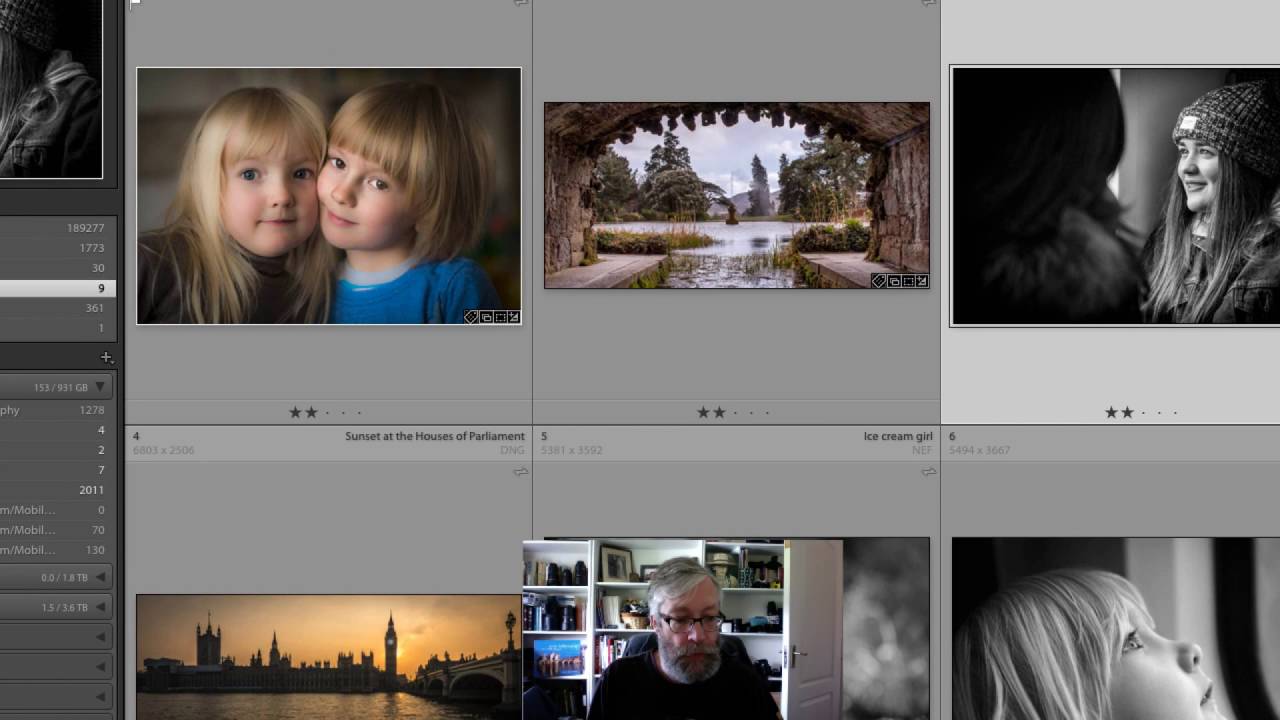
Joe Houghton walks through Lightroom workflows for photographers: organizing images with year/month/day folders and Smart Collections, culling with flags and star ratings, then editing with radial filters, adjustment brushes, and Dehaze for skin softening and dreamy effects. He emphasizes speed and consistency throughout.
Chapters
Hi everyone, my name is Joe Houghton and I'm a photography trainer living in Dublin, Ireland. In recent years we've spent a lot of time locally in Ramsgate helping out with my sick mother-in-law, and as a way of making friends here We joined the Hibiscus Coast Camera Club and now count many of the members as really good friends, so feel free to give Kathy and Tony, Darryl, Narissa, Akash, Henry, and Leslie hugs from us if you run into them. The plan for me was to give a session on using Lightroom, and when we realised we wouldn't be able to make it, I suggested we could put together this video as something of a fill-in. I know you won't be able to ask questions during the session, but you will be able to download the video and watch it again on your own computer. If it proves to be of any use. I first picked a camera up over 40 years ago when I was around 10 years old and avidly shot rolls of 110 and later 35mm film through my teens and early 20s. Then work and life got in the way and I didn't really come back to photography until about 10 years ago when digital first appeared. As someone with a background in computers, this ticked all my boxes and I started with a 2-megapixel Kodak, graduated to a Nikon D70, and now shoot a Nikon D810. Along the way I met and married Penny, a South African from Constantia, who happened to be in the back row of church here in Dublin one day. We now have 2 children, Danny, 5, and April, 4. You'll see more of them later on. Penny shoots a Nikon D750 and is an expert in graphic design with many years of publishing experience. In 2006 I began teaching basic digital photography in the local village hall. And a couple of years later Nikon asked me to provide their camera training in Ireland. So as well as my day job of university lecturing and consulting in project management, Penny and I run a small photography business, www.houghtonphoto.com, doing mainly small group and one-to-one training as well as some corporate work and portraits. We both also love landscape photography and have dabbled in some nature stuff while in South Africa, Under expert tutelage from HCPS members, Jacques Schelshop has kindly showed us some of the intricacies of shooting the eagles in Sanlamere, and Andy Ruffle and Ian Taylor have showed us the wonders of the Orobé vultures on several occasions. This is a must in KZN if you haven't had a chance to visit yet. Penny and I are regular Getty Images contributors and have sold images all over the world and been published in several magazines including En Photo earlier this year. Where I showed a student around Dublin doing night shots. I first encountered Lightroom as an early beta before it was officially released and have been a fan of the program ever since. It's had some ups and downs recently, but it's still a very powerful and professional solution to organizing, processing, and outputting photos, which many people barely scratch the surface of. Photoshop is much more powerful if you need layers of masking control, but for the vast majority of people almost all your editing can be accomplished in Lightroom and typically far faster and easier than in Photoshop. As an Adobe Certified Expert in Lightroom, hopefully I can share some of this experience with you and help you take your use of Lightroom up a notch or two. So this session aims to show you a bit of what you can do with this wonderful program. I'm firmly in the camp that a photo is made, not just taken, and that quote's paraphrased from Ansel Adams, one of the all-time greats of landscape work. Of course, I'd never advocate digital manipulation for photojournalism or straight nature submissions, for instance, but most times I'm more concerned with producing a final image which matches my pre-visualised idea of how the shot should look, so that's where we'll be concentrating today. I hope you enjoy the session. I want to show you something which you can do in Lightroom which is quite easy to do but makes it much easier when you're submitting images to the salons or your club nights, you can set up what's called an export preset in Lightroom, and what this allows you to do is export your finished file as a JPEG at a particular size. So, I mean, when we're putting in images for club night, they're typically at 1024 by 768 pixels. So I'll show you how to set Lightroom up so that you can do that in just a couple of clicks. So you're in Lightroom, you're in the Library module, you're in Grid View, which you get back to by pressing G anywhere in Lightroom, and you've got an image that you want to save as 1024 by 768 and upload into PhotoVault. For your club or for your salon. So the first thing you do is you select it, so you just click and highlight the particular image. Now over on the right-hand side in Library there are a number of tabs and there's a couple of things that you should get into the habit of doing when you save any image. The first one is keywording. So this was taken on a family day out on the DART, which is a light railway system that runs up the east coast around Dublin. So I'd put in various keywords relating to this particular shot, but I might put another keyword in for, say, you know, girl, mono, black and white. So any keywords that are relevant that you may want to use to find the image later on, you should put in and just get into the habit of doing that. So that's the keywording tab sorted. Under Metadata, one of the things that I generally do with, you know, images that I'm actually going to use is actually give them a title. So as you can see, I've already given this one a title, Girl on a Train, and I've put in all the other information around my copyright and stuff using a preset which was set up previously. Previously, but the title is quite important, okay, and I'll show you why in a moment when we, when we set the preset up. So that's all set, and I can close that down. So now what I want to do is I want to come over to the left-hand side of the screen, and I want to click on my Export button. So the Export button is now brings up the export dialog, and in this dialog what I'm going to do is make a series of settings, and then I'm going to save those settings and give them a name. So where am I going to export this photo to? Okay, so at the moment the folder is Users/Penny/Dropbox, but if there was a particular folder— so let's say I wanted to create a folder for club uploads. So I click on Choose, it brings up my Finder, and then wherever I want to put those— let's say I have a Joe folder here and I want to create a new folder and call it Club Images. So I create that, that's selected, So I click on Choose, and now that's showing in there. And if I wanted to create a subfolder under Club Images, I could actually put a name there. So I could, you know, maybe put, I don't know, June 2016, okay, as the subfolder. So, file naming. Now, by default, it'll just give you the file name. But what I generally do is go in, I rename, and I go into custom settings and I edit that. What you have here are a list of dropdowns which give you all the different pieces of information that are stored along with your image, and one of them in the metadata dropdown here is title. So I generally set up the export preset to first put the title in, and then I type in space dash space, and then I put in filename. Okay, and so you could get to filename if you didn't have filename. So let's just get rid of all that. So title, so I press Insert and there's title, and then space dash space, just me typing on the keyboard, and then I want filename, which is there. Okay, and you can see that it builds it up there so that you can see what's happening. So I click on Done, and then anything that I select, any photo that I select in future, it will look for the title of the photo and the filename of the photo, and when it does the export, it'll create a JPEG file with title space dash space and then the original filename. There's no video, so that doesn't count. Now, file settings: JPEG, because at the moment it's set to original, which in this case was a NEF file, a raw file, a Nikon RAW file, but I want to save as JPEG. So you can set whatever quality you like. I just typically leave it at 100, but for Club we're limited to 500K, so I can limit the file size to 500K. With image sizing, I can resize to fit, and you've got various options here: dimensions, long edge, short edge. Now I've found that if you select width and height and just put in the width, then— so that'll be 1024 because this is a landscape image— and if you just take the height out, then it'll apply whatever the height is in the right ratio to the image size. So there we are. If I put in 768, it would resize the image to 1024 by 768, which might cause the image to be squeezed if it wasn't actually in that proportion to start with. Make sure that's set to pixels rather than inches or centimetres, and For screen use and club use, resolution 100 pixels per inch is fine. I don't do any output sharpening for screen. If you want to remove all the metadata when you're uploading to club or whatever, you can check all these and remove all this stuff. I generally just include all metadata when I'm uploading photos. I don't put any watermark in. And I don't leave— yeah, leave post-processing to show in Finder. So once it's actually done the save, it'll then bring Finder up, or Windows Explorer if you're on a Windows machine, and you can actually see your image in Finder, which is great if you want— then want to fire PhotoVault up and upload it straight away. So there's all the settings, and now I can click on Add And I can give this a title, so this is going to be Club Images 1024 Landscape. And what I found in the past is that I find it tends to work better if I do a landscape preset and a vertical preset. Because the limit is, I think, 768 on the vertical, so I just set a separate preset up for that. So I just create that, and when I press the Create button, you'll see down here it'll show in the list just here. There it is, Club Images 1024 Landscape, and if I now click on OK, it will export the selected image to the hard drive. You can see up here Export 1 File is happening, and Lightroom is— and there it is, and it's exported the file. Okay, and it's exported the file with that particular filename. So all I need to do now is fire up Photovolt and and upload my file, and it's as quick as that. So if later on I come back into Lightroom and I edit another image, let's say this one of my father-in-law Howard, then all I do is select it, click on the Export button down here, choose the user preset Club Images. So let's— if something else was selected, you see all the settings are different. So I just choose Club Images 1024 Landscape, there it is, and then export. And now it's exporting that and it's going to change this from a 5600 pixel file down to 1024, and there it is, Howard exported. So it makes saving your images and making sure that they're the right size far easier than having to do it all yourself every time. One of the most powerful but very often overlooked features of Lightroom is the functionality around collections, and collections allow you to create sets of images which you either select yourself, but what I want to show you is something called Smart Collections, and this is based around keywording and the image data that you put in when you, when you save your images, but it allows you to set up collections which are based around rules. So for instance, I'm going to show you how we set up a collection to search my entire library of 190,000 images and automatically pull out all the images that are in any way tagged with the word lighthouse. So let's have a look at that and see how we get on. Okay, so here I am in the Library module. If we click over to the left-hand side and look under Catalogue, you'll see that my entire catalogue, all the photos that I've got on all the drives that I've, I've kind of got, total 189,277 images. As you can imagine, keeping track of what you've got when you've got that many images can be a little tricky, and so one of the things that I try and do is stay on top of keywording. When you import files, you can assign keywords as part of the import process, and you can also keyword a set of files or an individual image at any time by going into the Library module, clicking on the Keyword tab over on the right here and then entering information. So for instance, the shots that we've got up on screen at the moment, the shot that's selected, April and Danny, I've got a shot of April over here. So if I hold my Command key or the Control key on a Windows machine down, I can select that one as well. That's also April. So as I've selected those extra files, you can see more keywords have appeared because there were additional keywords associated with this particular file and this particular file. So there we are, there's all the keywords associated with those 3 files, and the ones with stars next to them, okay, are only associated with 1 or 2 of those files, not all of them. But if there's a keyword such as April which is actually associated with all of them, I can just make sure that it is applied to all 3 of them by just taking that star away. So just remove the star and hit Enter. And if I click off now and click on each individual one, there's April, April, and April as a keyword on all of them. Okay, and to apply a new keyword, you can choose one or more shots. So let's say I wanted to apply keywords to these 2 shots. So Command and click. So these 2 shots shot in London, well, we can see I've got London in there, I've got Houses of Parliament in there, but that's only associated with one. So I can just associate it with them both by taking the star off. But let's say I wanted to, you know, Blighty. I don't know. There we are, Blighty. Right, so that's now applied to both of those shots. So keywording is quite important because it lets you search when you get hundreds and hundreds and hundreds of thousands of files. So if we come down to the bottom of the screen on the left-hand side, I'll just close up folders. We come to this tab called Collections, and if I open up my Collections tab, you can see I've got lots of collections. To create a new collection, we click on the plus key here, and I want to create what's called a Smart Collection. So I'm going to create a Smart Collection, and I'm going to call it Lighthouse. Now I'm not going to create it inside a collection set, but I could, could make a set of different collections and then give the set a name, but for this particular one I'm just going to match this rule. So match all of the following rules. Now here you can choose pretty much anything to do with any information that Lightroom has about the photo: the camera, the lens, the serial number, all kinds of stuff. So, but I just want to pull out any photos that mention lighthouse. So any searchable text is what I'm going to choose. Contains, or contains all, or just contains the words, or doesn't contain. So you've got a lot of flexibility here, and I'm going to type in the word lighthouse. That's not case sensitive, okay? So lighthouse, any searchable text contains the word lighthouse, create. Okay, so what that's now going to do is search through my entire 190,000 photos and just return a subset of them, and in this case there's 59. Okay, and there they all are. So I've got this one, which was taken, and if we go and have a look at the metadata, this was taken back in 2003, okay, with a little Casio QV-5700, okay, what, 2 megapixels, something like that, and then as we come further down, this one was taken with a, I think, a D600, yep, down in Valencia on Kerry Coast, And there's some more shots of Valencia. Here's a shot that I took in Port Edward. I took a trip in a helicopter and shot this from the helicopter when flying over Port Edward in January 2015. So you can see all the shots there, and G brings me back to grid. Have something to do with lighthouses. Now, if I wanted to edit that further, I could come back in and I could edit that smart collection, and I could add some more rules. So I could plus and add another rule and say, well, just show me all the shots where any searchable text contains lighthouse and my— I don't know, my— let's have a look— camera info. My camera, yeah, was a D600. Save. Okay. All right, there's nothing in that collection according to this, so let's come back out then. So my camera contains D600. Let's see whether that works. There we are. Okay, so yes, because If I look down in the metadata, the model is the Nikon D600, so contains finds D600, whereas is, it was looking for just D600. So there's just the shots of lighthouses that I shot with a Nikon D600. So it's a hugely powerful way of keeping track of images and finding images very, very quickly if as long as you've got into the habit of keywording. A few more little things in Lightroom to show you. Over on the left-hand side here you can see my 4TB Seagate drive, which is one of the drives that I have most of my photos on altogether, and they go all the way back to 2000. But just to show you how I kind of order my photos, so I set up a folder for each year, and then I set up a folder for each month within the year, and the month folder is 01, January 2016, 02, February, because if you don't have the 01, 02, the months sort in alphabetical order, which doesn't give you the right month order. And then typically within a month, if I'm doing a particular shoot for whatever, I'll generally put the day as a 2-digit number and then a short description. These descriptions are great because if you don't get around to keywording, the descriptions will show you what's going on in Lightroom and will also allow you to search in Smart Collections just like using keywords. When I do a shoot, so for instance here we've got April 9th, and you can see as we go through, this is the photos that I was taking of Danny and April that day, just trying different ideas and portrait shots and whatever. It's quite a good idea to cull your photos. I mean, I don't know about you, but I mean, I shoot a D810 and each photo comes in at are kind of 50 megabytes, something like that, 36-megapixel photos. So as I scroll down through these, and when I first kind of have imported them, what I generally try and do is any that are obviously not going to work— maybe they're out of focus, maybe the expression is wrong, or whatever— As I'm going through, so let's say we're going through, I'll double-click on this one. Now, if that's obviously not one that I'm ever going to use, I click on the X key and that sets it as rejected. You saw when I clicked on X it says set as rejected. Okay, if I hit the 1 key, it sets the rating to 1, it gives it 1 star. Okay, and if I hit the 2 key, it would give it 2 stars, 3 for 3 stars, or whatever. So generally what I do when I first pass through is I I have them up full screen like this, and I will either hit X or 1. So 1s are ones that I'm going to work with a bit more, Xs are rejected. And if you type 0, it gets rid of the stars completely. And then if you go back to G, once you've been through all your photos, you can see very quickly all the Xs. And to get rid of those, you then go up to the top to the Photo menu. And at the bottom of that menu is Delete Rejected Photos, so you can delete the photos, and rather than removing them just from Lightroom, I'm never going to use those photos, they're rejects, I don't want them, they're just going to take up space, and that's 30 times 50 megabytes, so that's 150— no, that's 1,500, that's 1.5 gigabytes of photos that I can delete from my disk. So I click on Delete from Disk, and now they're gone. So the only ones that are left now are the ones that are either 1 stars or 2 stars, or that I've not crossed out anyway. Okay, so I've been through and I've given them all 1 or 2 stars. So now I can go up here and click on Attribute, and then choose just show me the 1 stars, rating greater than or equal to 1. And if you can, you can either say less than or equal to, equal to, but generally greater than or equal to. So 1 star, and that just shows me my 1 stars. If I want to get rid of that, just click on it and drag to the left, and it'll bring all of them back. Okay, so now you can see what you've got to play with, and it's just a very quick way of doing it. Now I just wanted to show you quickly, I've been following the work of, I think she's Russian, a lady called Elena Shumilova who, if you haven't come across yet and you're into photos of children, she is just, she has a command of light and her photos just look wonderful and I just wanted to see whether I could achieve the kind of dreamy look that she gets with her photos, just with some shots that I took of Danny and April. So this is the kind of look that I was kind of looking for, with kind of very creamy skin and then, you know, just quite a dreamy look to the photo. So if I press G to go back to grid, and let's pick one of those where we haven't processed it. So that's straight out of the camera. You can see it's just loading off the hard drive at the moment. There we are. So I'll just close down the left-hand side, and let's just see what we can do to edit this photo. A useful little shortcut when you first double-clicked and you're still in the Library module, if, as most of the time I do, is the first thing I want to do is to go to the kind of crop tool and resize the photo according to how I want it to show, and the resize shortcut key is R, so if I press R that's going to move me into develop mode and effectively just press this button here, so it just saves you a couple of mouse clicks and it brings you into the resize module, and now you can pull it down a little and just put them where you want them on the screen, and generally it's best to do your resize early so that you can then work off the proper histogram, because as you change the resize, the histogram will change just to reflect what's in the selected area. So let's say I'm happy with that. I just hit Enter, and now we can look at the shot. So the next thing I typically do is look over here at the histogram and make sure that I'm using the whole of the dynamic range, which at the moment I'm not. You can see over on the right-hand side of the histogram we've got quite a lot of empty space there. So you go down to the whites, because this, the right-hand side of the histogram, is the whites, and what we're going to do is drag the whites until we see the little triangle light up on the right-hand side, and that's going to just make sure that our whites are actually white and we're using the whole of the dynamic range, and you can see it's affecting the shot. Once we do that. Okay, so as soon as that little triangle starts to flicker, then you've gone too far and you're starting to lose, lose some of your detail. Another little trick when you are doing the white and black points like this is to hold the Alt key down while you drag, and if you do that, the whole picture goes black and you just keep dragging until you start to see little bits of white And as soon as you start to see little bits of white, that's saying those little bits are completely white and you've gone too far. So you then, you just pull back until those whites just disappear, and then you know you're at the right place. And the same with black. So if I Alt and pull on the blacks, as soon as I start to see black, that means they've gone completely black in that area. And generally you know, with darker areas maybe you do want some complete black, so you may just allow a little bit more black than white typically. So that's now set our white and our black points so that we're maximizing the dynamic range in our shot. Now the next thing I want to do in the basic slider is look at clarity, but I want to do it in a slightly different way. I don't want to do clarity on the whole shot at once, so I'm not going to do it in the basic slider. I'm going to go up and I'm going to use a radial filter. So let's click on radial filter, and now I'm going to drag over the area where their faces are. Okay, so there we are. Now radial filters by default are affecting the outside of the circle, so at the moment my exposure is set way over to the right, so it's just basically overexposing the whole picture outside that circle, and there's a bit of a feather as well. The feather is only set to 50. I find with radial filters and with adjustment brushes If you bang that all the way up to 100, it generally just makes everything much more soft and even between filters and things. You can always adjust the size of the filter if you want the effect to be more in a certain area, but it softens the gradation of the filter if you put the feather up to 100. I'm going to double-click on the exposure line to bring it back to zero. Okay, and now what I want to do is I want to de-clarify. So if I, if I went to the right, I would be adding clarity to the outside, and you see as I do that, as I add clarity, things kind of sharpen up. Danny's hair and Boo's hair is sharpening, but I want to do the complete opposite. I want to de-clarify their hair. Okay, so I move clarity all the way back, and you can see if I turn that on and off, you can see there's already quite a difference between there and there. Okay, but what I've found is to get the, the kind of dreamy effect, if I now move my mouse into the center of the screen and right-click on the radial filter, and duplicate it. So now we've got, if you like, 2 instances of completely de-clarified radial filters. So you see, you can see if I just move the top one slightly, we've actually got 2 radial filters stacked one on top of the other, both of them completely de-clarifying. And again, if I, if I turn the radial filter effect off and on Now you can see there's quite a dramatic effect on the hair and on the outside. It's really softened and de-clarified this. And you can also use sharpness as well if you want to take the sharpness out on these filters as well, and that also has a little bit more of an effect as well. So it's just a slightly different way of using clarity which a lot of people kind of don't tend to use. Most people tend to use Clarity going the other way to increase mid-tone contrast, but it can also act as a lovely softening tool as well. Dehaze is also another way that you can use to produce a very kind of dreamy effect. Again, Dehaze is very often used by going to the right to bring, you know, detail back out especially on hazy days and things like that. But if you want to actually apply a kind of slightly milky softened look, then if you go to the left with Dehaze, as you can see in this picture, it's really kind of softening out and applying almost a milky kind of Vaseline glow to the shot. So with Dehaze, you know, plus or minus 5 4 or 5 is often all you need. It's a very, very powerful tool, and you can apply it to the whole picture down in the Effects panel, or you can apply it selectively as part of an adjustment brush or a radial filter here up at the top. So that would kind of take care of the outside, but then I'd want to also maybe just do a little bit on Danny and April's faces. So I click on the Radial Filter to turn them off, and now I'm going to create a new Radial Filter. So go over Effect, hold the Alt key down to reset. Everything is now reset to the middle, and I'm just going to create another Radial Filter. Actually, I'm going to create an Adjustment Brush rather than a Radial Filter, because what I want to do now is just paint over the skin slightly and and soften it out just a tad. So again, Declarify. Okay, and now my flow and my density set to kind of around 80, something like that. Feather fairly high, 70-80, and turn Auto Mask off. Okay, and all I'm going to do now is just paint the skin very Very soft, especially where there's stuff like, you know, little veins. Danny's got a couple of little veins there in his skin because he has very clear skin. You can see the same there in April's cheek. So it just softens off a little bit without losing too much of the definition, and then I can turn that off and And go into the cloning brush, and Danny's just got a little bit of his dinner or whatever left on his cheek, so just do those tiny little clone-outs of imperfections that you just want to get rid of. And that's that. Now the last thing I would do is maybe just Work slightly on Danny's eyes. So I'd go up here to 1:1, drag the box down into here, and now just see whether we can bring those eyes up. So you can either use a radial filter and just draw something like the right size and drag it to his eye. Size, there we go. And what you tend to do here is— what I want to do— oh, it's working on the outside, so I need to invert the mask. Okay, and then if you add a bit of clarity to the eyes, sometimes it can just make them a little bit sharper. And just pop the exposure maybe just by about a quarter stop or even less. Just changes it very slightly from— and just brings out the contrast in the eye a little bit. And if I want to apply the same to the other eye, right-click, Duplicate, and then drag the Radial filter across to the other eye, and then maybe just rotate it and resize it because the other eye is further away and a little bit smaller. There we go, and turn that off, and then come back to Fit. Okay, and that's pretty much the quick edit on Danny and April. Okay, so I hope that's been of interest and has maybe taught you a couple of new things that perhaps you didn't know in Lightroom. Just to finish off, my website, you can see here, houghtonphoto.com, and you can get various information and stuff on here. There's a videos page which has links to our YouTube channel. We haven't done loads of videos yet, but these will be up on it, and there are a few more. I'll just flick over here and you can see that there are a few videos up of different edits showing you different techniques, so that's available through the main website. I also recently added a link to some photography videos that I've kind of pulled down off YouTube, and this is really just a page where I've kind of curated, if you like, a set of pretty good documentaries about Some classic, mainly the classic photographers. So you can see Capa and Avedon and Cartier-Bresson and Karsch and whatever. So if you've got a few minutes to spare and a broadband connection, these will provide you with quite a lot of inspiration. There's some really good stuff in some of these videos. Houghton Photography also has a Facebook page which is facebook.com So drop over here. If you give us a like, then I regularly post up kind of articles of interest about photography and Lightroom and stuff. Yesterday, for instance, I was watching a video by Tony Northrup, and he's just released a free 384-page book because they got to 500,000 subscribers, so I posted that up on Houghton Photography and a lot of people have downloaded that. So that will help you keep up to date with, with stuff that's going on as well, so that's facebook.com/HoughtonPhoto. Give us a like! And the last thing I want to leave you with is that if you would like any sessions doing one-to-one training with Lightroom, I'm quite happy to do that. I did a couple of sessions with Tanya, one of the club members, a couple of months back, and we used FaceTime, I think it was, so that we could talk using the Wi-Fi, and then we used a little free application called TeamViewer which allows us to connect the 2 computers. So basically we work on your computer on your images and your copy of Lightroom, but I can see that on my screen and I can move the mouse in Dublin and kind of drive the screen at your end, or I can watch what you do and offer advice and suggestions in terms of how to get the best out of Lightroom. So if that's something that might be of interest, we can set that up very quickly. And it's very easy to do. So if you're interested, just drop me an email, joe@houghtonphoto.com, or Cathy or any of the club members have got my details as well. So that's it from me. I hope you enjoyed the session, and I hope you enjoy the rest of the Congress. Bye.
More from Joe



2026-01-31 RPS Under the bonnet 5 - Masking in Lightroom Classic with Joe Houghton

Joe Houghton on creating a Google GEM based on a NotebookLM notebook optimised

RPS Let's Edit - Composition - Depth & perspective - Joe Houghton 2025-12-06