DataSelf Analytics Deployment - Part 2: DataSelf ETL Connection to Data Source
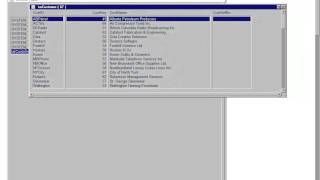
Learn how to connect DataSelf ETL to a SQL Server data source, import tables from Sage 500 ERP, and set up automated daily refreshes using SQL Server Agent. The video walks through naming conventions, the Import Table Wizard, and how to verify the refresh worked.
Chapters
Data Self analytics deployment Part 2 Data Self ETL connection to data Source and Data Refresh I recommend reading this page carefully before proceeding with the video to save time. I'll move on. So I'm assuming you already completed it. Completed the part, the video. Part one where you installed the ETL and you have the ETL open with the plain. Template that you have installed now. You need to connect to a data source.
In our example we're going to pull.
Data from a Sage 500 ERP system. So first of all we need to.
Create a connection or a data source.
Name or an ODBC to that data source.
If your data source is SQL Server or Excel or Microsoft Access, you can create the data source connection directly into.
The ETL by doing the following procedure.
You click this button which is the.
Import Table wizard and from here when you open it, right now you only have one data source which is pointing.
Directly back to your own data warehouse. But we need to add an additional.
One for Sage 500. If you were to use another data source, providex oracle db2, you name it.
Then you'd have to use odbc32bits to.
Create that connection and that will show.
Right onto this page. In our example, because our sample database is Microsoft SQL Server, I'm going to.
Create the new data source clicking the Add button.
And then here I'm going to choose Microsoft SQL Server. I'm going to give a name to this data source and if it's a brand new data source, you can put any name. If you're using an out of the.
Box solution for Data Self, let's say.
You know the Data self analytics for Sage 500, then there are standards to follow and you have to check our.
Documentation to see what the standards are.
And typically you know, if it's from from Sage 500, the standard would be DSS data self underscore and the ERP.
Name in this case sage500. So that would be the typical name.
For the standard data source name we.
Use in all out of the box solution.
Next you put the SQL Server instance name. In our case it's a local SQL instance and then pulling from Windows Authentication. And just to double check, in our.
Sample database, the database name is sage500.
So we just enter the database name.
Here as sage500 and click finish. And that's it. You just created a new data source that is SQL Server pointing to that particular data source.
If you need to edit later, you can go back to the same icon importable wizard. You can click click it and choose the Edit button and change if you need to.
Well, now if we need to import a table or a set of tables.
From this data source, so what you.
Do is you go back to the Import Table wizard, double click the data source that you want to work with. So double click it and click Next.
And then you can choose the table.
Name from this list.
You know, if you click on the.
List and you type in, let's say in this case, TAR Customer, I go straight to the list that has a.
Tar cus and now I'm going to.
Find this table here and you can use the control button to select more tables if you want to, and they're.
Going to be imported one at a time. In my case, I'm only going to choose one table. Click next and now you select the fields that you want to import from.
The available to the mapped ones.
So I'm going to choose a few of them here. Click Next.
Typically we don't do grouping, so click next and then here you can either finish this mapping and import the data later, or you can finish and import now. If you have lots of data to import, we always highly recommend clicking this button, otherwise you may have to wait a long time until the date import finishes. Once you click one of these two buttons, if you have chosen more tables.
To be mapped, the wizard will go to the beginning and you'd have to.
Select the next table, the next fields and so forth.
In this case, we just selected one table, the Tor customer, and I'm just going to click Finish and import data.
Now, because it's a small table, when I do that, the ETL will map that table into the data warehouse and import its data.
So right here, if I go now.
To the browse table, I see the TAR customer.
If I click on it, it opens.
And it shows me the actual data.
So that's a very simple and straightforward.
Procedure to import new tables into the data warehouse. Now, what if we want to add.
This table to a refresh and then we want to run this refresh on a scheduled basis.
So to do that I'm going to.
Go to this icon which is the refresh wizard.
I click on it and if you're using out of the box solutions for, you know, Sage 100, 500x3, sales, Logix Dynamics, you name it, this wizard will be already highly customized with a lot of tables and different steps.
Understanding this is the matter for another.
Video, but for now I'm just going to add the TAR customer table to my first step of the refresh.
So right now we're looking batch zero, which has this name.
I'm going to go to the first step of the batch zero and I'm going to add the TAR customer table.
To that step, I'm going to click save. I go back and I press save and that's it.
I just created a batch for that that I can run manually. However, typically you want to run this batch on a schedule basis. And the most popular way to do that is using Microsoft SQL Server Job Services.
Let me show how you can configure that. You can go back again to this.
Refresh wizard. And here at the bottom you can.
Click the properties of the SQL Server.
Job that can run this refresh batch.
Right now it's red because it's disabled and probably doesn't even exist. I'm going to click and by the.
Way, before we create it, let me go here to the SQL Server Jobs refresh and show nothing is here yet in SQL Server. So I'm going back to the etl.
I'm going to click the properties and as I say I want to refresh.
This batch every day and do it.
At 1am and I'm going to click apply. This may take a little bit.
That's it.
Now in the ETL I can see that this job SQL Server job is.
Called DSRefresh Bat Zero Plane. It will run daily at 1am If I go now to double check and I refresh my job list, there it is, the DSrefresh plane zero. And now every day at 1am it will run this job.
Now what really is going to happen? Well, let me show.
I'm going to close this and close the etl. And if you just leave the system.
Every day should be refreshing, but you.
May have some errors that you may have to fine tune until you get.
All the security lineup and so forth.
So the recommendation is to run a manual refresh if you can, to test manually to see if all the connections are proper. So you have to go to the.
Dataself ETL folder, which in our case.
We saved under the C program Files.
Data Self Data Self etl and that's where the Data Self application is. And then it created these two shortcuts.
Which run refresh batches and the one we created was the batch zero. So I'm going to double click this one to run that refresh which will.
Bring the customer table data again and.
Refresh formulas associated with the core Data Self solution.
So I'm clicking that, clicking yes. And now the DSRefresh is going to import the table and recalculate some extra.
Procedures that are part of the out of the box solution.
This refresh in this example took only a few seconds. A real out of the box solution.
This may take several minutes, and if your data is large, it can even take hours.
But did it work?
Well, one way to see if it work is opening the log file.
The log file usually is called log and then the project name, which in.
Our case we're working with a plain project.
So I'm going to double click the.
Log file, which is a text file. And when you open, if you see the last section is what we did the refresh, so it tells the batch. Zero is what we ran.
You ran step one and step two.
And pretty much, you know, it looks pretty clean. No errors, it was successful.
That's one way to see if there.
Was any error is checking the log.
The other way is you can open.
The ETL and then open the table and see if the data was refreshed. Sometimes by looking at the table, you can see if new data came in. Let's say if before it has 76 records and now it has 70, it means more data was brought in. You can also do the same kind of tasking using SQL Server Management Studio. Now, when you run the job at night. I'm sorry, when the job runs at night, automatically the job runs using another user, the user that runs the SQL Server agent. And that user may not have rights to read data from the data source and it may fail. So typically you have to watch the.
Auto refresh at least the first night to see if it was 100% correct.
If it was, you should be all set.
If you had connection errors, most likely.
You have some security to be configured.
To be sure that all the services.
Associated with this data refresh all have reading and write rights to the data source, reading rights to the data source as well as reading in writes to the data warehouse. And that's our video part number two. Thank you for watching.