DataSelf Analytics (Tableau) - Adding New Fields from DataSelf Data Warehouse
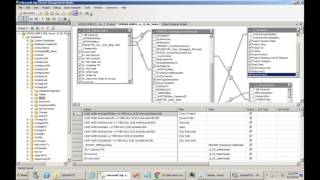
Tutorial on adding new fields to a Tableau data source in DataSelf Analytics. Shows how to back up projects, modify import mappings, and publish changes to Tableau Server using Sage 300 as an example.
Chapters
This video is to show the guidelines of how to add new fields to an existing data source in Data Self analytics or Tableau. So in this example I want to add a product category, revenue account and return account to this data source. And when I go to the product hierarchy I see product category information, but I do not see the product category, revenue account and return account. So I need to add those two fields. This example I'm using Sage 300 out of the box solution. The concepts apply pretty much to all out of the box solutions and here are the steps you should go through. So first of all, let's just take a quick look at the architecture. So I was looking at the tableau desktop and then we need to be sure the fields we need to add to the solution are already in the data warehouse. Then we can plug them to Tableau. In order to do this whole procedure, you must be fairly familiar with the etl, the Data Self ETL with the SQL Server data Warehouse, as well as the tableau technology here. And actually before you get started, we highly recommend doing backup of the ETL project, the SQL Data Warehouse as well as Tableau data, because in case something goes wrong, you can go back to the prior settings. I'm going to go through quickly backup procedures, but be sure that you do them properly and you know the details. So how can you backup the ETL project? One way is when you open the etl, you go to Tools Backup and run the full metadata Backup Wizard. To backup the data warehouse you can do the traditional right click on Management Studio and do tasks and backup. Or in the ETL you can also do Tools Backup and Data Warehouse Database Backup wizard for the tableau. You can google for backup tableau data and this page here will describe what you have to do to back up the tableau data. So once you have done a backup and you know where the backup files are and you're comfortable that you can now move forward and you have a safe backup, then you can start the procedure. Many people will know how to push the new fields always in the data source to the tableau front end. Some people will not know the whole framework, so they have to reverse kind of engineer where they should find the places and then go back again. I'm going to assume that you don't know as much. I'm not going to cover the reverse engineering approach, which probably will help pretty much everyone with some understanding to do the job. And before we make changes, before we make changes to this essay sales Demo data source, first go to the Tableau Server. So go to the server, go to data sources and let's check the settings of this SA Sales demo data source. First of all, what project is currently deployed? So make notes. What project is currently deployed? Click on it. Then make notes or screenshots of this data connection page. The refresh schedule, if there's any refresh schedule, as well as permissions currently associated to this data source. Because once you make all the changes and you move the changes to production, you should be sure that it has the same data connection, refresh schedule and permissions set up. That way you'll be able to retain the same configuration just with additional fields in the data source. All right, so once you had these pieces, so now we're going to start to kind of reverse engineering. Well, before we reverse engineering, the first question is, are the new fields that I want to add here already in the data warehouse? As I mentioned originally, I want to see the product category revenue account in the product category return account to see if those fields are already in the data warehouse. I need to go to the etl, which is the tool to bring data from the source. I go to the table that has or is supposed to have those fields. So I know that these fields are in this table here. The product categories table from in this case H300 I can right click on the table name and choose fields. And here I can see which fields have been pre mapped in this case preview preconfigured right now. And I can see that the revenue account is currently already mapped. However the return account is not mapped yet. So I could just at this point map the revenue account if I don't know how to change and add new fields. But in this case I'm going to also change this table and add the second field. So we'll do for both of them. So let's right click on the table and choose Modify Import mapping so we can add new fields to this table. So it opens the import table wizard already plugged or connected to the sage 300 table which is the ICCATG I click next. These are the fields currently mapped which match with this black font fields here. And I want to also add the return account field which was not mapped yet. I'm going to click so now this field is also mapped. I'm going to click Finish and import Finish and import data right now it's a small table so I can import all the records. Right now let's wait for the ETL to do the job and recalculate formulas, then recalculate indexes once it's done, you can click the table to open it up. For instance, so these are the table with all the records and fields. I can right click and choose fields again. And now I take Return Account, Press Enter and Revenue Account. Press Enter and go back to my table. And I see that all the data has been properly populated. So now I know that in the data warehouse I have all the fields required to push them forward all the way to the tableau data source. But where should I put these fields? Well, if you don't know how to push them forward from the ETL all the way to Tableau, the idea that I want to give you is how to reverse engineer that sequence of connections. So let's do this reverse engineering. So right now I already have in Tableau Desktop the SA Sales demo data source. And I need to edit this data source to see where it is connected in the data warehouse. To do that I have to right click on the data source and choose Create Local Copy. So I'm copying from the tableau server and making a local copy and I can save anywhere. Usually goes to my documents tableau repository data sources, but can go anywhere I save it. And now I can remove the tableau server data source because I cannot edit that one. So I'm going to close it now. This data source here, it has this icon with two cylinders. It means it's an extract. I cannot edit extracts as well. I have to remove the extract from my data source before I can edit it. So how can I remove the extract? I just right click on the name and I uncheck this box. And when I do so now I have a single cylinder, meaning this tableau data source is connected directly to the data warehouse. And now I can make changes to it. I can trace where it is connected and so forth. So now that I have the direct connection to the data warehouse, I can go to the Data Source tab. In here I'll find what is the SQL Server instance name that the data source is connected to. What is the database? The SQL Server database name. And in that database name, what view or views that are actually being used by this data source. So it's local is the DWCH300 database and then the BSA sales view. So let's go to management studio now, SQL Server Management Studio. I'm right now connect the local instance. I'm going to the DWCH 300 data warehouse or database and I'm going to go to Views and then I can find here the BSA Sales, which is the one that the data source is connected to. So let me design this view to see what we have inside. And once I look at it, you can use whatever way that you like. Maybe the tables, the columns here, the grid or the SQL statement is your choice. But if you look around you'll find that product and product category information is is currently being used inside of this C product view. So what I have to do actually to add those two new fields is to insert into this C product view those two new fields. So let's do that. You could connect directly here the product category table and just customize this view. But if you customize the C product view, it becomes part of the data cell framework and you can easily add those fields to other views much more easily. So let's go to the, let's find the C product view which is right here. Let's design it. And currently in this C product view I only have the ICITEMS table, I don't have the product category table. So let's add it. There's different ways you can bring those fields to here. One way could be using the ETL to denormalize the fields. But in this example I'm just going to add a new table which is the iccategory table. I add it, then I have to link it using the proper keys. The key is for the category key or category key, which category key. I just link both of them and I want to be sure that I'm getting all of the item records. So I make the kind of link between the tables and now I can add both the return and revenue accounts to this view. And typically you may want to make these names more nicely more descriptive. In this case I'm just going to call return account. It's just easier to read in Revenue account. So I changed this product view. Now all the views in Data Self that use the product view, such as the purchase order, the sales order, the inventory views, they all can have this new nicely business descriptive new fields to be inserted. Well let me go back to the essay sales and then now the C product should have those two new fields. I add them up and I save. So now I have brought the new fields all the way, you know, from the ETL down to the BSA sales view. So now I'm ready to go back to Tableau Desktop or Data analytics Desktop. Go back to my sheet one and now if I right click and I refresh this view it will pull any new fields from the SA sales view into this list of reporting parameters. So let's click refresh and there it is. We have those new two fields. When you bring new fields, sometimes you have to format them. If they're numbers, are they dollar amount, are they quantities, how many decimal points and so forth. So you could come to each one of these new fields right click, go to the default properties and change formatting and other things. If you have dates, for instance, you should know how to do that. But overall formatting is also an important piece of this process. Then if these fields belong to a hierarchy, you have to drag them into those hierarchies. In this case they are product category, so let's drag them inside of the product dimension. So I just brought both of them into the product dimension. So nicely organized. And now I have to republish this back into the tableau server. Now you have to go back to your notes at the beginning when you saw you went to content data sources, what project you should publish it to and also see data connection, refresh, scheduling permissions. So this kind of information now comes into play. Now I want to make something simple here. First of all, when I saw before here, I noticed that this data source, when I go to it and I click here, I see there's an extract. So I should publish it as an extract as well. So let's make this an extract instead of direct connection to the data warehouse. How do I do it? I right click, I choose Extract Extract data and click Extract. And then the tool will crunch the data. Sometimes this may take several minutes to complete, sometimes a lot of time. If you have a very large database, in this case just a sample database was super quick. Now I have the icons with two cylinders, meaning this is an extract. Now you have to publish this back to the server. Now we highly recommend that when you're doing this and you're not really savvy doing this, you haven't done this a lot. We recommend cautious. So instead of replacing the current production data source with a new one, just publish it. So right click and click publish to the server. And instead of replacing with the same name, put a number one or call it test test one, whatever it is. So you're not going to be overriding yet your production one until you're sure that what you're doing is working as expected. Then here for instance, you're going to tell what is the refresh extract schedule. So based also on this information here, you know how often you refresh it. You can come and say, okay, it's weekly days, every morning. What about security? You look at security permissions you can also edit on the web here, but you can also use the client tool to define the security. And when you publish, you republish with the security rights. But be sure that at the end of the day you'll have all of these settings replicating exactly how the original data source was published. So now that you have all the settings, you click publish. So it goes to the server. Now when you go to the server here, you can go back to content data sources. You should be able to see the new one and they should be pretty much matching all the parameters according to the original one. Go to the data connection, go to the refresh schedule, go to permissions, be sure everything is matching and then let it run. Let it run for a couple of days and then every day come back here on your Tableau desktop. Let's close this because we just finished the process. Connect the data, go to Tableau server and now pull. We need to refresh here. Pull the one that you modified and see if it has information as you expect. In this case we have the revenue account, the return account as well as the revenue account. See if it's working properly, see if other data is working as expected once you tested it. Once you see secure is properties refreshing every day, then you can go through the procedure again to replace the production one with this new one. How do you do it? Simple. Now we just come here, we make a local copy again, just save it, close the original one. And then let's publish this. But now we're going to replace the original one is no longer a test. And be sure again to be, you know, to check the refresh extract when it should be refreshing to change security and all the other parameters. Be sure everything is matching, click publish. And now you're overriding production. And now you should have the system back with the new set new fields and pay attention again for the next couple of days of refresh to be sure the system is working as expected. I hope you found this video informative. If you have more questions, please give us a call. We'll be glad to help assisting you in getting this done. Thank you very much.