DataSelf ETL+ Legacy ERP Data Blending
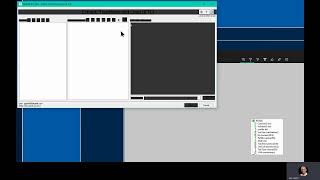
Learn how to combine old ERP data from Excel with live ERP data in Tableau using DataSelf ETL+. Match column names and IDs in Excel, load the tabs into the data warehouse, use UNION operations in Tableau Desktop to stack legacy and live tables, then publish to Tableau Server. Keep legacy IDs optional so you can trace where records came from.
Chapters
Hi there. This video is going to show an overview of how to do data blending from a legacy ERP into a live one. Using Excel as the way to bring the data from the legacy system to the live one and consolidated. The techniques involved here are also apply to other formats of the legacy data, like CSV files, databases, database formats like SQL access and whatnot. So the techniques, the idea overall is similar. We'll focus on Excel because it is very popular. So let's start with the problem. First of all, right now I am in the Tableau portal and look at my Live ERP data. This example, my Live ERP data only has records for 2022 in my legacy system, has the data in Excel has been exported to Excel and I can see that for every month I have different tabs. Very important. We recommend that when you bring legacy data that the data, if you're using Excel, that all the data is inside of a single Excel file. You can have as many tabs as you as you want. You can have dozens, even hundreds if you want to. It doesn't matter how much data you put into Excel that it can handle. But having everything inside of a single Excel file has benefits down the road in the process. Yes, you can use multiple files, no problem, but having inside of it will make your life easier. A quick overview here. So in this Excel file we only have three months. So for 2021, month one, for month two and month three. So all the data is here ready to be imported. I'm assuming that this Excel file data has already been prepped. What is the prep that you do in Excel? It's a lot of things. One of it is, first of all is convert the column names that you had in the legacy system into the equivalent column names in the target system. For my sample database, I'm using Acumatica. It could be any target erp, but I'm using Acumatica. And then in this example, the line detail table has headers like this one, which is the same as the ar tran in acumatica or ar invoice in sage 100 and so forth. So be sure the headers are exactly with the same spelling. Also, I'm assuming that the IDs have already been translated. So you already, you are, you know, the client has already taken what the old IDs were were in the legacy system and converted into the same IDs for customer, for salesperson, for product one, not in the Excel file. In this example, we also have a column for legacy IDs in case you want to retain and bring them to data self. But that's an optional. The most important thing is to have the IDs from the legacy system already translated. All right, so now how can we bring the data from Excel and blend it into this tableau data source? So when people are looking at out of the box reports on new ones, it's all seamlessly integrated behind the scenes. That's what we're going to do next. Go to the process of doing the data blending. The first step is bringing the Excel data into the data warehouse. Just raw data bring to the data warehouse in Data Self. Step two is union, the data of the legacy system. With the live system there are two main places where people can do the data union. One could be directly in SQL. If you are a SQL expert, it's an amazing place to do data blending or table union. In SQL you have the raw data. It's very helpful to analyze and assess in case there's some discrepancies, in case you run into. But most of the time using tableau as the way to do the data blending is significantly easier. So if you don't have a lot of SQL expertise, taking the route which I'm going to take here is usually significantly easier and works perfectly. So let's see how to do that. First bring the data to the data warehouse, second to the table union tableau and then publish back to the tableau server. All right, let's do it. So let's take ETL plus. So this ETL plus is already connected to the ERP system in this example again is an Akumatica ERP system, but could be anything. I have only a few tables pre mapped just to focus on the use case here. And what we need to do is to do the data blending on AR trend. So first of all, let me just double click AR trend here. When I double click, it gives me the option to expand the columns and see the columns in their formatting. So right there I can see the columns from the AR trend, the sales detail. And again if I compare them with the Excel file that has the historical data, I can see that all columns are correctly spelled as in the Excel file. Now you can have more columns here than here or vice versa. Like this column doesn't exist here, no problem. But columns that are in both places in the target and in the Excel, they should match the column headings, the column names be sure to match, no misspelling. All right, now how do we bring the data to the data warehouse? So you go to the left panel where you have the sources and you add a new source. So click here and choose Excel as a source and then find the file and open it. So my file is this one sales line from the legacy system. And click Open and click Connect. And right there I have a new data source with all the Excel tabs. Now only bring the first one, do not bring the others. Only bring the first one. In this case is this one can click and then click the plus signal here or right click and choose Add table, meaning I'm mapping the table to the data warehouse, which I just did. The table is right here in my data warehouse mappings and it's asking me, do you want to rename it? Usually yes. I want to make it friendlier for me or anyone else in the future to know what this table is about. So first of all, remove special characters or weird. I call it the weird characters. I don't want to see this and this, I don't want to see this. So I just put in the number. I also like to put this table along with the table that will be blended, which is the AR trend. Eventually in the data warehouse. I'm going to be calling this AR tran underscore trend L legacy, for instance. So I'm telling explicitly for a human to know that this is AR trend data coming from the legacy system is only for the period 2021 01. So helpful for humans. Now comes a very important process. First of all, load the data so I can click now load now or right click on this table and load it. I have a small sample data if you take only a few seconds. If you have a lot of data, this can take several minutes, even hours if you were to have lots of records in a very slow computer and Internet connection. All right, once you load the data, you can double click the table to expand, you know, to expand the columns in. The very important next step is that the formatting of these columns must match with the format of the target table, in this case AR trend. So let me double click AR trend and expand. And as you can tell, the formatting is not matching. It's very hard in Excel to control the format when you bring Excel to a database. So how can we customize to be sure that they match? This is a manual work and I'm going to take a screenshot of the AR trend and then I'm going to put here on the left. Right now I have plus at the top in a screenshot that I just took. And now I need to replicate here to match the formatting. So I click on the table, the Excel table, right click and choose Design. And now I come to this DW Data warehouse data type, and I match them. I'm just going to match quickly because I know right now how to do it. It's integer. Integer. This is integer. This is integer. All right, if you check this is matching perfectly with the formatting, you click Confirm. And to guarantee the data warehouse data is matching with the new formatting, you right click on the table and load it again. And that should be all set. And now comes the part that is actually fairly quick because you took the first table and you matched with the target. Now, to do for all the other tables, you might have dozens, even hundreds. It's faster. You pretty much what you do is you take the first one, you right click, and you duplicate the table. That means everything you did for the first table is going to be duplicated into a second table. So right now I have a duplication and for this table, going to take the second table table. So is the O2 for the O2. And the mappings of this table comes from the second tab. You know, this tab is still pointing to the first one, and I say, no, no, bring from the second one and confirm. Is it working? Let's see. I'm going to choose back the first table, which is 01, pointing to this one, and I do a preview, and it shows me that this one has data for January 2021. All right, how about the second one I selected is pointing to the O2 table, which is this one. And if I right click into a preview, it shows February. Very good. Let's duplicate this one again. And this would be done for all of them. So there's going to be number three going to come from the third tab. You press Confirm, you do a preview, and should be March. All right, Then you do this for all the Excel tables, all the Excel tabs, and once you're done, you click Save. So all of them are mapped, and now you load them all in a single shot. So you come to the header, which is the name of the Excel file, you click it and you click Load now. And if you have a lot of data, maybe now you go to take a break, go for a walk, get some coffee, and ETL will take care of loading all the records. No matter how many records you have, it can be huge. It will eventually finish the job. Right now if I click the the log file, it shows me that they loaded all the three tables and it was quick because I have sample data and that's Pretty much all these tables have been loaded to the data warehouse. What's next? Well, remember, we need to take this data source here and now do a table union of the legacy data from the data warehouse with the live system. How we do that? We open Tableau desktop. We connect Tableau desktop to the server where the data source is. Then we click Tableau Server and then we pick the data source we want to customize or edit which is the sales invoice and connect to it. So right now we simply connect to the data source on Tableau server into ed. This data source, we have to download it locally with desktop so we can change it to download locally. We right click on it and we save create local copy. So just saving any place because this is a temporary work, I'm going to here override it. Now I have a copy. You know this icon here means is the server, this one is a local copy and this is the one we're going to be editing. So right click on it and choose Edit. You might have right now you might be prompt for credentials and whatnot. So go to the security side of it once you get to this page. So first of all, on the left in this panel you can see all the tables available from your data warehouse. When you are in this page, sometimes it's very helpful if you use this yellow box to search for tables that match a certain string. In this case I put Test Excel and it only gave me tables that have Test Excel as part of their name or their schema. Next we need to edit the actual sales invoice data source. Double click this box to get inside of this framework and see the actual table linking. This is a simplified table linking for demo purposes. When you open your own data self data source, it might be a lot more complex. Anyhow, the point is how can we get the legacy data union into my AR trend here it's fairly straightforward. You take the first one, you just drag input right below, not on top, but you see the orange below saying Dragon table to union. You put the mouse right in that orange box, it becomes orange. You just drop it over there. When you do so this box here, it might take a few seconds become it will have these two lines at the bottom, meaning this table now is a table union. Meaning two tables together are combined or stacked with each other. Which tables are actually unioned. If you come to this dropdown and click Edit Union you can see inside what you have, which in this case is the original one plus the legacy. Now you add the other table. So you can pick every table and keep on adding here, just drag and drop all of them and keep on just adding all. Or let's say I just added one of them just to show you click ok. If I want to add I can also just drag over here and do the same thing is the same process by dragging and dropping into the orange box. And if you want to double check at the end, if you did it correctly, you go back to edit union and you can see if all the tables were correctly added. Depending on your how you're doing your data legacy consolidation, you might have to also bring the same equivalent data and do union with the invoice header is almost always mandatory because if you're bringing records here that you don't have a match in the invoice header, you might be missing things such as the invoice date which is usually in the header. You might be missing how to link to parent tables to the invoice header like customer, salesperson, whatnot. So in most cases you have to do the table union for two data sets. The invoice header for my example, I'm going to only focus on one of the problems because the other one is the same mechanics. Anyhow, we already did the table union. Now I click the sheet one to go back and when I do this tableau will re import all all the data into this data source. And this might take a while. We have a lot of data. Not in my case here because of the sample data. Anyhow, is this showing what I'm supposed to. Well, when you do table union tableau creates what is called a table name new field. This only appears when you do table unions in the table linking behind the scenes. Now when I drag and drop table name into my report, it shows me all the tables that are part of my table union. And if I take the count and put in my report, it shows how many records that is in each of the tables. And this should match to the penny or to the line detail of each of the tables that I did a table union in, this pretty much means that I almost have a successful data blending. Now why this would not work in my sample data. If you remember, if I put the invoice date which is the out of the box, it's the formula input in my column here you'll see that for the original invoice I have dates but I don't have a match for my legacy data. Why is that? Because of the purpose. I just told you before that typically the invoice date is in the Header table, not on the sales line table. And that's why you might need to do the table union as well for the header. I'm not going to do that now. Just making the point of what kind of trouble you might run into in case you don't do that. But I'm going to proceed and publish this data source to the server. So right click on the modify data source publish to server and you have to match the name. So it's the sales invoice, the original, I'm going to say also sales invoice. Typically you have to be sure it is on the right project. At the end of the day it must show that you're going to be overriding the data source. And yes, you want to override it. Click publish. You can confirm to embed credentials. Yes, you can confirm to override it. Just see it's going to go to the right place. And when I click yes, it's going to overwrite that data source. So when it pops this in the browser, it means it's been overwritten. Now if I go back to my original report and I'm going to refresh this, the good news is I'm going to have more data, but it's not going to match with the years because I'm only blending the line detail, not the header. But let me show you, I'm going to right click and say refresh on Tableau Server. And now we have all the records that are from the legacy over here. How do I know that? If I take table name and I drag to my report, I can tell that this whole line is coming from the legacy and this one from the system. And if you remember, we have two invoice dates. If I bring this invoice date to my report, I can tell that this one is actually bringing the legacy data correctly. And if you also do the table, the table blending for the header, all of this can blend in. The whole numbers will make seamless analysis of the legacy and the live system. You know, seamlessly for users. Once you do this blending, they're going to be able to go back and forth in history like they never changed ERP system. I hope this helps. Thanks for watching.