Easy Organization projects - 3 budget friendly projects that can each be completed in 2-4 hrs!
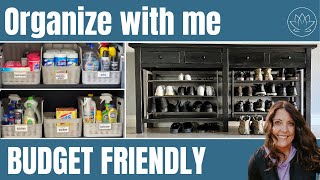
Nicole Jensen walks through three budget-friendly organization projects for your entryway, bathroom, and garage. Each takes 2-4 hours using off-the-shelf containers from Target and Amazon, with the goal of making it obvious where things go so your family actually puts them back.
Okay. I have three great projects for you today. You're not going to want to miss them, and I hope that you're going to be inspired to tackle a spot in your house that you've been wanting to work on. Okay. So we're starting in the entryway. This entryway can get very cluttered because we have seven people in this house, and we don't generally wear our shoes in the house. So they all get left right here in the entry. So we wanted to put some sort of organization in place that fit within the cabinet that we have. So we were a little bit limited on what we could use, but we found the perfect solution and it's been working perfect for us. Okay. To start the project, I pulled everything out, matched it up, and made sure that everything was in working order, pulled anything out that we didn't want, and then I had my final set of shoes that needed to be stored. And then I took the opportunity to do a quick cleaning because everything had been pulled out. So we took some measurements and we went shopping. We were hoping to avoid having to make custom shelves ourselves, so we went to a few stores and we finally found something perfect from the Container Store. It fit our measurements perfectly so that the shelves, the shoe stands, could sit inside our hutch because I didn't want to have it be too intrusive. So we. We lucked out because I had a 25 off coupon, so it was a huge bonus. We grabbed two and we left. All the shoes fit in perfectly, and I love the result. We can walk in the door, everybody can have somewhere to put their shoes, and we don't have this clutter we walk into as soon as we enter the house. And the smallest one proved the solution works foreign. I've been avoiding this project, but it really needs to be addressed in this bathroom, it's very small, and the only storage that we have is inside this small cabinet. And it's an awkward cabinet. But I'm going to do my best to create a solution for each kid so they can easily store their belongings and have access to them. And then I'm also going to ensure that nothing else is stored underneath here that doesn't need to be there. This vanity is really difficult to access and it's old. It's been through a lot, but it's still nice and it still serves its function. So I took measurements and then went shopping. My goal was to do this project on a budget, so I want stop by Target, and thankfully they were having a sale on their bright room line. And I was able to get the product that I wanted. I lucked out because today, while I was working on this, a canister for storing wipes showed up that I had ordered from Amazon. So I can give it a try with this project. Storing a hair dryer and flat iron were the splurge for this project. But I'm so happy with the way that it's able to tuck away on this little side door that we have in the cabinet. Sam, so what do you think of this wipey container? I'm not sure what I think. I mean, I definitely would not put that bright yellow thing up on the counter. This is at least a little bit better looking. But I'm still not sure I want this giant thing on my counter. What would you do? Would you leave this out or would you put it underneath the sink? I have room to put it underneath the sink on the left side. There's a side door on that one as well. On that side as well. So I might end up just putting it over there. I don't know why I've been putting this project off. I'm so happy with the results. Each kid can access their stuff easy. We don't have extra stuff stored down there, and it's nice and organized. The hardest part of this project was getting the stickers off the containers. So overall, I'm super happy, and hopefully it stays like this. Hi. Right now I'm in my garage. I have a storage cabinet where we store a lot of our household goods, our cleaning supplies, toilet paper, paper towels, anything that we use for the house. But we store it out here in the garage. It's kind of overstock. So what I want to do is kind of organize it, take things out that don't belong, and then put some structure to it so the family knows where to go to find things and where to put things back. So let's take a peek. It's pretty full, but it's. It's not too bad. I think it'll just take a couple hours for me to organize this. So let's get started. The best way to approach organizing this amount of stuff is to pull it all out. I always set up a couple tables and just get everything out in the open and then just start moving things around and creating categories and putting, like, things together. I like to go through and get rid of anything that's damaged. It's not usable. We don't need it. Donate things, you know, make sure that you're planning to keep stuff that you want. Don't keep stuff that you don't need. That's. That's not a good idea. So I go through that process with all of these projects and that's what I did here. After emptying everything out, I took measurements and went to Target and again was able to utilize the sale they had going on and bought this product. I specifically chose this product because it fit within the width and I was able to have a mixture of different bins. So it worked out really well. To start the project, I put all of the big bulky items that I knew I wanted to store in into their spaces. So I knew what I had left to work with for all the other items that needed to get stored in there. Then I just took each item and worked through the pile one by one. For example, here's some baggy boxes that had some bags in them, but I could easily eliminate them by just filling my stock of baggies inside the house. So I was able to eliminate both these boxes and move on to the next thing. In these types of projects, labels are very important because it creates boundaries. People know where to find things and they also know where to put them back. These labels could have been made by handwriting them using tape. You could have put a P touch type label on there. I used my Cricut to create these labels and I like the way it turned out, but it doesn't matter how you create your labels as long as you have them. Sam, it's. It feels so good to have this project done. It was not difficult to do. It just took me an afternoon and I love the result and I think this will be easy to maintain. So super happy. I think I hit all of the goals that I had set for these three projects. I was able to remove clutter, put systems in place so that people know where to find things and where to put them back, and overall just removed a bunch of clutter from our environment and it just feels so good to have things nice and tidy. I was also able to stay in budget for all three projects. Target was my big win with their sales and worked out perfect. So join me next time. Please subscribe and join me for my next project. I'm going to be working in the kitchen next week. See you then. Bye.
More from Nicole

It takes minutes to set up and seconds later to find what you are looking for! See full video