Adobe Fresco Tutorial For Beginners
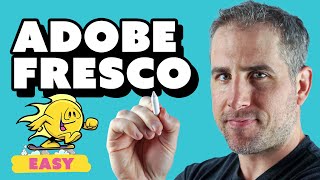
Ryan Maloney shows how to draw a skateboarder in Adobe Fresco, starting with a 3500 × 3500 px canvas and moving from pixel sketch to vector inking. He covers brush types, layer management, exporting to Illustrator, and coloring with the fill tool and separate shadow layers.
Chapters
Hey, we're talking Adobe Fresco for beginners. I am going to dive in and I'm going to sketch a character from scratch. I have no idea what I'm going to draw, so if you don't want to watch me sketch, skip forward and we will talk about the basics of Adobe Fresco. And by the end of this video, you will not be scared of Fresco. Let's get started. When you first open up Adobe Fresco, you're going to have your library here with all of your artwork that you've already created and the ability to create a new canvas. I'm going to create a Custom size. When I draw, I like to just lock in a size that I'm always comfortable working with, which is 3500 by 3500. I want to make the DPI 300. Everything in Fresco is— well, not everything, it has some pixel-based elements, but everything is vectorized, meaning you can draw it and you can scale it up and it will not get pixelated or grainy, which that's the great thing about Adobe Fresco. If you're like me, when you first open up a program, you're like, oh man, what do I do? I have no— I look at this and I'm like, all right, I want to take a break. First thing we should do is just get oriented with the brushes. The first brush you see is going to be a pixel brush. So when you draw with this, if you scale this up, this is going to eventually get pixelated and blurry. Notice I just tapped with two fingers for an undo. I very rarely use pixel brushes in Adobe Fresco unless it's for my sketch, my underneath sketches, which in this video I will do that. So. I'm just going to start drawing with some ideas, knowing that this sketch layer is not going to be my final artwork, which is kind of nice. And I think Adobe Fresco has improved their pixel drawing experience. I used to use Procreate to draw my underlying sketches, but now I'm going Adobe Fresco all the way from, from sketch to vector art. So I'm just going to get a rough sketch in here so I can get the ideas going. The next brush we have here is live brushes. I'm not a fan of these. These are too overwhelming for me. I'm not even going to touch on those in this video. This is where we're going to live for most of the time is in our vector brushes. You can look at the basic, the jitter, the manga and all that. I'm not a big fan of the jittery brushes. I am a fan of the basic brushes. So this little arrow will get you back to your brush list. The two brushes that I use the most are the round brush and the tapered brush. The tapered brush is going to give you a very thin line when you push down gently, and then when you push down hard, it's going to give you a thicker line. So when I'm drawing an object and I want it to feel like it has some weight on the bottom of it, I'll start off at the top pressing down lightly, and then I will draw hard at the bottom and you'll get a little bit of weight down here and it'll be thin up top. As I was drawing that, you'll notice I jumped over to layers. So I'm just going to touch on the layers briefly. A lot of people get tripped up with the layers in Adobe Fresco, but I kind of like them. So anytime you want to get the flyout menu to add a layer, hide a layer, all of the submenus in the thumbnail here. When you want to add a new layer, there's this plus here. Next we have our eraser. You know what an eraser brush does. Smudge brushes. So you can use this. Let's create a pixel-based drawing. Let's create, grab a blue. I'm going to increase the size of my brush down here. Let's grab a purple. Let's grab some orange or maybe like a reddish orange in here. So this is going to blend your pixels together very much like Procreate. I personally don't do blending colors in Fresco, but I want you to know that it's available here. Let's try to find some cool character that— something simple that maybe you could draw, like maybe some sort of skateboarder or something. I use a different color too, so my brain associates that color with like a loose free drawing and not having it be perfect. If I try to do a perfect vector drawing at first, I'm going to get nothing done. So I don't know what kind of character this is. Maybe just a smiling circle sunshine of some sort. The sun woke up and hopped on its skateboard. So that's going to be our rough sketch underneath. Now, I— when you want to turn the transparency down on this, you click over to this filter settings here, and this is also where you're going to find your blend modes. So I'm going to turn this down because I'm going to do a vector drawing on top of this. I'm going to lock this layer wherever the locking is, then I'm going to create a new vector layer on top of it. I'm going to grab the black. And let's see what kind of brush. Yeah, let's go with a round brush, no tapers. You know what, for this video, I think you're going to learn more if I taper it. So I'm going to go tapered. And I'm going to start with the thing that excites you the most. So for me, it's probably the mouth or the eyes. I like this crazy mouth shape I've got going on here. So the smoothness of the brush, I want to turn up a little bit. So I'm going to bump it up to around 65 just because I noticed— yeah, just because I noticed my last line was pretty unsmooth. Notice how I'm just taking swings at the ball right here. None of these are connecting, and I'm using mostly my arm. I'm not bending my wrist in any way. You're going to learn some drawing tips in this too, not just Adobe Fresco tips. So I want a light grip on my pencil and I'm going to pull my elbow and then push it with my shoulder. You know, I'm going to take that just because I'll be here all day trying to get it perfect. The bottom lip, I'm going to give a little bit extra weight. And maybe I'll round it off so it doesn't match the shape of the upper lip perfectly. Then I'm going to give these some Bruce Blitz eyes. If you don't know who Bruce Blitz is, YouTube him. That's how I learned when I was like 5 years old in the 1980s. Now let's get— I'm either choosing what excites me the most or what I think is the most difficult thing to do to focus on, because I know if I just keep focusing on the most difficult things, the drawing becomes easier and easier as I go. So I know that this hand is going to be difficult because of the angle of the thumb and the fingers. I would say that a sun Only has 2 fingers, 2 main fingers and thumb. Maybe they're pointy fingers, so when they poke out, they are pointy. The one thing I don't like about the tapered brush is if you need to make a really short line, it still tapers. You know, I, I'd like it to just be straight. I could switch my brush, but I don't have the patience for that, and neither do you. So let's get this arm drawn here. And here, maybe we can— here's where we can show the pointy fingers. See, no line is perfect. I would always get tripped up when I was younger thinking that the lines needed to be absolutely perfect. If you go up to like a famous painting or even the best, cleanest artists, when you zoom in, they're not perfect. I do know some artists where you can zoom in and it's literally pixel perfect. Enoch's art is one of those guys, but not everybody is, and I am not one of those artists. So let's go for the circle. If we want to draw, I'm going to create a new layer on top of this because I'm going to try to draw a perfect circle and notice it's not going to work. So I'm going to hold it down and then we're going to have this little weird connection point here that I got to clean up a little bit. And when I drew that, the thinnest point was over here. I want the thinnest point to be up top here, and this area right here is too close for me. I want to bump that out a little bit. I'm going to go down on the bottom layer here and erase some overlap here. I'm going to go up on the Actually, this is a good time to talk about the Select tool, 'cause I need to rotate and move this arm. So I just grabbed this Lasso tool over here and I'm tapping around this selection, this arm. And then I'm gonna switch over and grab this arrow right here. And I'm gonna scale this arm down a little bit, move it up and make sure the hand isn't over, it either needs to overlap like this or be totally away so the eye can read what is happening here. And I think this will read a little bit better. And then to release, you can either deselect it down here or just tap this tool and, um, uh, basically select another tool. Oh no, wait, you do need to deselect it here. My bad. Then I'm going to go grab— I'm going to go up to the circle and I'm going to erase this overlap and then tap on this and I'm going to go merge down. So now I have one complete body for the character, for the upper body of this character. Now I'm going to create a new layer on top and try to follow my foot. Now for the foot, I'm going to make like a little S-shape here, and that's going to be the bottom of the foot. And then this is going to be the leg. And now I can grab the Select tool and I can move it to a place that reads the best. So let's see, skateboarding, this leg is going up. It's probably going to need to be like that. And then we can go I'm going to leave it on its own layer just in case I did mess that up and I need to go back and fix it. I'm going to draw the other leg coming right off of this, this leg here and put a little bit of an arc in the heel here. So then it has some weight on the skateboard. Now the skateboard, this is a tough part. I don't want to just draw the skateboard like this, like that's all you see is the side. If you can see, I put on the— what is that, the lip of the skateboard or the tongue of the skateboard? So it's going to need to be some— a little bit of angle. So you see that the top of the board there. And then so I'm basically sketching the vector right now and I want to make sure the wheels are clunky and cool. I don't want to just phone it in. I just stuttered there. Phone it in with the, with the wheels. Because this drawing might be boring you a little bit, I'm going to talk about exporting this to Photoshop, Procreate, Adobe Illustrator. It's super easy. So in the background here, I have Adobe Illustrator on my desktop computer. Here I have Adobe Fresco. I'm just going to hit this button and hopefully this works. I am going to open a copy, Illustrator Desktop, and then let's see, let's see if this works. Hopefully this works. 5, 4, 3, document sent. 2. Don't make me look bad, Adobe. Don't make me look bad. Oh, here we go. Now it opened up. See this? Open up. All I have to do is convert layers to objects, like it. Boom. Now our drawing is on my desktop. I don't know about you, that's like the coolest feature I've ever seen in a program. I wish Procreate had that. Back to the drawing on the iPad. We have our skateboard ready to be designed. I think it's in a pretty good place. I'm going to turn down the opacity here. Turn, uh, create a new layer on top. We're sticking with the tapered brush. Let's see, do I need to do the wheels first or the top first? Let's do the top first. Let's draw a line all the way through. I'm going to draw one lipped edge here, another here, and then pull down. And then we're going to draw it all the way across. Lipped edge there. And pull over. I'm going to create a new layer for the wheels. Let's just draw a circle and hold it down. Try to make the taper the same all the way around. Let's draw the inside of the wheel. I'm going to turn down the brush size with this slider right here to about 9.5. Drawing a little bit lighter and I'm going to put some details on the wheel here. And I'm like 30 minutes into drawing this and now I'm starting to get comfortable with the drawing. At first there's always this massive resistance where you're just saying like, this is terrible, quit this drawing, start over, nobody's gonna pay attention to this, nobody's gonna like this. Now I'm getting into the flow and I find it's almost like a workout going to the gym. If you open Adobe Fresco, you're gonna be like, I don't wanna be here, I don't wanna do pull-ups, push-ups, I don't wanna warm up. Just say you're gonna commit 45 minutes to it and you will hit this zone of like, you start to get like excited and you're like, oh, this is actually fun. I'm not, I'm not, I'm not— it doesn't hurt anymore. And that is the point I'm at right now. I'm sure I'll hit some more hurdles, but for now we're good. I'm not sure if that wheel is perfectly setup, but let's stick with it. Delete some of the skateboard. So while I'm doing my drawing, I like to keep a lot of separate layers, and then as I go, I start to merge them together. And delete overlapping areas once I'm confident with the positioning of objects. But I mess up a lot and things don't look right and I need to fix things. So I'm going to keep them on separate layers as long as I can. But you can still erase overlap. Now let's draw. This should be kind of fun. Let's draw that. The hair or the sun. I want this one to go under the leg here. See, what's the overlap here? That's— that leg is there, so I'm going to grab the eraser tool and erase that line, erase this line, and I'm going to look around. Any overlapping No overlapping. The wheels are a little too complicated for what I'm going for. Something about those is not sitting with me. Um, I think they're just too complicated. So I'm gonna grab the eraser tool. Shouldn't have merged that layer. I'm gonna delete them completely. You know, I wonder if the sun just rides a hoverboard. Like, do there even need to be wheels? I'm gonna go in here and add some shading on the back leg. So it feels like it's behind the character. And we can do that here too. Just a little bit. So the next step after this, after I get my inks done, I'm going to clean up the inks, combine and merge the character into one layer, duplicate it, and then I'm going to add colors to it. I'll explain all of that because I said that a little bit quickly. So for now, I'm going to speed through this. Clean up the, the inks and decide if I want to put some circles there. Not 100% sure how I'm gonna get those circles, the wheels, perfect. So I'm gonna go through and clean this up. Stick with me if you wanna watch. If not, skip forward. One thing you can do, you can select multiple layers by, um, just tapping on the layer and select. And then I believe you can merge these selected over here in this three-dot menu. That's going to merge all of these layers together. In one shot rather than doing it one by one. And if I went through that too fast, just tap on here, select multiple, select all your layers, tap this three dot, and merge them together. I'm gonna shape— reshape these eyes a little bit, putting a reflection on the top of them and maybe one on the bottom. I'm going through and I'm finding the bottom edge of objects hand, adding a little bit more weight. I find I'm— every— anytime I look back at my drawings, I always think to myself, oh, I could have done so much better. And it's usually around the line weight, getting— putting the line weight in the right spot rather than just randomly throwing it in there. And staying disciplined and doing— putting it only on the bottom of objects is— sometimes I will push it to the top like this and make that part thick when it, it doesn't need to be thick because the elbow is bent and it's not gonna look great. I'm gonna grab the eraser and I'm just gonna clean up some of these lines here. Let's see what's messy. This is kind of messy. So the fun part is coming up. That is going to be the coloring. And then I'm— the, um, the wheels of the skateboard are still weighing on me. What's something creative that could be a solution? So this lip is— I want it to be a little bit thinner there. Lines can get wiggly around the edges here. I don't know what I'm— where I'm going with that. All I know, I grab— usually grab the eraser and go through and fix them because my hand isn't perfectly steady like some other incredible artists on YouTube. Like this taper of the line, I think that works, but It's like, I would even look in here and probably change those up a little bit. Getting a little sloppy in here. I'm going to erase this completely and redo it. Here we go. Anything in here? This is not reading well. And now we have a cleaned up character. I can see a little bit of cleanup work that needs to be done. Sometimes I like to go through and make the outline of the outside character really thick. Let me just do that really quick. So this could be like a— for a sticker or something. So I go tapered throughout the character, and then when I'm done, I'll put like a thick edge around the entire character. I've I feel like it kind of glues a character together sometimes. And for like commercial product, like toy packaging, stickers, something like that, cereal boxes, a thicker stroke on the outside can make it feel cohesive. It may not work, so may abandon it, but it's right now it's It's decent. I'm gonna stick with it. Okay, so we've got our sun on a board. Let me go to the pixel brush, and I'm just gonna sketch two big circles here. It's almost like I want this to be a cloud of some sort. Will that read? Like, could be kind of cool. Let's, let's make— turn those into clouds. Um, I'm going to grab the round brush on this. Turn it down to around 18.5. Now these really need to read as clouds. Let's see how that work. I think that will work. I'm just going to make the outside of the clouds a little bit thicker to match the lines of the character. I'm only going to do that on the bottom of the clouds. I may go through with a tapered brush and turn the tops, or like with the— where the cloud bends over, to have some like little sharper nooks. So let's grab the tape. Gonna merge some layers together. I see some little cleanup I need down here. Sometimes I don't know if it's dust on the iPad or a line that I messed up. Okay, let's see, do we need a black stroke around those clouds? I'm gonna go no for now, but I am gonna merge this down. So we have our character art on one layer here. What I like to do for colors, and there's multiple ways to do this, is I like to duplicate this original layer and I'll tap on it and I'll hit duplicate. And then this bottom layer, this is going to be my color layer. For colors, I'm going to grab the color fill tool. Let's grab a yellow for the sun, a little orange. And you just tap into the, into the circle, or into your closed shape. You need to make sure the shape is closed. And then for the outside of it, let's make it a little bit brighter, almost like blonde hair. And the tongue can be pink inside. Let's do like a seen some people do a purple mouth like that. Skateboard. So we have a yellow for the sun, complementary, or so yellow to purple would be the skateboard color. And I'm going to create a wooden, wooden bottom underneath. So the reason I put my colors underneath my inks is because I can do this. So I can draw colors through it and the inks stay on top of it. There's the bottom of the board. Let's put some— let's see, some light blue for the clouds. These clouds in the back maybe get a— oh, nope. Color like that. Now I'm going to grab a highlight color, the white on top of the clouds. I'm still underneath my ink layers here, and now I can add some highlights to the clouds. For a character like this, there's going to be shadows, there's going to be a mid-tone, and then there's going to be a highlight. Usually I'll go through and put my shadows first. For some reason, I just want to get those highlights in the clouds out of the way. And there's a little bit of a conflict between the shadows and the stroke color of these clouds. I'm going to turn that down a little bit. I'm actually going to create a new layer on top for the shadow of the sun. Grab a little orange, turn down the saturation a little bit. Suns are very bright, so there's going to be very few shadows here. The back of this arm, and this arm and back can be completely shadowed. And then maybe there's a little shadow in here in the mouth. Definitely some shadow underneath the foot. Now we're going highlights. Going to keep that. Let's create a new layer for that just in case I mess it up. The more layers you have, the larger your file size will be. It's— I don't think it gets too bad with vectors. Let's drop a highlight on the lip. Now let's add some Reflection— oh wait, select multiple layers. Now that we have our character just about complete, I'm going to go through and do some final details of things that are driving me crazy and I want to fix. So I'm going to grab the tapered brush. This line here, just not cutting it. And do we even need these lines around the eyes is the question. I think so. So I'm going to MER— I'm going to select multiple. And hit the three dots, select merged. Let's get this centered in my 3500 by 3500 canvas, and I'm going to fill in the background. It's going to ask me if I want to choose a vector or pixel. I'm going to go pixel for the background just for this art. Let's test out if I— do I need a stroke around this character? I don't know if there's an easy way to quickly add a stroke around your character without drawing it. I'm just gonna draw it. Kind of like it without. Let's see what— let's see what these live brushes are all about. Like how they flow. Grab a pixel brush. Is there anything like a painting something that can give me a nice glow around this. I don't like that, that color with on a blue background, so maybe I'll change it to a white. So that's going to wrap up our drawing. We went over the user interface, we went over how to share it to a desktop, and you know what, you can also quick export it as an image or save it to your iPad. I like to send it to my desktop and then rework it there. We touched on brushes, the whole layer palette, Don't be intimidated by this. Just know that these things pop in and hide. Your layers looks like that. Your layer property— properties looks like that. And what is this? Wow, you can share and add comments on this. I didn't know that. That's a cool feature I just discovered. Uh, very cool. So that's going to wrap up the Fresco tutorial. If you have any questions, drop them in the comments. If I left anything out of this, I want to know. So I can make my next tutorial a little bit better. So thanks for watching.
More from Ryan




Drawing Mr. Beast into a Beastly Baller trading card #art #drawing #tradingcards card




The first draft of my graphic novel #art #procreate #originacharacter #graphicnovel #drawing


