Animating Music Videos with Procreate & After Effects (Asher Roth & Logic Breakdown!)
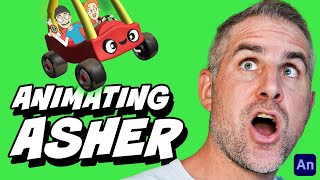
Ryan Maloney breaks down how he animated a music video for Asher Roth and Logic, from initial zombie-screen concept through final compositing. He uses Procreate for backgrounds, Adobe Animate for character rigging and lip-sync, and After Effects for compositing, tracking 26 scenes across a 20-day production schedule in Google Sheets.
Chapters
Today I'm going to be walking you through how I made this animated video for Asher Roth and Logic. All videos start with a message or an idea. Asher messaged me and said he had some music coming out with Logic. Could I make something around zombies? That's a great starting point for me. That makes the whole process a lot easier rather than trying to pitch an idea cold and trying to, trying to warm people up to it. Asher already had a vision for this that he wanted a zombie theme for the video. Now naturally I have to take that and I have to add my own spin, my own voice, my own perspective to that. And something I've been feeling on social media lately is everyone's just addicted to screens. We're all screen zombies. So I took his idea and just added a little bit of mine on there to create a video around zombies holding screens invading this little town. If ideas are down that quickly, it makes the production so much easier. First step is brainstorming. I like to brainstorm on paper or in Procreate. So an old sketchbook here— not old, but it's like old school, you know, paper. Remember that? Sometimes I like to lay out a giant sheet of paper, turn on music, and just draw for 45 minutes. Don't do anything else other than draw. Let all of the ideas flood in. Another thing that can help you generate ideas is thinking of yourself as a sponge. So Let's say I wanted to make a children's book. So to make something like this, I needed to be a sponge. I needed to surround myself with picture books, with other authors and people that are in that pool creating those things. So I absorbed that, and then you just fill up with so many ideas and so much inspiration that it starts to pour over you. I drew Asher's character in 2009 for Lark on My Go-Kart. So I've always had the character design of him pretty much locked down for the last, I don't know, 13 years or so. So I started with this base character of Asher as my main character, um, and I simplified it a little bit. Asher mentioned Rick and Morty, and I wanted to kind of stick with that simplistic, rigid style. So I cleaned up his character, which I think looks better than 2009's character. Lark on my go-kart. Logic's character came pretty easily because I just modeled it after Asher's character, similar proportions, similar, similar body shapes, very simple, simple shapes, simple lines. And I'm using a calligraphy pen here, which is one of my favorite pens other than the Crunchy Cow pen, is, uh, calligraphy, the Monoline. That gives you a, like, a very simple straight line that you don't have to think about. I find, as much as I love the Crunchy Cow pen, I use it all the time, if you're doing a tapered line like this, that can add to your production time in your video because you're always going to be worried, like, is the weight of the line correct? Is it on the bottom of the shape? Is it too thin up here? Is it too heavy here? And this, this line I find doesn't work as well in animation unless you have a seriously good production art staff. I'm more into the, the mono line and especially for adult animated humor clips and cartoons. This style is already established with The Simpsons and the Family Guy and Rick and Morty. So you don't have to think about it. It's like already expected. Staying on the topic of brainstorming, because I'm probably going to jump around here like a maniac. 45-minute sessions are what I set for myself, and I don't let myself do anything else outside of this. It's sort of the Jerry Seinfeld technique of writing. You can sit down for 45 minutes and write or do nothing, but you can't get up, you can't leave, you can't do anything else, can't scroll your phone. I find those sessions sort of relax your brain and relax your body, and you're open to new ideas, and you can let the ideas flow out more. All right, so I drew some zombies here, all with the monoline. And I don't rig or build any of my characters in Procreate. You're not going to see me doing many mouth poses in Procreate. I used to do that, but now there's Procreate Dreams. And really, mostly what I, I do is rebuild my characters in Adobe Animate. And I'll get to that in a little bit. For now, the brainstorming is where all the rough ideas get dumped together. You're just creating a pile of clay. You can think of it like building a sandcastle. So the first thing you're going to do is scoop all the sand. And just build it into this large mound that has no shape, no definition, no clarity. That's your phase 1. That's all you want to do. You don't want to try sculpting anything before you have all of your ideas together, and this is going to make the process down the line a lot easier because it's going to allow you to eliminate things that you don't need. After the brainstorming, the sketching, the writing, the ideas, and constantly talking with Asher or your client, then you can organize those ideas. You can begin to shape those ideas. My next step after brainstorming is creating an animatic. Now this is working backwards. This is very different from what other studios do. A lot of other studios will make a script, make a shot list, make storyboards, make an animatic, and then they will go and create assets to, to turn that into an animation. The problem I have with that is when you're putting ideas in a script or storyboards and then you're moving on to the animatic, You don't know if these ideas work yet, so you're going to test in the animatic. What I do is I flip this around and I make the animatic first. Here's a look at the Owl City animatic and the Lark on My Go-Kart animatic. <LYRICS>Lucky there's plenty of beats. I've stuck it for many weeks. I'm in the weed leaf, your tree seat. I see lazy by nature, but I still get the gravy. Hey me.</LYRICS> You can see how unbelievably rough that is, but the reason I do that is because it saves time. I can get the timing of the video down., and I can get a bunch of ideas in there that I know will work. And then I can go, then I can screenshot that and I can turn that into, into static storyboards. And then I can turn those storyboards into an asset or a shot list. So after I create the animatic, I screenshot that, turn it into storyboards and label each one A, B, C, D, E, F, G. And then I import those static storyboards into Google Sheets. This is my checklist. This lets me know that I've gone from that pile of clay to testing ideas right away to taking the ideas that pass that test and put them in this Google Sheet. This Google Sheet then becomes my daily checklist to create. And over, I think I made this video over about 20 days, um, divide A through Z. What is that? 20, 27 or something like that. I hopefully, I should probably know how many letters are in the alphabet. Let me ask ChatGPT. Damn, 26 letters, one off. I should know basic stuff if I'm going to be teaching you this stuff. All right, so I had 26 scenes that I needed to create in about 20 days. So over that 20-day period, then I say, all right, I only need to make 4 or 5 scenes per day because a lot of the stuff is— there's going to be hurdles, technical challenges to overcome, and you usually only get 1 to 2 scenes made per day. And then who knows what happens during the production period. Maybe there's a couple days you need to miss. So I get this checklist in here. Once these ideas are in Google Sheets, I'm super confident in this production because I know it's just a matter of checking the box and making each scene, and then we'll go back and we'll refine it later on. I don't have any notes in this because I was the only person working on this video, but if you have a team, you'd usually invite them all to this doc and then you'd put their names and who's working on what scene. And keeping this all organized in one Google Drive folder, then everything would link up to your After Effects file. And I'll dive into After Effects and animate in a little bit. When you go to create or animate this video, the best thing about this checklist is you don't need to work in linear order. I don't need to work from A to Z. My brain sort of gets restless if I go in A, B, C, D pattern. I like to jump around and do the thing that I'm most excited with. But having this checklist in place allows me to do that. If I want to do scene G first, from day one, I can do that. I could, but I, and I can see that I finished that scene and then I'll go back and do A, B, C, D. It's usually I'm mixing together what is the hardest thing I need to do today and what's the most exciting thing I need to do today and finding that overlap there, that's usually what I focus on. And then I take care of that on that day. And then the next day I ask myself the same questions. When I find myself putting off a scene for too long, That is a sign to me that it doesn't work. I'm not interested in it, or I'm scared of it. If I'm scared of it, that needs to be the first thing I need to do the next day. If I'm not interested in it, I need to examine why I'm not interested in it. If it's not working, I need to examine why it's not working and I need to fix it or make it interesting. Breaking a complicated creative project down into bite-sized scenes like this really helps me finish projects. It helps keep it exciting for myself and helps me focus. So this Maybe this may be my standalone technique that not many people use, but I need something like this to see everything stacking together and all the, the Lego pieces coming together. Now, once I have all of this done, then the fun begins. The next steps are a mixture of background designs in Procreate and building characters in Adobe Animate. So let me show you some of the background designs in this. This is a scene I did later on. Very simple. Crunchy Cow pen, monoline pen. Textured paintbrushes. This scene just flies by, so I wanted something really simple. These are the trees in the background of the end screen, some buildings going off in space, and then I move this along in After Effects. The way I angle the buildings means I can move this JPEG along, and the JPEG keeps the file size light so it's not too— it's so the After Effects file doesn't chug. If I kept this all in different layers, this would be a slow-moving file to render in After Effects. Screen Zombies, I ended up removing this. It's one of the end screens with the transition where the slime slides down the screen. I just changed it to not FOMO. FOMO flies in, stays in. Let's see what I changed it to. I changed it to these social media icons. More, more, more. The chat bubbles, video game icons, just feeling like everybody is a screen zombie. So that's sort of my personal perspective that I have to throw in there. Lazy by Nature. I love this shot because first of all, it's Asher's lyrics. He says lazy by nature in the song. I remember working on a video for him in the past and I could get a sense that I was too literal with this first video with Lark on my go-kart, and I could have taken that route and just designed everything that he was talking, the words that he was talking, as I created the next video. But I remember one of his notes is, don't be— you don't have to be so literal with it. So anytime I work with him, I always keep that in mind, like how to break free from the lyrics and add my own visuals on top of his lyrics to create this sort of interesting chemistry. But this shot, I had no choice but to create Lazy by Nature, the pet store, with screen zombies going by. It's just total destruction. I thought once I clicked with that, I'm like, all right, that's my— because I love making things literal to people's lyrics or to stories that I write. Maybe it's the easy, the shortcut route out. But once I clicked in with this, it made the video super exciting for me to push forward and to complete. Here is the background of the end scene. I'll show you that in a little bit. This is an overhead shot. It's really— I, I sort of cringe at the shot because look at these zombies. These aren't fully designed zombies. It's very primitive. But the, uh, the vehicle design is also primitive in this video. Here are some simple backgrounds. I don't even remember if I used that. This is the rooftop scene. I went back and added trees in there. Asher wanted a little bit more trees for, uh, Bend, Oregon. Oregon? Oregon? Sorry. So all of these scenes, I will select them and I'll send them to, I'll AirDrop them to my MacBook, which is right here in front of me as JPEGs or Photoshop files. If it's a scene that has parallax, meaning as the camera moves by, the foreground and the background move at different speeds. If there's different layers in the Photoshop file, I'll preserve that and create that animation in After Effects, maybe moving a camera by them or actually just moving the background elements. But if it's a very simple scene where there's no camera movement, I'll usually just keep it as a flat JPEG or PNG, like something like this, and bring that and place that behind the characters. Because I find once you get that behind a character, it looks pretty good. Like there's not— see, there's not much background movement here. And actually I think it's this one that I ended up using. You can sort of layer it and make it more dynamic without creating like a true 3D space. Here's a background where the zombie, right before he gets turned to green goo. I created this building here and created some 3D buildings out of it. Let's see if I can show you that. So that, a 3D building would be right here. You don't even see them. It's very subtle right there. It's not even a sidewalk there. And then the car flies in. Let's talk about this car real quick. I modeled this car in Nomad Sculpt on the iPad. Then I brought it into Blender and exported an OBJ. And let's double tap into this vehicle. As long as After Effects allows me to today. Here's my main vehicle and I can spin around it. So one thing I was conscious about, self-conscious about actually, is how primitive my 3D works. I'm not an expert 3D artist and people that I follow are absolutely incredible with it. And then once I designed this car and set it up, and brought it in After Effects, I said, that looks like 1993 Toy Story car, but there's something about it that I just, I loved. Like I didn't try to add strokes or lines to the outside of the car. I wanted this, you know, this old school animation style with Asher's character and Logic's character driving around in it. I thought there was something just interesting about it. Kind of make fun of my own skills a little bit by keeping it so primitive. Here's a background zombie. I did design this zombie and use it as it is in Procreate because not much movement was needed for him. I don't even think he's taking a step. See, he's right there in the background. Let's see, I might have added a pin to his leg. Where's my zombie? Nope, didn't even add a pin to his leg. So no movement on the zombie at all. Let me quick talk about that fire in the background. That fire is from Mr. Horse, I believe, is the After Effects— Excuse me. Sorry, Animation Composer by Mr. Horse is the After Effects extension. It's an extension or a plugin, I can never remember, but it's pretty amazing. Let me show you. You can just type fire, click it, and add it, and it'll add it to your scene in about 2 seconds right there. So you don't need to frame by frame animate that. And they have a bunch of other stuff you can do for lights, transitions, text effects. Huge fan of that. If I remember, which I probably won't, I'll link to it in my show notes, is that what it's called? No, comments. I don't even know if I can get you a discount on that. I'll see what I can do. Hopefully I can get some sort of an affiliate link. Let's keep going through the backgrounds. All right, so sometimes when I'm creating a video, I like to make like a poster for the video about a quarter of the way into producing it because this is like a carrot on a string that I dangle in front of myself throughout producing the video. And it's like a vision of where I want to go. It's a reminder of where I'm going. And it's something to give to the client before I even finish the video. And it ends up holding me accountable because this is now what the client expects they're going to get. I need to deliver on that. And that accountability holds me to my Google Sheet and my checklist, and it makes me work every single day to make sure I hit past this target. This is— I do that with, uh, when I'm making books too, I will write the story and before I'm even done with the story, I'll design the COVID even images of people holding the book. Because I want to see the final product of that. I want to see what it's going to look like on Amazon. I want to feel the final product as I'm working. That's going to keep me working towards it. This road texture was handy because I can import it into After Effects and rotate it in 3D space, and then the, the vehicle will drive along and the background lines will move. Trees, trees, trees. So I had to go, go in and add a bunch of additional trees to make it Bend, Oregon. I'm sorry, organ-like. That's the background designs. Let's hop over to the characters in Adobe Animate. Let me give you the quickest rundown of a character setup you will ever find on the internet. I'm making that up, I don't know. Our character consists of all graphic elements. There are a few things in Adobe Animate you're going to need to know. Don't worry about button or movie clip. It's not 2002. Everything is a graphic. When you have a graphic, you can click on it and you can have that graphic play the entire graphic once, hold as a single frame, and play the graphic. You don't need to know any of that. It's either going to be play it once, loop it, play it once, or be a single frame. So down here we have our timeline. You can see his mouth is moving to the music. I have an audio track dragged in here as an MP3. Let me just make sure that MP— sorry, W as a WAV file. I don't believe Adobe Animate likes MP3s. Could be wrong. So I have my audio track in there, my WAV file right there, and his mouth moves to that. So Asher's head is a graphic file. His body is made— or a graphic, not graphic file. His body is made of graphics. You can double-click into each one of these and you have your own individual timeline here just for this object. You can duplicate these objects, you can duplicate them and create new ones from them to save time. So you could draw, say, only the left-hand side of his body and then duplicate that graphic and change its name, and then you would have two different files. So see if— yeah, I did that with arm. So when I double-click inside the arm, I have these lines and I have this shape underneath, and I can extend the timeline here and create an animation within this timeline. That has nothing to do with the timeline on the outside of it. So I'm just going to remove that. Inside the head, I'm going to double-click. There are all of these different layers: the nose, the eye blinks, the pupils, the eye whites, the eyebrows, Asher's hair. The most important part about this is the mouth. If you double-click inside the mouth, these are nested graphics. So I have all of the mouth shapes that I designed on each one of these keyframes here. There is an easy mouth chart to follow. You can Google Adobe Animate mouth chart to find the exact shapes you need to create on each one of these timelines. But this is pretty much all I did was grabbed the, um, pencil tool, wherever it is. What's the shortcut for the pencil tool? Y? That might be it. And drew his mouth shape. And then you can do that on each keyframe. Once you have the mouth shapes in place, you can double-click outside of this and you can keyframe when you want that mouth shape to change based on the music. Now the cool thing about Adobe Animate is there is this lip syncing feature. You can click this, and once you assign all these frames to the frames within that nested graphic, you can just hit done and it will sync to the music of the audio track on this timeline. It's about 60% accurate, so you're going to need to go in and hand keyframe a lot of these keyframes to get it right. But I usually start with this auto lip sync feature. So let me show you it. Let me play a little bit of this. See, it's a little off. I didn't— I don't think I— this wasn't my main character file, so I didn't animate in this file, but listen. So there's an S sound here, so he shouldn't hold on that. We should have— I'm going to open up my frame picker here, and I would say I need to have this S sound in here. And this would be a P sound. This would be my M or my P sound. And I'm always lipping my own lip sync. When I'm lip syncing, I'm always— So I won't do the whole thing there, but you get the idea that you need to go through this whole track and lip sync the mouth movement. Now I'm going to double-click outside here and you can see the mouth movements still move, but you don't see the keyframes on the timeline here anymore. That's 'cause they're all nested with inside of the shape. And if you hit Q, you get the bounding box and I set the anchor point to the bottom of the chin here. So I can rotate his head with moving all of the interior shapes of this graphic. And you can set keyframes here and add a classic tween. If for many weeks. Just get a little. If for many weeks. If for many weeks. Get a little head bop going in there. If for many. And you're moving all of the shapes inside, the eye blinks too. Let me quick touch on the eye blinks. Let me undo all this. All right, so for eye blinks, I make an eyelid over top of the eye. This is how the eye is broken down. We got a pupil, the eye white, and the eye blinks. Double-click inside this pupil or inside the eyelid. And you're going to see all of my shapes. I got a wide eyes, this is for my character surprised, 3/4, half eyelid blink here, I have a full blink, and then I have my rest state here. When you click on this graphic and go over here, you can see it's set to be a single frame graphic, meaning as this timeline moves, it stays the same unless I create a keyframe. Let's go to my frame picker and say blink, then create another keyframe that says open. And the way I time the blinks out is I will say the music or the words as I blink. I just take note that— ready? So you can just time it out so your blinks are sort of organic based on the timing that you feel is right. And you don't need to overdo them. A little blink goes a long way. Underneath the blink, this is where you can move the the pupils. They'll usually move together, and sometimes when I animate them to the side, I will squash them slightly just to give it the appearance that they're going around a curved surface and you only see the edge of them. Also inside the head, we got the eyebrows, the stache we set up inside the mouth, so the stache kind of moves with the mouth as well. And I just hand drew that frame by frame. So that's how I build all of my characters in Adobe Animate. I'll open up the Logic character and show you one thing I tried for this video that I wasn't 100% with. So I started with a template file from Adobe Animate with this, this character skeleton pose, and it allowed me to just design my character in the background, and then I can move the character. See, I can move its shapes. I found this to not be great. You can see how the elbow gets disjointed and the shoulder gets disjointed here. So once I set this up, I only— I just did very basic movements. And you can see, let's see, like right there, that's that very basic movement that I did. I used the skeleton, but then I abandoned it around halfway through the video here, no skeleton. See, where else do I have logic anywhere else? No, I don't think so. All zombies. Oh, here we go. No skeleton needed on that, very minimal movement. I got to get into rigging more using the skeleton. I wasn't so sold on it just because I got to find a way to keep all the body parts together. And I think the way to do that is in After Effects and I'll, Maybe I'll make videos in the future about After Effects rigs, because I think you're going to get a little bit more out of those than the Adobe Animate rigs right now. So let's see, what else did we— here's one shot I sort of struggled with. There's this— it's the second to last shot in the video, I think. Right here. I did a 3-shot, 3-frame shot. Logic on the left, Asher on the right. I wasn't 100% sure if this would be too confusing of a shot. And I realized that the more movement that I added in the top characters, the more confusing it became. So I just did very subtle primitive movements here. It's like 6 frames or something to get that shot off. I don't even think I used this full animation here, did I? Yeah, maybe I started to. So Logic drops the tube sock in there. And then we just, I just cut to a brand new character here, right there. Brand new SWF file comes in here. And now I have my full animation from that Animate file here. I guess it's a good point to talk about SWF files. SWF files, are a relic of Adobe Flash from the early 2000s. They're no longer used on the internet, but they are awesome for animation because they create— so from here, I do all of my design in Adobe Animate, and the exported file of this is going to be an SWF file. I forget what it stands for. What does SWF stand for? I don't know. But it's something, maybe a Swift file or something like that. I set the JPEG quality of these to 100, and then I export them to After Effects, and then I can scale them up. And shrink them and move them around. Sort of a crisp look on the line. If you zoom in on this, you can see it's still pretty crisp. We're at, um, 200% here. But if I scaled this up, you— it would preserve— sorry, I'm scaling Logic there. So if I scale that up, the quality still stays preserved versus, uh, like a PNG sequence or a JPEG sequence where if you scale it up, it's pixel-based, so it's all going to blur. So anytime you need to export your files from Adobe Animate, you just hit Command Enter, and then it's gonna pop out. Let me just make sure I didn't mess up this file. Do it here. So the file is gonna look something like that. And then you can just File, Import that into Adobe After Effects or drag and drop it into this project panel right here. And then you stack all these layers on top of each other. So I have SWF files on top of JPEG and PSDs to create the appearance of, to create the scene. Characters on top with a monoline in smooth vector look. Textured background on bottom. And I find that this gives the, the video a little bit more depth and professionalism, even though this is like an independent, independently produced animation. Now all of this animation here takes place in After Effects and just a simple squash and stretch. So I have my PSD file. This is drawn in Procreate coming down. Once it hits the ground, I squash it, overshoot it, stretch it, and then it settles back. You can see I added this eyeball in later and the stroke is a little bit different than this, than this cake slice. Ideally, the stroke would have been the same, but I just needed to add an extra, extra element here for a little bit more layering. Now let's jump back to After Effects where we composite all the artwork and all the characters. So the way I create the scenes for this video is I have my music track on the main layer, which is down here, and then each one of these scenes is just a segment of time. You can see this scene is going to cut to this scene, and each layer stack here is a different scene. There's many, many different ways to composite. And with a short animation, I like to build everything on the same timeline because I need to see the timing and tweak things as I go. So each one of these scenes is just a stack of different files here. I have Procreate or Photoshop files created from Procreate, UFs. I have effects from Animation Composer. I have a JPEG here. What else do I see? Some more backgrounds. I'll have cameras. So each one of these scenes can have their own camera. So if I didn't have this camera turned on, this shot would probably change to a mess. But keeping this camera in place locks it in view on my 3D files in After Effects. So it gives me a little bit more control and a little bit more movement and allows me to frame things without having to move every, all the elements and assets in each scene. So the face on this vehicle, vehicle is 3D, but I added the face from Adobe Animate. So just like these files here, I can open up, let me open the vehicle. I don't remember what it's called, the face. So there we have this face. And that's exported as an SWF file. And then I place it in front of the 3D vehicle. So you see there's an SWF file on here called car face, this whole thing. That's placed on the vehicle. And actually that elements of this are 3D itself with the SWF on top of it. So that face was just modeled, some simple shapes in Nomad Sculpt, exported it to Blender, Blender as an OBJ to After Effects, and then layer that in. And then that creates— I like 3D with VFX on top of it. I think it just creates a really interesting look. It's nothing crazy, just takes a few keyframes to make the character's face come to life with a blink and some mouth movement. Here's that Lazy by Nature scene. I just added some simple movement to the character's arms, Nothing crazy had to go on here. The movements in the fire. And then I'll show you this scene in slow motion. The car flies in, squashes the zombie, eyeball flies, Asher and Logic mount up, and then we cut to final shot. And that's it. That wraps up the breakdown of a short animated video. If there's anything in here that you see that you have questions about, just drop it in the comments. I'm sure I flew past things here that I should have talked about. Just let me know what I forgot and I'll respond to every single comment. Thank you for watching.
More from Ryan




Drawing Mr. Beast into a Beastly Baller trading card #art #drawing #tradingcards card




The first draft of my graphic novel #art #procreate #originacharacter #graphicnovel #drawing


