Before you start drawing in PROCREATE you need to watch this
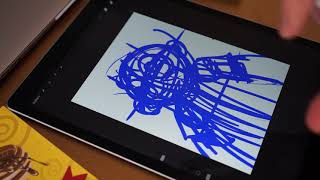
Ryan Maloney shows his complete Procreate workflow: fix your tools and canvas first to cut decision fatigue, then work through a repeatable six-layer system from rough sketch to highlights. He collects references in Notion, practices individual facial features, and keeps his workspace tidy to stay focused.
Chapters
Today I'm going to be talking about my sketching process. I'm using Procreate and I'm drawing on an iPad with an Apple Pencil. First thing I do when I'm about to start a drawing is think of the audience in mind. I think of the person or people looking at my drawing and I think about what I want them to feel, think, do. I think about the purpose for a drawing. Sometimes I just have an urge to draw. I don't know why, and I need to just dive right in and get started. So the thing about sketching is it's totally rough. It's not final. Very few people are going to see it. It's not something you should ever put too much pressure on. I think with sketching, it's, it's all about getting a structure down. And this structure is to move the eye around the frame. And it is to eliminate distractions in your, in your final piece. Sometimes if the structure is off, it can make people question what the drawing is or make it look a little bit amateur, but I really wouldn't worry about that too much. In Procreate, I'm— I always— I've set very set parameters. When I sketch, I use the Studio Pen under Inking, and I use a blue color. To me, now I don't have to make this decision every single time I go to make a drawing. I'm just going to have this blue sketch in this pen. That's going to be the beginning of all of my drawings, no matter what. So now that I've eliminated that decision, now I can focus on the content or the topic and explore. So that's to get ideas for sketches and drawings. I'm constantly looking at other artwork, constantly listening to people's conversations, seeing how words hit my ear, what they make me feel, and I'm sort of gathering and collecting information and data all day, every day, and putting it into the Reminders app or Notion on my phone. And that's a repository of ideas you can pull from. A lot of times I don't go into that and it's just spur-of-the-moment sketches. So in Procreate, I think of my sketches as layers. First layer is very rough. It's very basic. Get your very basic framing down. Doesn't have to be perfect. You can change this. The problem with the first— doing a very rough sketch layer, your brain will constantly be talking to you and telling you it's not perfect, don't move forward, no one's going to like this, don't do it. And you got to sit there and be patient until your body sort of calms down and you can get a little bit more of the details. Once you get Once you start adding cleaned up layers on top of the drawing, then your brain will start to think that there's something there, you know, that it's kind of cool that you should explore and go further. But up until that point, your body's sort of in rejection mode and it doesn't want to complete the sketch. It wants things to be perfect right away. And that's, that's never going to get you anything if you're not patient and you can't sit there. So I follow the guides, I just do another rough layer on top of my initial sketch layer. Now, there's some structure principles that I'm using. There's a good one for drawing heads, draw a circle, you can split the circle and then you can pretend that every head has a mask on it at the bottom. This, this mask will give you the jawline, the eye line, and then right above the eye line, you're going to get an eyebrow line. And then you can split the mask, and that's going to be the bottom of the nose. And then split that, and you're going to get the, the mouth— the sides of the mouth go up to the pupils. This will give you some basic structure. I'm not going to go into the structure of the human head or anatomy in this video. I think there's tons of videos that do that, so you can YouTube that. I just want to give you my perspective on sketching. I think it's good to know the rules just to break them. Sometimes I find when I'm following structure too much, the drawings become a little lifeless and they just look like every other cartoon out there. I like to know that underneath my drawing is a little bit of structure, but sometimes I like to draw without it just and force myself to figure out what the structure is. And then it kind of gives you an interesting look. I mentioned removing distractions. Another thing you can do in Procreate or whether you're working on paper While you're practicing your sketching or creating artwork repetitively, you can always choose the same canvas size, same paper size, the same pencils, paper, pens, and this will remove one of those extra steps that is going to get in your head and make you not want to draw. There's— I find if my desk is messy or if there's anything in the way, it's going to give me an excuse to not draw because when you sit down to draw, that fight or flight response kicks in and your brain starts to wonder what the hell you're doing. And it's not, it's not going to get you anything if you can't fight against that. So remove all distractions and interruptions as much as possible. These are all going to be getting in the way of your drawing practice. So let's get back to the sketch. I'm doing two layers of sketching. In all my drawings, I do one very rough layer, one cleaned up layer, and then I get right to the inks and colors. This is my set process that almost never changes. It's also one of those things that I don't need to think about. I know going into any drawing, whether I'm drawing a graphic novel, any artwork, I'm gonna have this very rough— I'll show you some very rough layouts. This is a rough layout for my graphic novel. I'm gonna have this layer, and then when I go back in, I'm gonna do one more cleaned-up layer still in blue, and then I'm gonna do a third layer that's gonna be my black ink lines. I'm gonna use a Studio Pen again, and then I will color, and then I will add shadow, and then I will add highlights. This is a very locked-in process. I can explore different styles of art, different topics, different subject matter, but I very rarely break that process. This, this speeds things up and allows me to explore tons of different styles in artwork, knowing that I'm, I'm going to build up to have a final art piece using this process. Things that's going to help your sketching is if you practice each element of a character or any, anything you're drawing many, many times over. So when I was younger, I would just draw a nose 100 times, an eyeball 100 times, and eventually you begin to figure out a style that works best for you. And this is adding these elements and mixing them up, knowing 100 different ways to draw a nose, 100 different ways to draw an eye or mouth or ears. You're going to have a constant— you're going to have a way to constantly create brand new characters without having to really think about it because it's like playing a chord on a guitar. You know, you know, a combination of tons of these different chords to make different songs. So I recommend Sketch characters, sketch whatever you want, but take some time and really rep out drawing different noses, drawing the nostrils, animals, humans, anything you can think of. And that will help you create more original drawings and have things you can pull from when you're drawing. Once I have my second layer sketched down, I'll turn down the opacity on the layer. But you can do that if you're on paper, you can use pencil and erase layers. Then I go to my inks. So I have my sketches done. I'm gonna go to my smooth ink lines. Now I can just pick the best line that I think works from that sketch. And the undo button is your best friend in this situation. If a line doesn't feel right, just hit that undo or erase it on your, on your paper. I'm going to do this quick, so it's not going to be a perfect drawing. Also, you can do layers over top of this. You even— your inks don't have to be perfect. So that's sort of a theme of sketching and drawing is it doesn't have to be perfect. You can always go back and change it. But also, don't be scared to put things out if you feel they're not perfect, because a lot of times no one's going to notice the things that you're worried about. In this ink layer, you can also choose to add a little bit more detail, something that's not in the underlying sketch. I think this is where a lot of the personality comes in. It's like jumping off a cliff and learning how to fly. Like, you don't realize you can fly— well, that's a terrible analogy, but what I'm trying to say is a lot of times good ideas come when you're not expecting them, almost towards the end. And, um, you have to be ready for those and, and, and push yourself on this in this phase to give it a little bit more character. It's those final lines and details that are, that are going to add that character too. I find when I move faster with my inks, they're a little bit smoother. Sorry, I'm breaking my train of thought. It's hard to talk and draw at the same exact time. I like to add these shadows in underneath the arm sleeves. Add some buttons in here. So after my inks, I do some details, and then I usually get to the colors. In Procreate, I duplicate a layer and make the bottom layer either a reference or just keep the line layer. I'm just making this drawing up as I'm going, so no rhyme or reason here. I like to fill in the colors as soon as possible because I start to get a little bit antsy and I want to see results pretty quickly. And I find the, the shadows and the color help me get that feeling of completion. So I want to start to see the final drawing pretty quickly. After my flat colors are laid in, my next step of the process is shadows. There's a couple ways to do this. I add a layer on top of this, grab the black layer, and then you can envision where the light is coming from, and anything that isn't facing that light is going to get a shadow. I'm going to draw black over this character so you can see, see the shadow before I turn down the opacity. So there's my shadow. I'm just going to hit the N, turn it down. I also have a set process that my shadows need to fall in 20 to 30% range. This also eliminates the amount of decisions I need to make in a drawing. Now I can go back in, add some more shadows. My shadows are really never perfect. If I'm doing a cartoony style like this, I think just a little bit of depth goes a long way. You don't have to— I'm not trying to make this an artistic masterpiece. It's more about the comedy. It's fun to experiment with eye color. Make your eyes a little off-white instead of that pure white, and it can give them an original look. And then you can go on top— once I have my shadows in, you can go on top, start adding highlights. So I usually drop in some eye glares. For highlights, I usually choose the color that I'm working with and just choose a brighter color. I usually create a new layer, keep it under my ink layer so I don't interfere with the lines. And then I go through and add in my highlights. There's my skin tone. I'll go to the blue shirt. So that's a basic gist of a— from my sketching process to the final colors. This isn't perfect, but this is how I do all of my artwork. Sometimes I'll— I won't add the lines in until after I do my flat colors. In Pancake Pennsylvania, I did mostly color blocks and then added the lines in afterwards, it sort of made this rough look. And I kept things very loose in this book, so I didn't get too, too uptight about it. I felt it was more about the story and the feeling of the book rather than perfect drawing. See here, you can, you can see, might be blurry, but I did a very thin, rough sketch line, I basically reversed my process. Usually I'd go lines to colors. Here I did colors to lines. So that's my sketching process. Hope you learned a little bit. If you have any questions, let me know in the comments and I will respond to everyone. Thank you.
More from Ryan




Drawing Mr. Beast into a Beastly Baller trading card #art #drawing #tradingcards card




The first draft of my graphic novel #art #procreate #originacharacter #graphicnovel #drawing


