Beginner's Guide to Creating a Graphic Novel in Adobe InDesign
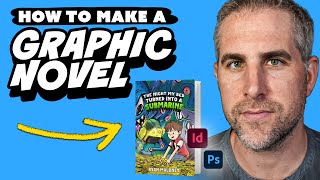
Ryan Maloney shows how to build a graphic novel in Adobe InDesign for Amazon KDP, starting with RGB artwork and a 6x9-inch trim size. He covers placing high-res images from Procreate, building paragraph styles for speech bubbles, and using linked files so changes update across the whole book. The workflow moves from rough sketches to inked to colored versions, then exports to PDF with proper barcode handling.
Chapters
Setting up a graphic novel in InDesign can feel a little bit overwhelming. Now that I've gone through it, I know that there's just a few things that you need to focus on in order to set up a lot of stuff. This video assumes that you already have your artwork created either in Procreate, Photoshop, whatever program you like to use. As long as you have a JPEG or Photoshop file, that's going to be okay to place into InDesign. When I create my artwork, I still work in RGB just because I have digital running through my blood and CMYK confuses me and scares me. So I don't convert anything to CMYK until the final PDF is exported. And I just roll the dice and say, you know, I hope the printer prints out my RGB colors as well as it can because I don't want to overthink things. And if I'm trying to get every CMYK color perfect, I'm going to overthink things and never finish. And to me, finishing and publishing is the name of the game. I'm also going to be talking about getting this graphic novel up on Amazon Kindle KDP, Kindle Direct Publishing. I think this is the easiest way to sell your graphic novels on demand and the most affordable. My book ended up being 432 pages and it cost an arm and a leg to print and sell. That was a big mistake I made. I hope you don't make the same mistake. So let's say you have a book that you expect to be around 220 pages. Go over to kdp.amazon.com/cover-calculator. Let's do a paperback book with an interior of standard color. If you go premium color, it's going to increase the price of the printing. So I'm going to go standard color, paper type white paper, reading direction be normal, uh, and let's go inches. And the size that I work in all the time for graphic novels— and I've only made one graphic novel, so that's all the time— is 6 by 9 inches plus bleeds. So I'm going to type in 220 for my page count, and then I'm going to calculate the dimensions, and it's going to give me this handy little chart here. And I can download this template, and this is going to be my cover. So the COVID I am not going to create in InDesign. I like to see it in Photoshop. Interiors being set up in InDesign, cover in Photoshop. So make Maybe I'll change the name of this video to something else, I don't know. Download that zip and open it up in Photoshop. I just want to show you what we're working with. I'm going to right-click here, open it up in Photoshop, and this gives you everything you need with the bleeds. I'll show you an example I have here already set up with my book. You'll notice that there's no barcode on this. That's because I'm going to save this as a PDF and I'm going to upload it to Amazon Kindle. And they are going to put a barcode on it. If I were printing this myself, I would go to myidentifiers.com and I would buy an ISBN barcode and put that on here so bookstores can scan it and you can sell it anywhere. The Amazon barcode, I believe, only works in the Amazon ecosystem. You may be able to print author copies, get those shipped to you, and then take those to bookstores. I don't know if bookstores can scan That ISBN, that's a ChatGPT question and one that I might have to put in the comments here because I don't know that off the top of my head. Usually I'll have my books printed in China with an ISBN, have them shipped to me, and then I'll take those to bookstores or I will just upload it directly to KDP. So I have books I can sell locally and I have books that can be bought on demand. I won't go through the details. Just put your information, just tilt it, it's at 90 degrees clockwise. For the spine, you're gonna need logo, title, maybe subtitle, your name. See what else? Little description on the back. I'm not gonna go through the details of the COVID I'm sure you know exactly what you want your covers to look like. But for most of this video, I'm just gonna focus on the InDesigning. So let's dive into InDesign. I have a copy of my graphic novel set up here that I just opened on a new computer, so I don't have I don't have the Comic Fonts installed, so it looks a little weird, but you're going to see that everything is— let me go to the page setup, document setup in File— 9 by 6 inches with bleeds on it. So I go down here into this little bleed dropdown and I put 0.125 inches in all of these, lock the constraints so you can type it in once, and that gives me the exact size that Amazon is going to like. This takes me like a million tries to get right. Sometimes I'm uploading 10 different PDFs to KDP just to satisfy their requirements. This size will get it done on the first time. Just make sure that the artwork— and you can sort of match this up with the cover— make sure the artwork doesn't go outside these borders here in this bleed zone. I aim for actually way inside. So let me look at my book and see if most of my book, all of the book, yeah. Oh wait, no. So I have some that bleed over the edge, over the edge. Let's take a look at that. Page is number 12, 13. So I do have my pages bleeding over, but for the most part they're constrained. Uploading Amazon KDP with a, with a full bleed over the edge has always been a pain and a problem for me. So if you can, just keep everything— like, make one decision at the beginning of setting up your graphic novel to just keep everything within that safe zone so you never have to worry about it. When I am laying out everything in InDesign, in the properties, I have to make sure facing pages is checked. So you go to— say we go to File, New Document. You're also going to check facing pages here. And in order to get the size of your book, you can just type 6 double quotation mark here, 9 double quotation mark here with facing pages. And let's say 5 pages. And you can go down and you can set the bleeds here, 0.125 inches. And that's going to create your your pages like this. This is a little too tall. I just rushed through that, probably didn't get it right. So you have your bleed pages with the, with the bleed if you are running a bleed in Amazon KDP. It's a long morning, I realize I'm talking all over the place. I do facing pages when I lay everything out because I like to feel like what it is going to feel like when somebody's on a page and they're reading left to right. I'm going to show you what it looks like when you export it. Here we go, non-facing pages for the whole book. So this is what it's going to look like, and you'll get some overlap from the other pages, but this is in the, in the bend of the book, so I couldn't find any instances where that actually affected the next page. But just make sure it's, uh, it's not crazy amounts of overlap there on the— in the middle of the pages. Like here, this overlaps a little bit, but that's still not going to show up. I could show you page 15. Now you can't even see it because it's in the bend. Of the book or in the crease. So it's not a big deal if you have a quarter of an inch color overlapping there. Now we've got the foundation of InDesign and setting things up. Let's take a look at the very beginning of the InDesign file. Maybe I'll link this file or a simplified version of it in the comments so you can just use it from the start. This is how I start my book off with that single page up top and then a double layout. That will give you an image on the first page when you open the book. Kid just wants to get in and read this. They don't need to see your dedication to your great aunt. I'm going to take one of these pages and show you how I set it up. I find that the easiest way to set up all the panels is to just do it in Procreate. If your book is something like a standard squares and rectangles all the way down, you could very well just set up a Procreate canvas and have it that exact size and just place it on these pages. This is just an entire piece of artwork. Yeah, this is a Photoshop file, so you can see all my layers are still linked or still set up here, so I can change things around. The way I place my artwork in here is I go to File, Place, and it's going to ask me for the image. It's called bus.psd. Double-click it, and then you can see it, it's floating around here. You can either If your size is set up— let's see, I designed this much larger on my Procreate. This is probably 30% larger than a 6x9 at 300 DPI. What I would do is draw larger in Procreate at a higher resolution, and then when you place it, you can just place it, drag and drop here, and then double-click in here and increase the size and just drag it around and increase the size. The thing that tripped me up in InDesign when I first started is these double, this double, um, bounding box here. So you can see this blue bounding box, that's going to be basically the mask around the image. When you double-click in there, you can see here's the size of your image, and if I drag it over here, it's going to cut it off. It's only going to show up to the blue edge. One thing you could do if you want to speed things up is Create. Let's see if we can insert a placeholder. Yeah, so I'm going to grab this placeholder and I'm going to drop it here. And you can do that for 2 pages. You can just duplicate these pages and go to File, Place. Let's see how this places the artwork in here. Yeah, so it placed it right in here, and then you can scale things up. That way you're not fidgeting with every single page every single time. I set up each one of these pages going File, Place, drag and drop the artwork, scale it, File, Place, and I would do that from page to page. I think you can automate that a little bit more so your main focus is just on the drawing and the story and getting that right, and things will auto, sort of auto-populate into your InDesign file so you don't have to go crazy. Now when it comes to text, let's say I want to place this text in here. It should be a comic style. I should have been prepared for this video. I'm kind of like looking over the side here because my camera is blocking my menu. So I grab the text tool and then I just make it the size of the talk bubble and then I paste things in. I will center my copy and I will just— let's see if I have any— I don't think I have any comics— good, good comic font on here. So I will adjust the copy and the line height. I, I would recommend you create a library of text styles and line heights so you can just quickly copy and paste this wherever you need to. So you're not constantly changing the copy and the line height on every single page. It's automatic and it's, it's like you're making these decisions at the beginning of the graphic novel that are going to save you tons and tons of time. Before you put the final artwork, colored artwork, into a graphic novel. Let's say you want to put your rough sketches into this graphic novel. I would create this layout exactly the same, create almost like an animatic or a full storyboard of your graphic novel. And then when you go to ex— when you create the final artwork, colored artwork on Procreate, and you go to export that, save the names as the exact same files and just replace them in your folder. And then every page will get replaced all at once. Say we placed this artwork here, and then we do that throughout the whole book. Now we have our MVP or a prototype of the book. This could either be sketched— I did this as soon as I had rough sketches, like I would just make blue rough sketches at 6x9 size. I placed them and started building my graphic novel, so I had a full graphic novel of rough sketches. Then I'd go back and I'd do the inks. Then I would look at the MVP again, add the copy, add the words, and then see what worked and what didn't work. That way I'm not spending time on doing full-color artwork of pages that aren't going to work in the story. Once I have this prototype done, I just go to File, Place, or you could relink the image and relink the image. Let's see, where was it? This has got to be it. Boom. And then it just automatically replaces everything inside in the exact same size that it was, and then your text would be in the same spot. So you don't need to constantly rebuild every page for every phase of the process, from sketch to inks to colors. So let's say you don't want to make your frames in Procreate or Photoshop or wherever you draw. You could make them directly in InDesign, and that will take working with shapes, which is not too difficult. Let's, let's just lay out a basic page here. Box here, and I'm going to set the stroke to maybe, eh, let's say 4 pixels. Then we're just going to duplicate it. I'm just doing an Alt-drag. And I'm going to make sure that these are sized to the page above the page number that goes in here. So now I have— let's make it a little bit more complicated. I'm just going to drag this over, drag this over, get these close. I'm going to press the A tool, select these corners, and I'm just going to go like this, shuffle these over. Now we have our page set up. What we can do is create— you can either— let's see, if I place something in this, I wonder if it keeps— it should keep the, the frame around it, but let's see. Yeah, so it's going to keep the frame around it, which means you don't need to put a placeholder behind it. So this is an easy way if you're just creating full-page artwork, you can set up frames like this in InDesign and just File, Place, everything. I think this will be a little bit slower, but you'll get a little bit more control, and you'll be able to make more edits right in InDesign. So let me place some more artwork here, scale it up. And you can see I'm grabbing the actual artwork here by double-clicking in here. This is the frame of it. So if I move this over, you're going to see more of the artwork here. This is the mask, the frame or the mask. And then you can just keep placing that and just do what I talked about with the text. Create a bounding box for the text, paste it in, style your text. But I like to do all text in InDesign. I do not like setting up text in Procreate. It's just very slow for me and it's like I'm switching modes. In Procreate, I want to be drawing and flowing. In InDesign, I want to be analytical, critical, and be making sure the story is as lean as possible so it just reads very, very smoothly. So let me see, we did cover, we did interior, we did placing images, we did text. I think we've covered it all. If you have any questions, let me know in the comments, and I will drop a simple InDesign file and that link to the Amazon cover calculator in the description. And thank you for watching.
More from Ryan




Drawing Mr. Beast into a Beastly Baller trading card #art #drawing #tradingcards card




The first draft of my graphic novel #art #procreate #originacharacter #graphicnovel #drawing


