Draw, Animate & Sell NFTS on Opensea / Simple Procreate & After Effects Tutorial
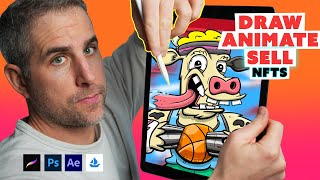
Ryan Maloney shows how to sketch in Procreate, design a trading card in Photoshop, animate it in After Effects using 3D layers and the Animation Composer plugin, then upload and sell it on OpenSea. He keeps each element on separate layers, renders to MP4, and walks through setting up a MetaMask wallet and listing the NFT for sale.
Chapters
How's it going? Today I'm going to teach you how you can draw, design, animate, and sell an NFT on OpenSea. Let's dive in and start creating. Let's start off with a sketch in Procreate. When I first started this drawing, I had no idea what I was going to draw. Whenever I'm in that situation, I just put my pen to tablet and start drawing. I just start making lines until I start to see some things take shape. It's sort of like looking up at the clouds and you see shapes, animals, and faces. Just create those shapes and things will start to appear. At this point, I started to see some sort of monster basketball player, and then it hit me. I'm going to combine Beastly Ballers with Crunchy Cows. Little seltzer refuel. If I try to make a perfect drawing, it never turns out perfect. I think about things in terms of layers and sketches and building on top. Start with rough sketches and just make the next version a little bit cleaner. For me, inking is the most fun part of a drawing. While I'm drawing this character, I start to envision it on a card. I'm going to add stats, a description, and then we're going to eventually animate it. I'm using the Crunchy Cow pen in Procreate, which is a little bit tighter studio pen. When it comes to coloring, to speed things up, make sure your shapes are all closed so you can drag and drop things in. For smaller shapes, I still color manually. Experiment with shadows and highlights. A simple way to think about it is to pick one side of your character and that's where the shadows will go. On the opposite side is where the highlights will go. You can also do things like double shadow, double highlight to add a little bit of depth, or even draw in a shadow and erase part of it to leave a hint of light on the other side of the shadow. I'll hit the max amount of layers in Procreate all the time. As much as possible, I try to keep things on separate layers. My sketches, my inks, my colors, my shadows, my highlights. They're all on different layers. I decided I was going to turn this into an animated NFT, so let's design some of the background elements for it. Bright flashing by the streetlights. Keep waiting till you've arrived. All of these elements will eventually be part of a video that I upload to OpenSea. Some of these elements will animate in and some of them will just get revealed. Let's create a transition scene with red barn texture. Now I'm going to need a logo. Artwork done, logo done. Before animation can begin, I need to design a card. Before I design that card, I'm going to map out a plan of how that card is going to animate in After Effects. Real quick, before we get into Photoshop, I'm going to write up some information that goes on the card, all the descriptions and the stats. Time to hop over to Photoshop. I look at Photoshop as the bridge between Procreate and After Effects. I do a lot of my organizing and designing before bringing to AE. I'm going to design a front and a back side of this card. I don't have a fancy plan at this point. I'm just designing whatever I think will work. And I find that if I don't overthink things, I don't try to get too fancy, that's when I create good stuff. But if I sit around, try to make the perfect plan, try to use the perfect tools, I end up doing tutorials for around 3 hours a day and never actually get anything done. It's After Effects time. All right, don't panic about After Effects. Just know that on the left-hand side, that's where we're going to import all of our files, our Photoshop file, and then we're going to drag things to this timeline. In the timeline, we're going to make things move. When you import files, make sure you select retain layer sizes so all the elements in your design file and your Photoshop file can be moved around pretty easily. I have some 1990s Nintendo-style music I had produced for an earlier series of Beastly Ballers, so I'm going to import that file. You can see I just bucket everything into this left-hand side into my project panel in After Effects. You can organize this, you can get all fancy, but really what I'm aiming for here is to just be done and to move as fast as possible. So I'm going to drag my Photoshop file onto the timeline. I designed this in Procreate and Photoshop knowing that I would be spinning and moving things around. So I know my opening scene, I know my middle scene, and I know my ending scene that I want to loop back to the beginning. The first thing I'm going to do is create simple move animations. This part I got tripped up on a little bit because I need to connect that spray paint to each side of the moving barn texture. So I duplicate it and create masks on both sides and then parent it to the barn texture. So when the barn texture moves, the spray paint moves. I'm going to duplicate these and I'm going to move them to the end because I know that I want my geese ball or crunchy cow animate back in exactly where it was at the beginning. I'm going to shift all the other elements to the middle in between, and these are all going to get revealed. And then the card is going to spin into frame. Anytime you want to rotate things in space, just make sure the 3D icon on that layer is checked. You're going to need to collapse the layers and the interior files. They're all going to need to be— have the 3D icon checked as well. You can see I have a back side of this card and a front side of this card. The back side is flipped around, so I need to make sure that when I rotate it around, it's the right side. I'm going to rotate that before I rotate the front side, and then I'll parent that back side to the front side. That means I only have to rotate one layer and both will rotate in and out. Cool thing with After Effects is you can solo a layer. So if you have a large file, just solo the layer. It's this little white circle checkbox on the left-hand side of the layer. Just check that and only the soloed layers will show up. That will allow you to create some smoother animations without having to render all the background files. So I'm adding a little anticipation, a little overshoot and settle on this animation. And then the card is going to fly out into the background. Time to get the logo animation in place. These are two separate layers from Procreate to Photoshop, and you'll see that I'm not creating keyframes for all these animations. I'm using the Animation Composer. It's by Mr. Horse. I will link it in the description. This helps you speed up your animations. You don't have to set keyframes, you just double-click one of these settings and you get nice smooth animations. I'm going to add very basic lens flare effect over top. This is sort of corny and people complain about it, but I like it. Just showing a little bit of light off the edge of the comp. I always like to render out the animation to test it rather than play it back on the timeline. I want to see what the final file is going to look like. I'm going to send it to the Adobe Media Encoder and export it as an MPEG-4 H.264. Let's hop over to OpenSea.io. In order to connect to OpenSea, you're going to need MetaMask. Buy Ethereum. You'll need about $100 to create a collection. The price of that may change based on the time you watch this video. On OpenSea, you can create a collection for your entire NFT line. Then within that collection, you can upload unlimited items, individual NFTs. Then when you sell an NFT, the buyer pays the gas fee of each. I already have a collection set up for Beastly Ballers. That's where I'm going to be adding this NFT. You can see all my previous Beastly Ballers here. I'm just going to go up to add item. So you can add images, videos, audios, anything you want in this main section. This is where my video is going to go. So if you upload a video, you're also going to need a static thumbnail. Let's find the video I just created. Upload the MP4. Upload a thumbnail. What I do for a thumbnail is I just screenshot the first frame of the video. Video. Then filling in the information is all pretty straightforward and pretty quick. Give it a name. The external link is going to be your social media for the project or a main URL. I'm going to paste in the description that I wrote earlier in this video in that dramatic scene where I opened up the laptop. Throw in some power and points per game. Add some properties referencing my Photoshop file because I have very little memory, like actual little memory in my brain, not on my computer. It was at this point that I realized I left out some information on the card and I had to go back and re-render it in After Effects. Once you're done, scroll down, create, and this will be added to your collection. There it is. The last step is just hitting that sell button in the right-hand corner. Before you list it for sale, it's visible on OpenSea and you can share it with people. That wraps up how to draw, design, animate, and sell an NFT on OpenSea. Thank you for watching. If you haven't yet, please like and subscribe. I'll see you next time.
More from Ryan




Drawing Mr. Beast into a Beastly Baller trading card #art #drawing #tradingcards card




The first draft of my graphic novel #art #procreate #originacharacter #graphicnovel #drawing


