HOW TO AUTO GENERATE NFTS - NO CODE!!
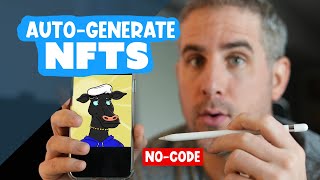
Ryan Maloney walks through generating an NFT collection using nft-generator.art. He shows how to organize layered PNGs by trait (background, horns, eyes, accessories), set rarity percentages, and preview 100 items free before paying to generate thousands. The key is fixing overlap problems in Procreate before upload rather than editing metadata after.
Chapters
And let me show you how to auto-generate 10,000 characters or whatever amount of characters you want to generate using nft-generator.art. So let's first break down, uh, Crunchy Cow. This is the artwork in the NFT series that I'm working on, and I used NFT Generator to build these cows. So this video assumes you already have your artwork done. I'm going to walk through this really quickly. I'm not going to design anything in this video, so maybe I'll create another video on that and make that as a part 1. I created all these characters in Procreate, and I made one Procreate file for each design element. So I'll first show you, this is a full Crunchy Cow auto-generated. You can see the foreground has the food element, then the next step is going to be the clothing, and then there's going to be a nose, a mouth. And what you don't see here is there's nose rings, there are sunglasses, and other ones there's hair. So you basically need to layer all of your files on top of each other. Crunchy Cow's got a little bit complicated. I would simplify things and make— put the head on top of all layers except for unless there's hands in the way or hands in the front, and then those hands will lay over the head, uh, head element. So that's the breakdown of the Crunchy Cow. Let me show you the parts. I keep everything in folders like this, but you could just keep it in one PNG folder. Here are all my background layers, and I keep them in common, rare, super rare, and uncommon folders. This way, when I upload them to NFT, NFT NFT generator, I know what percentages to set them at. I don't do it absolutely perfect in NFT generator. I'll— common will be about 65%, and then I'll break down the other items, uh, uncommon being 2%, super rare being 8%. But you'll see in this video it's going to change a little bit. It's— that's not right on. So let's dive right in. Um, go to nft-generator.art, and some people have been telling me that this URL doesn't work perfectly. So what you're going to want to do is Google NFT art generator or NFT generator art with spaces in between, and then on Google go to that link. Somebody created this and sent me this link. I, I'm not a developer on this site or anything, but I do chat with the developer and send him feedback, and we go back and forth to try to improve it. So let's go through the interface really quick. On the left-hand side, this is the layers. This is where all of your groups of layers are going to be. You're going to upload all of your backgrounds to this one group layer, and then let's do, um, color For the next one, spots, hair, horns, eyes, eyebrows, nose, mouth, nose ring, earrings. What else do we have? Eyewear. And let's see. I have already created Crunchy Cows, and you can see on the right-hand side of my screen, I have a screenshot of the order of all of the artwork as a reference. As I'm going, I'm always screenshotting the order because I was with Crunchy Cows. I was constantly testing which layer needed to be added on top of the other and shifting them around to make sure it worked right. We are back. You can see I have all of my grouped layers set up. This is my background and then the color of the cow and then spots and then the horns and then the eyes and the eyebrows. It was tricky with crunchy cows because the horns needed to lay behind the color of the cow. Let me show you how I ended up drawing these so there was no overlapping. There's more simple ways to do this, which I'd probably recommend. See how I created this empty space around the horns, so it really didn't matter if the horns are in the back of the character or in the front of the character. They're going to be out of the way. And also, one thing to note, that all of your artwork creating the NFT or working in the NFT generator needs to be the same size. So all the horn layers are 3000 by 3000 at 300 DPI. All of this, the, the hair is at 3000 by 3000. All the nose is at 3000. And you want to keep this alpha channel all the same around your character so when you layer it lay on top of each other. Let me give you an example here. All of your files are square and they just lay right on top of each other, and you don't need to do any positioning or guess the coordinates of your artwork. So keep it simple, keep all the artwork the same exact size. You can do that by exporting out of Procreate or opening your Procreate files in Photoshop and exporting as PNGs. All right, now that we have all the layer groups set up, let's drag and drop some of these items into place. I'm going to go and I'm going to grab my common backgrounds. When you drag and drop everything, it's all going to be the same percentages. Now let's talk about the, uh, cumulative percentages of what is going to be shown, um, after you generate the code. So Notice in the items group section there's this 100%. That means background layers are going to be shown 100% of the time if I choose that. Here is the rarity for that grouped item, so you can change that. You can see when I slide this down, that percentage changes here. You can also see the amount of items I have in this group. So I want backgrounds to show 100% of the time. When I drag all these items in, they're all evenly balanced at 4.2%. Let's drag in some— I'm not going to do all of the common rare, but I will do— let's drag in some, a few stripes. You'll notice these are— everything changes to 3.7, but I'm going to change— I'm going to click on each one of these items and I'm going to set this to be, um, to show very rarely. So it doesn't give you a percentage here in the slider, but it will change it, the percentage right here. So you can see these are going to show up very rarely, these are going to be common. I'm not going to go through and do all of my common, uncommon. I already have those generated, but you can get the idea that the items group— the group items, you can choose how often you want it to show. I want background to show 100% of the time, color to show 100% of the time, but spots I really only want to show 40% of the time. So when I drag those in, I don't want spots on every single cow. I just want it 40% of the time. So I'm going to change that. I'm also going to do that with horns, but eyes are going to have 100%. Eyebrows, I don't need to go through it. I think you get the point. So let me drop in some color of the cows. I'm actually going to drop all of these in. They'll all be evenly balanced here, and I'm going to set these 3 to be rare, and I'll make these 4, uh, very rare. For very rare, I just keep it below 2%. I'm not absolutely perfect on all of my percentages. I don't think you need to be if you have a ton of items. I think as long as the The difference between the percentages is great enough. It doesn't have to be absolutely perfect. I'm between 0 and 2% for super rare, around 8% for rare, and then you can do the breakdown between common and uncommon using 65% for common. I'm not going to do math on this video. I know that's a very easy equation, but don't ask an artist to do math problems. All right, let's, um, so now we have the background and color setup. I'm going to go through and upload all of these other items, and I'll see you back in a little bit. I have all of the items uploaded to each group folder layer, whatever you want to call it. I have all my background, my colors, my spots, my horns, my eyes, my eyebrows. They're all set up. I've gone through and I've changed the rarity of each group item or items of groups of items. Let's call them groups of items, and within those groups, those will be items. So you can see earrings, I have them all equally set, but they will only be shown 24% of the time. After this is done, you want to create— make sure you type in your— the collection size that you want to have. Crunchy Cows is going to be 9,999 cows. I want to name it 9,999 cows. I forget what I— what my description was. Uh, chowing down on the Ethereum blockchain. So this, this description is very important. It's going to be linked to each one of your NFTs, so make sure you double-check the spelling on this. I spell everything incorrectly. Um, let me show you. I probably spelled something wrong here. No, I'm actually good. Blockchain may be two words, but it's— let's go with one. All right, we got the name, the description, the collection size, and this dimension is automatically set by the artwork that you upload. If that is off, NFT Generator will tell you that the artwork is off and you need to re-upload it. So we're good to go. I have my rarity set. If you want to jump in each group of items and click on the item and you can change the rarity of each one of those, go through and do that., but I'm ready to preview my collection. The way NFT Generator works is you can— let's see, you can preview and download 100 for free. These will be watermarked images that, um, get generated and download a zip file to you. What I like to do is just preview these over and over. I hit this preview button and then, uh, Crunchy Cow will show up here, and I do that over and over to test. I try to test it around 20, 30 times within the generator before I download the 100 free items. After you download the 100 free, you can see the pricing here for 1,000, 5,000, 10,000. I think if you go to a developer, you're going to find that you're probably going to be paying a similar amount of money. If somebody finds it cheap, finds it cheaper, post it in the comments here. I think these are reasonably, reasonably priced. Um, yeah, but let me know what you think. I'm not the developer on this site. I think that feedback would be good for him to hear also, if you think this is a good price. So, um, let's start previewing these items. It's very, very simple from here on out. You just hit the preview button and you get a Crunchy Cow. Let me close this. Let me close this dropdown. Oh, we're getting a little buggy here. Whoops. No, no, no. There we go. And you can scale that up so you get a watermark. I know that these layers are pretty good because I've already generated these cows, but I'm going to preview through because I may have a couple of layers. This may be an old, an old ordering of layers that I'm going to try to find a problem to show you that what I went through with Crunchy Cows. So you can avoid this layering problem. If it's perfect, then we'll call it perfect. But I'm gonna try to find— see, you can see the nose ring. I didn't want the mouth to overlap with the nose ring here. I had that problem I had to fix. This mouth was overlapping the eyes, but you could see the eyes under the mouth, so I went through some of the mouths and I filled it in with white just to try and make it look, uh, figuring cows might have like white around their mouths regardless of their color. It looks a little off to some people, but I figured it was the best way to cover up the item underneath the mouth. So I had to make some adjustments like that. It's not absolutely perfect, but I think it adds to the charm when you have problems and you think of, you know, simple ways to fix it. And even if it doesn't look perfectly, I still sort of like it. So I'm going to preview a few more of these. So I have eyewear on some of them. A big problem I had was with the neckwear. I had to figure out how to get a necklace around this neck without the clothing overlapping it and without the, um, the food being in the way. So I just spread some of the food out. If the cows have two hands, I just spread some of the food out to make the neckwear visible. Yeah, so this layer, this, uh, this layering of the groups looks pretty good. I had earrings that were getting in the way of the glasses. I had to bump those out. See, here's an example of the neckwear with the food being in the way of the neckwear. I had to bump it up on the neck and then shift the food down. So if your character is pretty complicated I would try to think these things through in Procreate or on paper, and you could sort of make guides, horizontal guides along your character and make sure that, you know, the hair won't overlap with the eyewear, the eyewear won't overlap with the nose, the nose won't overlap with the mouth, with the mouth, the mouth won't overlap with the neck, the neckwear, whatever you want, however you want to, you want to create it. Just make sure that you figure out the, the layering of the items before you get into NFT Generator as much as possible. But the great thing about NFT Generator is you can preview your items so you don't have to pay anything or download any files, and you can work out problems, go back and re-upload the PNG file so there's not a big problem when you go to generate your collection. Yeah, so you're probably bored with me previewing Crunchy Cows. Here's a problem with the mouth overlapping the necklace. I had to fix fix that and figure that out. And you can see there's white in the mouth here around the chin of the, uh, chin of the mouth. So that part covers up any coloring of the cows. And that's, that was my solution to, um, seeing transparency through the, the black line of the mouth here. I'm going to preview 2 more, try to find any problems. This is an example. I had to bump the cereal and the hand over to the right and the left in case any necklace or clothing was in there so you could clearly see it. You can just see the nibs of the, the horn nibs here. I left it in. It, you know, you probably— I probably could have extended this a little bit, but I'm, I'm sort of fine with it, letting people sort of look at all the details of the cow, try to figure out what what rarities they have. All right, so that's it. That's the— that's pretty much everything you need to know about NFT Generator. I will, um, let me generate 100 cows here so I can show you. So click on, uh, 100 generative art. You'll— it'll jump up, but then you want to hit the main part of the button. Let me type in my email address here. And it's generating the cows right now. Usually takes a minute. It's creating a zip file right now. Sorry for my camera being all over the place. Just download your zip file, pop it open. You'll see you get an assets folder and you get a metadata folder. These are all the JSON files that will be connected to each one of your NFTs. And then you get a metadata file here with all the information and the rarities. So let's take a look at the assets first. These are looking pretty good. Wait, let's see, any overlapping issues? I had a lot of issues with this smoke over the eyewear. These— the snorkel is part of the eyewear and the smoke was going underneath the, uh, the snorkel. So I had to figure out how to relayer that. Um, so I put all the nose— the, uh, the smoke as part of the nose rings, and I put that on top of everything. All right, these are looking pretty good. Let me show you one thing with the metadata. I had to— I had to go through and retouch little parts of all the artwork hand by hand. I probably did thousands of retouches, but then I realized it's better to go back and regenerate, rebuild your character, regenerate it. And one of the ways that, um, when I was touching up all the items, if I found an error on, say, the blue sunglasses and I needed to know all the images with the blue sunglasses, I would open up the metadata file with, uh, that sounded weird, metadata file with this Dadroid JSON viewer. I just Googled this. There we go. So this is going to let you quickly search through all of your metadata. So there's my eyewear shades blue. I just typed in blue. Um, once I have that, I can copy, or I can just do eyewear shades blue, it's going to tell me that there are 2 of these, and then I can jump between these 2 and edit those by hand if I needed to. I don't recommend editing things by hand because it's going to be a never-ending wormhole you're going to need to go down to fix everything. I would edit your 1 item, go back and upload it to NFT Generator, test it again, download your 100 items again, and then generate your entire collection. So that is going to bring us to the end of this video. Let me know in the comments if you like this, if you want to see more tutorials like that, like this. I will create them. And let me know in the comments, questions, DM me on Instagram @rymaloney or find me on TikTok @ryryart. And I don't know when you'll be watching this, but hopefully Crunchy Cows will be out in, uh, on OpenSea or on crunchycows.com. Thanks for watching.
More from Ryan




Drawing Mr. Beast into a Beastly Baller trading card #art #drawing #tradingcards card




The first draft of my graphic novel #art #procreate #originacharacter #graphicnovel #drawing


