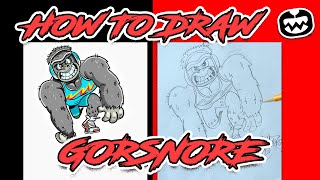
In this instructional video, Ryan Maloney walks viewers through drawing Gorsnor, the wrestling gorilla from the Seems Wild series. He begins by securing his paper and using simple, large shapes and shoulder-driven gestures to block out the head, snout, and body proportions. He details facial construction—placing the head circle, eyebrow line, eye line, snout shape, pupils, mouth, and teeth—emphasizing the characteristic scrunched eyebrows and cross‑eyed look. The tutorial then moves to the torso, showing how to sketch the bulky shoulders, upside‑down‑triangle torso, and arm guidelines before adding exaggerated muscle bulges for attitude. Ryan adds details such as hair, knuckles, and the wrestling uniform, including headband, chest lines, and shoe laces, while encouraging creative variation. He explains line‑weight choices, the purpose of light sketch lines for easy erasing, shading techniques to convey depth (e.g., distant foot), and the workflow of cleaning up, signing, and optionally digitizing the sketch on a tablet. Throughout, he stresses that the sketch is a practice exercise, not a final piece, and invites viewers to personalize the design.
Chapters
Welcome to Drawing Seems Wild. Today we're drawing Gorsnor, the wrestling gorilla of Seems Wild. I'm going to start off by taping down my paper, and I'm using pencils and paper to draw Gorsnor. All right, let's get started. If you've watched the other videos, you know that I always start off with very simple, big shapes to get started. I lock out my wrist and I'm just using my shoulder to draw big swooping motions. I'm going to draw Gorsnor's head as a circle to the left-hand side of the paper, and I'm going to draw a few lines that are going to give me an idea of where the shoulder and the hips are going to go. I'm going to draw a line across his head, and I'm going to drop in his eyebrow line here. Usually I would draw in the eye line first, but I want to get a good idea of where the eyebrow is going to fall on his face first. Here's the big snout of the gorilla, and two nostrils is going to be almost like a heart shape with a circle on each side. If you watch this— if you watch the other drawing videos, you know a lot of the Seems Wild characters have scrunched-down eyebrows and raised-up cheeks, so it covers the top and the bottom of their eyes. I'm gonna put in his headband and start to draw the top of his head, which is gonna be the wrestling gear. His pupils are going to be towards the, the center of his face to give him sort of a cross-eyed look. I'm going to color in the pupils to start to give myself an idea of what the final drawing is going to look like. Let's draw his mouth. We're going to have the top of the mouth and the sides of the mouth and then the bottom of the mouth. Let's drop in the teeth. I'm going to put some space in the back of his mouth, so we're going to see the edges of his teeth here, and I'm going to color that in to let myself know where the teeth end. And it kind of makes it seem like the teeth are popping out a little bit. I'm going to draw some jaggedy chipped teeth here. Color in the other side. And then add lines for the other teeth. You don't need to copy this exactly like I'm drawing it. You can make it your own drawing. Put as many or as few teeth in here as you want. So I'm constantly going back over my sketch lines to make things darker and easier to see and more final for myself. But normally I would take this sketch and digitize it, draw it on an iPad or a drawing tablet, and add color afterwards. So you really don't need to get too crazy with the heavy lines at this point. This is just a rough sketch that you can mess up and, you know, it really doesn't matter. It's more, more practice. You can't mess this up. Just put as many spikes as you want. Put some lines for his shoulders— or for his traps, and then his shoulders are gonna be two big circles. His upper body is gonna be much bigger than his lower body. His body will almost be an upside-down triangle shape. I'm gonna put some guidelines here for his arms. These are just to give me the idea of the angle of his arms, and then I'm gonna go back in and put muscles for the forearms and the biceps and the shoulders. It can make your characters interesting to do big bulges of muscles on one side of the limb And then on the other side, you can do just an equally as exaggerated straight line. It'll give your character a little bit of attitude and dimension. I'm gonna throw in some details, some hair here. I like to throw in details as I go just to keep it fun and interesting for me. I'm going to draw the hands. I put these lines in here to represent the knuckles. And for drawing hands, you can always look, look down at your hands and see where the knuckles and the lines fall and what the lines look like when your fingers are straight versus when they're bent. You really won't see the lines as much. I'm going to draw the top of his uniform and the top of his chest. For a gorilla, they have big bulky chests and shoulders. So, I'm just gonna put simple lines to represent what those might look like. Yours can look like anything you want. Now, for the legs, I'm sort of veering off my traditional way of laying down structure lines and shapes. I wanted this to look a little bit off. I'm gonna have one leg in front of the other. One leg is going off far into the distance, so it's going to be extremely small, the foot compared to the front foot. I'm gonna draw on his laces. A lot of the laces of the Seems Wild characters look the same. It's 2 to 3 laces, maybe 4. Okay, 5. And then I put the little metal holes where the laces are strung into. And then once you have the foot drawn or the shoe drawn, you can add a sole just by doubling up the line. I'm going to color in this back foot. I usually use shading to show that something is pushed back in the distance. I'm going to add some detail to his, uh, wrestling shoe. No rhyme or reason here. You can make the design look like whatever you want it to. Adding some more detail on the legs. Some more hairlines and a design on his wrestling uniform. You can go back in and erase sketch lines as you need to. I always draw my sketch lines really light so they're easy to erase, and even if you keep them in there, your thicker lines stand out more, so it's— they're not going to be that obvious. And I don't mind seeing sketch lines in, in my sketches when I look back at them. It's kind of cool to see, or to remind myself, how I, how I built the character with the structure. All right, we're getting close to finishing up this drawing. Just erase those sketch lines, clean it up a little bit, sign your drawing. Thanks for watching Drawn Gorsnor, and make sure you check out the other Seems Wild drawing videos.