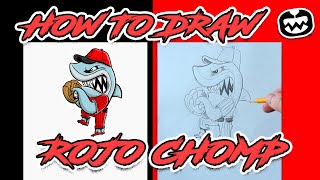
In this 20‑minute instructional video, Ryan Maloney walks viewers through drawing the cartoon character RoHoChomp from the "Seamswild" series. He begins with the basic geometric construction – a large circle for the body, a smaller circle for the head, and guiding lines for the legs and foot. He then adds the back, snout, and mouth shape, followed by detailed facial features: eyebrow, eye, pupil placement, and a series of triangular teeth. Throughout, he erases construction lines and adds shading to give depth. The tutorial proceeds to accessories: a fin, a baseball hat, a baseball glove with three fingers, a net, and a baseball. Clothing is drawn next – a 3‑dimensional sleeve, shirt, belt with loops and buckle, pants with bunching ridges, and simple cleats with spikes. Ryan demonstrates perspective by drawing the opposite leg lifted and foreshortened, showing how the foot and cleat appear when tilted. He repeatedly cleans up lines, thickens outlines, and adds shading to indicate where colors will later be applied. The video ends with a reminder to sign the drawing and a plug for the other five character drawings in the series.
Chapters
Welcome to Drawing Seems Wild. Today we're going to be drawing RoHoChomp. Let's first start off by drawing the structure of the character, which is one big circle with a smaller circle underneath and attached to it. Then I'm going to draw some straight lines downward. This is going to be the left leg of RoHoChomp. I'm also going to put a straight line across the paper for his foot. Now I'm going to draw the shape of Rojo Chomp's back. And then on the other side is its snout. I don't know the technical term for a shark's snout. I'm sure it's something every kid knows that I don't. Now I'm going to draw the shape of his mouth. It's going to be a line that swoops down and then rises back up towards the edge of his lip. As I go, I'm erasing some structure lines. Now let's draw the white part that's right above a shark's mouth. Let's draw a mean eyebrow. And underneath that eyebrow and underneath the top of the cheek, we're going to draw the circle for the eye. Notice that the eye is covered up by the eyebrow and the cheek, and it's— you can't see the overlap. If you want to, you can draw a full circle and then erase the lines that are on top of the eyebrow line and the cheek line. Sometimes I like to add some shading in just to give my characters depth and dimension as I'm going. So the pupil is going to be covered up by the eyebrow as well, and it's going to be more towards the left-hand side of the eye. Now the teeth are the fun part. You can't mess these up. They consist of a bunch of triangles facing up and facing down. I would draw the bottom line of teeth first and then draw the top line of teeth, and you can have them fit in between each triangle. I'm going to shade in its mouth. Now let's draw the fin. I'm going to cut across sideways on the paper and find the middle of his back and draw about a quarter of a circle downwards towards the bottom of the page. Now, this is going to be Rohochomp's hat. And where the hat divides, I'm going to draw the bottom of its brim. I'm going to add some more shading. This is the top of RoHoChomp's arm. It's going to be a sleeve, and sometimes I'll, I'll draw it as if it's 3-dimensional so you can see right through it or put something in it. That will give me an idea of where the arm is going to go and how this shirt is going to overlap the arm, or the fin in this case. So this fin is going to be holding or gripping a baseball, so it's going to loop around the baseball slightly. So the fin would be going onto the other side of the baseball. Alright, let's draw the bottom part of its baseball glove. Now this baseball glove is gonna have 3 fingers and then a net and then a thumb. So every time, any time there's a, a finger placement of the glove, just draw one of these top ridges or top, top mountain peaks. For the net, I'm just doing some simple cross-hatching. There's the other fin that you just barely see. So I'm going to shade it in to remind myself that, that it's a background or an element that's placed further back in space. Slowly clean up the drawing as I go. I'm going to wrap the shirt around the fin and do a little bit of shading to make it look like there's a little bit of space between the shirt and the fin. Here's the bottom of the shirt and the top of the pants. And at the top of the pants, we're going to have a thick baseball belt. And the belt is going to be interrupted by the belt loops and the belt buckle. And we'll barely be able to see the belt buckle. So I'm going to color in the belt too so I can clearly see what it is. I'm going to draw a thick leg here and these These ridges are the pants bunching up as they collect towards the bottom of Rohochomp's leg. So the cleats and the legs are going to be pretty simple. I think all the personality is in the face and in the jaw of this character. So I'm just going to do some simple clunky cleats, nothing too crazy here. Put some stirrups on them. I like to shade things in to tell myself or to remind myself where the color is going to go later or any shading or extra line work that I need to do. I'm going to add some spikes to the bottom of his cleats. Now let's draw the other leg, which is lifted off the ground like he's pitching a baseball. It's not as wide as the other leg because it's set back in space. So it's going to be a little bit thinner and we're going to see the bottom of his cleat. And the foot is a little bit smaller than the other foot as well. So when you lift up the foot, you're going to— if you tilt the foot or tilt the leg, you're going to see a little bit of the bottom of the cleat rather than it just being a straight line across. So this will add a little bit of personality and depth to the drawing. So I'm going to go through, clean it up, add some more detail. I'll thicken the lines. For this drawing, I'm just keeping it in pencil, no ink or no digitizing. So I can just push it until I get the gut feeling that tells me I've, I've pushed this drawing as far as it can go. Once you're done, you can sign your drawing. I always like to give it away. And thank you for watching Drawing Seems Wild. Make sure you check out the other 5 character drawings from the other 5 sports in this drawing series.