How To Set Up Your Book Cover on Amazon KDP - Walk through
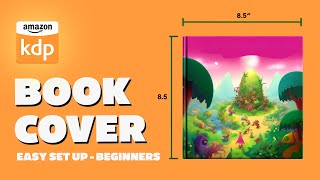
Ryan Maloney walks through creating a paperback cover for Amazon KDP, from choosing trim size and ISBN to uploading the final PDF. He covers the KDP Cover Calculator, template setup in Photoshop, barcode placement, and back-cover copy tips. The whole process takes about an hour to review and upload.
Chapters
Let's talk about setting up your cover in Amazon KDP. I'm going to open up a cover and just give you a little bit of a breakdown. I've spent 1,000 hours uploading files to KDP only to have them rejected because I didn't set up the sizing properly. I love doing the artwork for these covers, but setting them up is sort of a pain. So let me give you the breakdown of what you're looking at right here. This is an Amazon KDP paperback book. Cover. So this is not the interior artwork. This is the front page on the right-hand side, and this is the back page on the left-hand side. Important elements of this are— I mean, obviously you're going to have your title of your book and your name on it, or whoever the author or illustrator was. That's all on the right-hand side. That's very easy. In the middle, because my book is only— I think it's 32 pages long— there's no spine on this book. If I were doing a hardcover book there would be like a quarter of an inch to a half an inch spine on this book with the name of the book and my name sideways. That's not what's going on in this one. This is just a paperback book. Here's an example of what the finished product looks like. Please ignore all the notes that I had to myself in here. So the most important element of this is the barcode. This is the ISBN number for your book, and you can go two ways to get this barcode. When you upload your files to KDP, they will provide you with an Amazon ISBN number. This is what I do for almost all of my paperbacks. It just simplifies the process. When you upload it, you usually leave a white spot, a white space in the lower right-hand corner, and Amazon automatically applies that barcode to your book cover. For this one, I had Amazon provide me with a barcode. I took that number and then I generated my own ISBN number, and there's places you can just Google ISBN generator and you can get your own barcode. And then I put it on my cover because I wanted it in a specific spot. Usually you can just leave a white box in the lower right-hand corner and Amazon will apply that barcode. The second way to get an ISBN number is to go to myidentifiers.com, and this is where you can purchase packs of ISBN numbers or barcodes. These are custom barcodes that They can be used in bookshops, they can be used on Amazon, and when you upload your book to Amazon, you just check a box that says, I already have a barcode that I am supplying here, so don't bother to put a barcode on the back of my book. It's pretty easy to do. They give you a number here, you copy it, and you can buy the barcode, but I just go to, I generate it with, go on Google and do the ISBN generator and download a PNG that you can paste on the back of your book and then upload it. So that's the most— those are the most important things for your— the elements needed for your cover. Let's talk about the book cover size. If you go to kdp.amazon.com/cover-calculator, you're going to get this handy little website, which I wish I knew about years ago, to get the perfect size template for your book. I have all my options here selected. You can do paperback or hardcover. I usually choose standard color paper just because premium color paper is going to increase the printing costs of your book and reduce your margins. So I find standard, it's not like the, it's not the most perfect color paper, but it's going to get you there. All right. Uh, white paper, left to right page turn direction, because I don't know who would not do that. That's crazy talk. Um, book is in inches. The size of the book matters. So I usually do 8.5 by 8.5. I believe you can reduce the printing cost if you go a little bit smaller. So some of my books, um, I'm losing my memory, so I don't really remember. It's been a couple years since I uploaded new covers and new books for my older paperbacks. So I believe I did do 8.25 and it reduced the printing cost a little bit. I like a larger book because I make mostly picture books, so I like the largest size it can it can print, which is 8.5 by 8.5. I also like all of the sizes of my books to be relatively consistent just so they look nice when people buy a bunch of them and sit on bookshelves. But you got to do what you got to do and experiment with these different sizes because you may find that you want to write and illustrate a picture book, but maybe it's like a series book that requires that's, you know, a little bit taller and a little bit with, with less width. So it's like a 7.5 times 9.25 could be a good size for that. Really depends on what you want, what type of book you're creating here. I put in a page count of 45. I usually don't do this many. Let's do 40 and then calculate the dimensions. This is an 8.5 But just for this website, it looks like it's a little bit taller, but it is gonna come out a little bit more square. It should, hopefully. This gives you all of the safe areas, the bleed areas, and the margins. This stuff, I can't tell you how many times I've messed this up. I just, when I first started KDP, I would just create an 8.5 by 8.5 and sort of spray and pray and hope that my content stayed within these safe margins, but I was almost always wrong. Here in this, the lower right-hand corner of the back cover, you can see where the ISBN number gets dropped in here. That's where you're going to want to keep that white shape. So let's download this template, open it up, and see what we get. So I've got the, the template open in Photoshop right now. I just went right to Photoshop, but you can open it in Adobe Acrobat too. You could probably paste your artwork in Adobe Acrobat, or I mean, worst case scenario, if you don't have Photoshop or something like this, use Canva or even PowerPoint. I mean, just figure out a way to set up these dimensions and then paste in your artwork and make sure it's one long cover here. You'll see the spine is pretty small here. There's no room to put any information, so this is just gonna be a thin paperback. We have our cover here. This is where our title and name is going to go. It has all of the safe margins, so you don't want anything to overlap into this red margin here. And then on the back, we have our barcode area. So this is already, this is already set up for us. So what I would do is just create a white area over top of this. Let me— I would do it in Photoshop like this, cover it up. And what you're, you're going to end up delivering is something with— let's just say our, our book is pink. I'm just going to set a middle margin here so you can see the front and the back. This is what we're going to end up delivering. It's going to be a cover with our title here, our description here, and our barcode here. All one long file. You don't need two files for the COVID and everything within the, within the safety margins of this template here. But you're not going to deliver it with any of these lines over it. In your cover. And when you export this or you save the PDF, I flatten this cover. Flattening all of these layers is going to reduce the size. Let me see if I can just do that. File, Export as a PDF. Let's save it as a PDF. So if you preserve Photoshop editing capabilities or whatever program you're working in, I usually abandon this and save it as a PDF. That will flatten everything together, make a smaller file size, and you still have your Photoshop file to go back to to make edits. But for uploading to KDP, I just want the smallest file size possible because it can take a little bit of time to upload your files there. Let's see what else we got going on. So I'll go in, um, Fish Without a Bowl. Continue setup. And paperback content is where you're going to be uploading your cover. You can see I chose standard color interior paper. That will keep the cost down. Here I did choose 8.25 by 8.25 because this is part of a series and all the books I did at the time, I did want to be a little bit smaller, a little bit more cost effective for printing, and they're still consistent in size because there's about 10 of the books and I didn't mind that these were all a different size compared to my other books. I choose no bleed for this because it's a very simple book with a lot of white space in the background so the artwork doesn't go over the edges, but if you do have a book with Bleeds. If you want your artwork to go all the way to the edge of the page with no white space, I choose bleed, and you're going to need to run that artwork over that. I'll make another video on the interior of your book soon. For now, we'll just stay focused on the COVID The COVID finish is pretty important in my opinion. Glossy is what I choose 99% of the time. There's a matte feel that you can, you can use. I usually do this for like low content notebooks that I set up. Just for myself. I'm not a huge fan of the feel of the matte, the matte feeling. I wish it were more like a standard cardboard feeling rather than this matte, which has a little bit of a stick. I'm not, not a huge fan of that. So I'm always choosing glossy. Here is the manuscript you're going to upload. These are the— this is the interior PDF, one PDF for all of your pages. So if you have a 400-page book, you're going to upload that 400-page PDF right here. Now we're down to book cover. So they do have a cover creator within KDP. I've never used it. I just like to set up my own artwork. This is where you upload your PDF and you check this box if you, if you're including a barcode. So if your cover— wait, let me read it. So stop talking, just read it. All right, check this box if the COVID you're uploading includes a barcode. If you don't check the box, we'll add a barcode for you. So if you're uploading your book with a barcode, check this box. If you're using an ISBN number from Amazon, leave this unchecked. The reason this is important is because when you go to upload your files, there's going to be a 2 to 3 day review process after uploading files, and they may come back saying, well, you didn't check the box, so we're a little confused on what you want to do with your barcode. So this will save you a few days if you just get this right. AI-generated content. Did you use anything to generate your content? This can be a little bit confusing because so many programs have AI baked into their content generation and their writing. Uh, I'm not a fan of AI writing. I do use some AI structuring tools like BookWiz for plotting out structure, theme, um, and planning my book, but it's never the actual content that I use AI to write with. So, and for these books, for the Without a Series, there was no AI used whatsoever. So that'd be a no. And then I'd launch the previewer. So you see everything we just talked about. This is that template that we downloaded. We have our split line here. We have our front cover on the right and our back cover on the left. I like just in terms of content, what goes on the back cover. Anytime you can, and I didn't do that here, I would try to put some social proof, like testimonials about your book, or like what people loved about your book. I have not, uh, taken my own advice and collected that and put that on here. So I went with a really simple description of what the Without a Book series is about. 3 lines or less of just thinking about like, how is that a portable message that somebody can tell their friends? I show other books on here. I have a URL link to my website along with a QR code, and here's the ISBN number that Amazon dropped on. So that is the— that's the anatomy of a book cover. If you have any questions about this, just drop them in the comments. I'll try to respond to everyone. Yeah, I think we're gonna leave it there. I think I covered pretty much everything there is. I'm— I haven't created many different types of book covers on Amazon KDP. I'm usually just a picture book square cover creator. Um, but I think you can, you can push the limits of what this is, what this is, and the cool, like, cool things you can do with it. Um, and even make the, your cover more interactive and engaging. Actually, one last thing. What I love about KDP is your book cover and your interior. It's a little bit like software. So if you write a book and you put it out in 2024 and in 2026, You think, oh, well, my cover would sell more, convert more if I changed, if I changed the artwork on it, or I changed the content around. You can update your cover and you can update the interior of your book on KDP, just like you would update software. Sometimes when you create a book, you overcomplicate it and it takes years and time to realize the mistakes that you made and like learning how to simplify it. So, um, once I learn how to do that, I'll go back and just refresh the covers of my book. It's kind of fun to do, um, and to just keep things fresh and change things up. Yeah, but I think that's it. Let's, uh, let's wrap that one up. Chat with you in the comments. Thanks for watching.
More from Ryan




Drawing Mr. Beast into a Beastly Baller trading card #art #drawing #tradingcards card




The first draft of my graphic novel #art #procreate #originacharacter #graphicnovel #drawing


