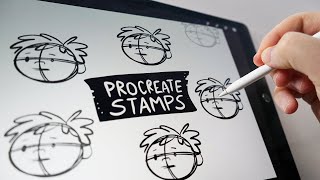
Ryan Maloney shows how to build a custom stamp brush in Procreate for drawing recurring characters in graphic novels. Sketch your character at 650 × 650 px, export it as JPEG, then import it as a brush shape with stroke spacing above 70. Tap to stamp the sketch on new panels, lower the opacity, and trace over it with a cleaner brush to keep proportions consistent while staying flexible.
Chapters
In this video, we're going to make Procreate stamp brushes. So let's dive into Procreate. I'm drawing this graphic novel and I have this character that I'm drawing over and over and I'm finding it difficult to keep his character design, the shapes and the sizes consistent. So I'm going to create a Procreate stamp brush that I can tap down and then create a layer over top of that in order to retrace it and redraw it. First thing I'm going to do is to jump into Procreate and create a square canvas. I'm, I'm setting this canvas up at 650 by 650 at 300. 100 DPI. So now I'm going to draw my character design once. I'm just going to create a rough sketch here. I'm using the Mercury brush, but you can use any brush here. I like to keep my stamp brushes a little bit textured and rough so it reminds me that they're sketches and they're not the final inks. So when I tap these down, it'll remind me that I need to create final smooth lines over top of it. So once I have my sketch done, I'm going to export that as a JPEG and I'm going to save the image to my iPad. Now I'm going to create the new brush. I'm going to hit the plus in the brushes panel. And go to the Shape tab and hit the edit button that's right to the right of this white circle. Now import that sketch, and with two fingers, you're going to tap on the screen to invert the drawing. Hit Done. Now in the Stroke Path tab, you're going to increase the spacing. I'm just going to pick an arbitrary number somewhere above 70. Now go down to the Properties tab. You're going to increase the maximum size of the brush behavior. This will reduce the amount of drawings per tap or per stroke. I'm choosing 718%. You can choose whatever you want in that range. Now I'm going to go back to the page in the book that I'm drawing. Make sure I'm selected on that brush. With a new layer. So there's a new brush I created, and I'm going to tap it down. So now I have a quick sketch drawn, and I can increase the size of that, I can decrease the size, and now I can create a new layer over top of that, turn the opacity down on that current layer, select a smoother brush. I usually go with the Studio Pen, and now we can trace over that character. So what this did is save— it saved me a a couple of minutes drawing out the sketch of the character's head when I already know what the shape and sizes need to be. I just need a template to draw over because I want an original drawing. I want each drawing to be different, but I want the proportions to remain consistent throughout. I'm, I'm going to delete those layers. So that's how you create Procreate stamp brushes to save time in your drawings. Like and subscribe.