Minimally invasive Neck Lift - 45 minute local anesthesia procedure demonstrated by Dr. Sean Simon
Dr. Sean Simon demonstrates a 45-minute neck lift using local anesthesia, combining suture suspension with Precision TX laser treatment. He makes tiny punctures to release platysma bands, then uses a laser to tighten deep tissue and stimulate collagen remodeling over 6-12 months. Results show jawline definition comparable to a chin implant with minimal scarring.
Chapters
Welcome. I'd like to invite you to watch a video that's going to demonstrate the entire procedure of my Elevate Neck Lift along with Precision TX Laser. This video will be about 20 minutes in length, and it's going to show you every single step of the procedure involving laser and my Elevate Suture Neck Lift. Let's get started. Showing the initial local anesthetic injections here. So first, I'm just making a few small injections behind the ears, a couple, uh, important points. The anchor points for the suture. Here I'm demonstrating the platysma muscle bands. A lot of people have these bands that form cords that contributes to the aging signs of the neck. So initially I'm going to make some injections both superficial and deep to these bands. Right now I'm injecting the area of the mastoid fascia, or the area just under and behind the ear. This is an important part to get anesthetized well, as this will be the anchor portion for the suture. This is— I'm demonstrating the puncture tool. This is essentially a tiny scalpel that allows me to make a very small superficial 1mm opening. It does not even require a suture. All the entire MyElevate suture placed through those 1mm punctures. Now I'm injecting above and below those platysmal bands, so both superficial and deep to those bands, to allow for division of the bands, which will help to rejuvenate the neck and allow the MyElevate suture to really lift up the neck, the lip, including the deep structure, the platysma and the submandibular glands. At this point, I'm taking the puncture tool once again, demonstrating that. You can see that it just has a very fine tip. First making those 1mm punctures, providing access to allow me to divide the platysma bands. So first I'm making a small central incision and then an incision, a 1mm puncture with the tool just 2 centimeters lateral to each of those bands. Those vertical marks are the platysmal bands that I marked both prior to bringing the patient and then reinforced them inside the operating room. These are— that's a dermal clearing tool. So it's a small curved little tool that's inserted into each of those puncture sites and allows me to clear those dermal attachments. So the deep part of the skin underneath the superficial portion And that just clears that area to allow for passage of the light rod and ultimately passage of the suture. At this point, I'm also utilizing it to dissect underneath each platysma band to facilitate passage of the light rod, which you'll see in a moment, and, and which is the portion of the procedure in which I'm going to divide those platysma bands, which are bands of muscle. A lot of patients, you'll see if you look at your own neck even and contract that muscle, You'll see like these two cords typically off to each side of the midline that really demonstrate some of the signs that we don't like with regards to aging of the neck. Here I'm using that clearing tool once again to help passage. This is the MyElevate kit. See, I'm organizing the suture as a very long suture. This is called the suture or the light rod. At this point I don't have the light attached because I don't need it for this portion. I'm going to do it by palpation. So I'm going to insert this through the central incision, through that puncture point, and I'm going to pass it below the platysmal band. I'm elevating that with my fingers, taking it away from the deeper structures of the neck, so I'm allowing safe passage of the light rod underneath it. You can see now I have it, and I can demonstrate that by— I clearly have the muscle. I can tell by the thickness of the tissue and elevating that. And I'll go ahead and pass that rod, which allows for passage of the suture underneath the platysma muscle. Once I do that, I'm going to reinsert the light rod and pass it back across superficial to the muscle, so just under the skin, so between the skin and the muscle. Now I've looped the suture around that band of muscle. See, I'll bring it back out, and now I have the two ends of the suture. So I bring it to the end all the way to the end of that 100-inch suture. There's plenty of suture to use just in case the practitioner or surgeon breaks that suture. You can restart that procedure because you have plenty of length to do it multiple times if necessary. Now I'm going to simply use that as a similar to a Gigli saw. So this is going to take the two ends in my hands and you're going to see me just gently rocking that back and forth, creating friction against the muscle. You can see it pulling under the skin as I start that motion, and over the course of a few moments, I'll completely divide that platysma band. So here I'm just working it back and forth. You can see it pulling, the muscle is engaged because I have it completely looped around the left side platysmal band, and I'll just keep working that Gently and slowly, with a little bit of tension, the friction of the suture just slowly works its way through that division of that band. One of the reasons we have patients wear a soft collar while they're sleeping at night for the first 2 weeks, as well as when anything that would cause a significant flexion of the neck, is to prevent the healing of that because we want that band to stay divided. Now I'm doing the same thing on the opposite side, on the right side. So I'm passing from the lateral puncture to the central puncture. I'm elevating the platysma muscle with my hand and passing that suture rod through that central puncture site. Now I have it. I've got the platysma muscle on top of the, the light rod as I've passed underneath. And now I'm going superficial once again to loop completely around the right side platysma band, and I'm just going to follow through with the same procedure. I'll just pull that suture through to the end and again use it as a, uh, in a sawing motion to completely divide the right side platysma band. So you're going to see that same motion once I get to the end of the suture. Important part of this procedure is just keeping that suture organized, keeping everything clean and sterile, and then working to the end. Now I'm just working my way through. You can see it pulling on that band As I'm just slowly working through, creating tension, friction, it's going to slice right through that muscle. It's all been injected. She's awake. She's not feeling any pain at all. She— we gave her some Valium prior to the procedure, and everything's just been injected with local anesthetic. She's very calm, just relaxing. Oftentimes just fall asleep while I'm doing this. Go ahead and— there you can see that it just got divided. So at this point I'm making a very small, about a 1 to 2 millimeter incision in the submental crease, and I'm going to infiltrate what's known as a tumescent solution. The tumescent solution is, uh, consistent of intravenous fluids along with, uh, lidocaine and epinephrine, and that's going to anesthetize the entire neck area, um, as well as provide epinephrine, which will cause vasoconstriction so there won't be any bleeding during the procedure. So I'm infiltrating the entire neck as well as at the jawline and above the mandible. You can see there I marked the jowls and the mandible area. So I will, I'll go ahead and infiltrate that entire area because I'm going to treat that entire area including the jowls, and I want to elevate those tissues away from the structures underneath including the submandibular nerve. Here I'm making a small incision just at the base of each ear. That will also provide additional access for infiltration of fluids, which I'm doing into the submandibular area as well as behind the ear. There's a very tight tissue. If you feel behind your own ear, it's known as the mastoid fascia, these mastoid retaining ligaments, and that's actually where the MyElevate suture ultimately gets anchored. This is the Precision TX laser. I've been using this for more than a dozen years doing minimally invasive neck lifts. Just with the laser and/or liposuction. This has been very effective for a lot of patients that want a minimally invasive choice, and this is only going to be more effective and the results will just be even better now that I'm going to be able to combine that with my Elevate. You can see the, the red light there. That is actually not the laser light. That's just a light that's in the visible spectrum to allow the surgeon to have an identification of the tip of the laser fiber. Now I'm just working my way around. Initially, I will actually apply this laser energy to the deeper tissues of the neck, including the fatty layer. If I was going to do liposuction, which in this particular case I'm not, but I would do it after application of the laser energy to the deep tissues, including the subcutaneous fat layer. This also helps tighten the platysma layer. So I'm going ahead and working that. The laser tip again has a visible light. The actual laser light spectrum, uh, is not visible. I'm demonstrating here that this particular laser is specially designed for the neck. You can see it's a very small 2mm cannula. It's very short. It's designed specifically for neck use. It also has a beveled edge, which makes this particular laser unique out of all lasers, and that allows for the, uh, actual light or the wavelength of light to bifurcate at the tip at a 90-degree angle. And depending on how I manipulate that laser tip and the, the handle, I can actually have the laser come out directly from the tip and then at a 90-degree angle either down to the deeper tissues, which I'm demonstrating here, and also, or to superficial. So I can treat actually straight down and straight up from inside the incision without actually having to torque the handle. Here I'm treating the area that, over the jowls, around the jawline. This is all going to help stimulate a tremendous amount of collagen growth, which will create tightening. Think of it like skin retraction or shrink wrapping of the tissues. So this is really what improves the actual quality of the tissues, and this process will actually take place over 6 to 12 months. So this is very critical to treat the entire neck. This not only frees up those tissues, undermines to allow for really recruitment and elevation of the tissues with the MyElevate suture, but also for the tightening effect of the laser itself, as well as, and you can see here I'm working behind the ear into the mastoid area, and that's also gonna help free up some of those attachments to allow for placement of the anchoring of the suture. I'm gonna go ahead and I like to re-prep multiple times. I've already treated both the deep and superficial areas with the laser. So I've treated the deep plane and the superficial plane. And that's based on the amount of energy produced as well as as well as the temperature, which is constantly monitored. Here I'm using a marking tape that just facilitates the marking of the puncture sites. I have the midline marked, the jawline. I'm placing this 1 centimeter above the lower edge of the mandible. Midline is marked as well as those vertical lines indicating the areas that the platysma was divided, and the— what's called the cervical-mental angle, which is that horizontal line. That's the area where the vertical and horizontal portions of the neck meet. And that's exactly where the suture will actually be anchored and be placing its pull. At this point, I'm using a small tool, a very small cannula, to help free up some of those attachments, those dermal retaining ligaments and the mastoid retaining ligaments behind the ear, and to create a little bit of a space under the skin. I'm going to do that on both sides as that is very adherent, and this will allow for passage of the light rod and anchoring in this area, which is, which is critical. To the success of the MyElevate suture platysmaplasty portion to really lift the neck and anchor it in that area. I'm sure many people that have thought about some sort of neck lift procedure and unhappy with their neck have taken— look in the mirror, taken their fingers and kind of pulled up the skin from the behind the angle of the jaw up to the behind the ear, and that's exactly what this procedure is doing. Here I'm using the puncture tool once again to create those 1mm openings. To allow for passage of the light rod and placement of the MyElevate sutures. So I've gone ahead and used that marking tape to aid in the markings. These incisions, or these punctures, again, they're 1mm, don't even require a suture, and they're placed in the area, mid-portion of the jaw, basically the area where the submandibular gland is, and allow for maximum lifting, tightening, and contouring of the jawline. I've made my incision with that puncture tool behind the each ear. And now I'm using the dermal clearing tool once again. This is going to allow for— it's a lot easier now because I've already undermined a lot of that tissue and skin with the Precision TX laser. But this just allows for clearing of any remaining dermal attachments just immediately under and adjacent to each of the puncture tool openings, as that will facilitate passage of the light rod and prevent it from getting tethered on any of those spots. So I'm gonna go ahead and use that clearing tool on all those areas and make sure each one is ready for placing of the suture. So clearing area of, of both ears, both the left, now the right side. Once again, taking the light, uh, rod or the suture rod, I'm gonna place it in the inferior central incision. This is gonna be just under the skin. So this actually has an attachment that goes on the back. It's basically a flashlight that goes through a, uh, fiber optic through the light rod. And you can see there's a little light on the end that helps the surgeon to determine the depth of that light rod in addition to palpation and just visualization. It's just one more tool to use to verify the depth. You want it just under the skin, so pretty superficial. So I've passed from the initial central portion to the next opening, which is in the area of the submandibular gland. So it's the one in between the central and then the lateralmost opening. So I'm pulling the suture through. Put a little— my assistant put a clamp on the end just so we don't accidentally pull the suture into the opening, because we'll need that to do the eventual knot at the very end. So now I'm I'm going ahead and taking that light rod, placing it into the, the next opening, reattaching the light, and I'll go ahead and pass around the angle of mandible, under the jawline, which you can see there, and then to behind the ear to the incision, that small little puncture behind the mast— in the area of the mastoid. Now I'm going to loop it around that area, which is going to catch a bunch of those retaining ligaments, and it's really going to secure that suture in that tough tissue behind the ear. And again, if you've ever gone in the mirror and looked and kind of pulled up that skin to the area behind your ear, that's exactly what we're doing. We're anchoring that area to allow for tightening of the neck, and you'll see that when I tighten that suture down at the end. Okay, so I'm pulling the suture through again, um, and I'm gonna get ready to pass it to the next spot. So keeping everything nice and organized, I've got it in the submandibular area. I'm gonna pass it back to the the upper of the two central puncture sites. So that's what I'm doing here, coming back to the central area. So this is just a centimeter above where I started, and then we'll start working to the patient's right side. So you can see the light there, and it's just— go ahead and upper to the passage to the upper midline and coming out in that area. I'm going to reinsert the light rod. At this point, we're going to pass around the patient's right side of their jaw, so underneath the right jawline, around the angle of the mandible. So we're going to go to the, the mid-incision. So I'm going to take the suture, bring it through, put a small amount of tension on it, get into the right plane, and then reattach the light. I'm gonna come out through that mid incision. So I'm gonna pass that through. So now we're at the right side, passing light to the— what I would call the second position on the right side, or that mid position in the area of the submandibular gland. I'm pulling the suture through once again. Very important to keep that nice and organized. Now I've got the light put back on there. I'm passing to the right side to the mastoid area, and that's going to be the right side anchor position. So once I got that through, then I'll go ahead and loop that around once again to create attachments to those mastoid retaining ligaments. That's that tough tissue underneath the skin, and that's really what's going to anchor that suture. So when it gets tied down in the midline and pulled up, it pulls everything up towards the area behind each ear and around the jawline, really create that jawline definition. All right, so now I'm passing back to that, the inferior of the two mid incisions, the area by the submandibular gland once again. And then finally, it'll be passed back to the original puncture site. So the original suture went in and out of the same opening to to allow for tying of that suture down. Everything's been essentially weaved through all these puncture sites, so there's no incisions. The only incision that requires a single tiny suture is the submental incision, the incision that I did the infiltration through. It's the same type of incision that you'd have, a 2mm incision for any kind of laser or liposuction procedure. It's the only thing that I put one single stitch in, and that one doesn't even really require a suture, but I place it. I'm having the patient extend their neck. I'm setting the tension. You can see pulling that suture and already see the definition that's creating on that jawline. You can see her entire mandible when I do that. And you can imagine once that tissue is tightened down, especially the effect of the laser, of course there's all sorts of tumescent fluid in there too, so it's very swollen at this point in the procedure, but you can still see that definition. It's only going to get much better. So I've, I've sutured, put the first suture. I'm double-checking everything. And now I'm gonna go ahead and tie the knot, just putting enough tension to create that definition and tightening, but without too much tension. If you put too much tension, the suture will simply break. So now I'm cutting the, the suture after I've tied about 6 or 7 knots, and I'm just using the light rod to bury the knot. So I'll just go ahead and push that down. I'll make sure that there's no little areas that are tethered in the area of the knot or any areas, uh, near the puncture sites. So I've checked all those spots, and I just use that light rod to clear those, uh, puncture sites as necessary. That is pretty much the end of the procedure. The only thing that you'll see me doing here is placing, um, one suture in that the small submental, or the incision in the crease. Just demonstrated a photo of that. This is the particular patient that's on the table. That was just a 24-hour post-op picture. Here I'm just tying that one suture. It comes out at 4 or 5 days. And again, no other sutures required in any of the other incision sites. Here's a few examples of patients at 24 hours post-op. 24 hours post-op again. Another patient, also 24 hours post-op. You can see a tremendous change in jawline definition. Almost looks like they have a chin implant at this point, which they don't. Thank you very much. I hope you appreciated it. And, um, there will be some short videos, but this one is a, a good example of just the entire length of the procedure. And, uh, look forward to more video demonstrations in the future.
More from Sean
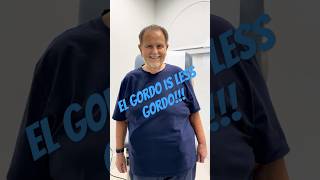
Raul De Molina aka El Gordo talks about his recent surgery with Miami Plastic Surgeon Dr. Simon
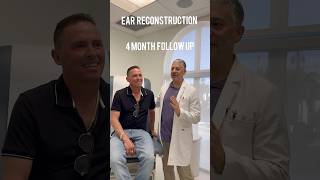
Ear Man returns. 4 month follow up after complex ear reconstruction in the emergency room.