Sourcing Automation with Microsoft PAD - We cracked the code!
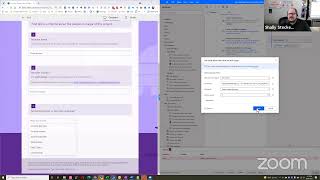
Shally Steckerl shows how to use Microsoft Power Automate Desktop to scrape job postings from iframes, store them in Excel, and automate web forms. He extracts full job descriptions by looping through URLs in Chrome, writes data to workbooks, and exposes the workflow as a no-code Power App for one-click execution.
Chapters
All right, we are live. Good to go. So welcome to Shelly's Alley. Sorry if I'm not terribly highly energetic this Friday. I had a little bit of bad news. Nothing big deal, just kind of some business stuff. So I'm a little down in the dumps. Hopefully somebody will cheer me up soon though, or I'll just cheer myself up. Anyway, so funny story, I did not realize this until I launched the video, but I'm looking at myself on the camera here. I'm wearing a Microsoft polo shirt that I bought at the Microsoft Store when I when I used to work there. I really like it. It's nice and soft and very subtle, and I don't know, it just was a nice shirt, so I wear it quite often. But it's got Microsoft on here, and then my t-shirt underneath— it just happened to be the first thing that I grabbed— is a Google Diversity t-shirt from the Google Diversity recruiting team. So, um, that's ironic, right? Like, I've got Google and Microsoft on the same, um— anyway, I guess you had to be there. Funny story, true story, but funny story. All right, so for those of you that would like to join live, please do. I would love to go over an example. Remember that the live, uh, Zoom, if you want to participate and engage, would be cn.co/zoom. S-R-C-N, so Sierra Ray Charlie Nancy, dot co, not com but co, and then forward slash zoom. And I just posted that on the Facebook group there. Thanks, Glenn, I see you on there. Appreciate you, uh, joining us and taking notes today. I wanted to continue some of the pad conversations that we've been having. So I'll start with one thing that I meant to finish up last, last Friday, which was that extraction from— yes, I know, extraction, blah, blah, blah— but it's the extraction from an iframe, which was a little bit challenging just because The data was completely encased inside of an iframe inside of the page, so I had to figure out how to break the frame, get all the links, then actually go to each of the links, then copy the data and put it into a spreadsheet. So this is probably one of the more complex workflows, particularly because it has, um, you know, it's, it's basically multiple steps within the workflow that require, um, opening various web pages and launching Excel, closing the pages, etc. So this is really not something that a straight-up, you know, one-click data miner type of application would be able to do, starting with the fact that it's an iframe, which I'm sure you can break with JavaScript, but then you also have to open all these other iframes So basically you'd have to continuously break the iframe to get the data. Anyway, long story short, where I went was a list of jobs because I needed to get the descriptions from the jobs. So I needed to get basically a list of the, the jobs themselves and extract the job descriptions to grab some keywords to do some further analysis and so on. So that was the idea here. The same thing would work with a list of other things that would be, you know, could be resumes, it could be articles, it could be shopping cart items, whatever. So let me start with that. I'm going to share the screen here. On the left-hand side, you see what I ended up doing with the frame is I actually found the original link to where the, to where the frame actually lives. So I went into the source code and you can do this manually. I actually use Power Automate by inspecting, inspecting the frame, sorry, inspecting the source. There's a, a action inside of web automation here. Oh, that's a little small. There we go. Inside of the web data extraction that says get details of an element or attribute on a web page. So I use that to discover this, but you can easily do it manually. You basically just go into the web source, the, the source of the web page, and look at the frame and, you know, find out the URL. But ultimately With a very basic just get details, I was able to just run a quick Automator example that would open the page and go in and extract the element that actually was the original hyperlink. And then it browses to that page, which is how I ended up here. So this is a list of all of the jobs. So that's where we start. Now I can go and scrape that list for all of the URLs, which is what this is doing here. So it launches this page, extracts all of the URLs, stores those into a spreadsheet by first finding the first free column. Then I initiate a variable so that I can increment the rows. And I also initiate another variable that was the last row so that I can do a regular loop because this time I'm going into a spreadsheet And I don't necessarily have a ready-made list. So I have to generate the list, put it in a spreadsheet, then count those items. So the loop is going to have a start and an end this time. So I've got two variables. By the way, all of this is over here on the flow variables here. So first row, which is just row, then last row. Then I'm actually launching another Excel, which is now where I'm going to store the data. So the first Excel is being automatically generated by the extraction of the, of the hyperlinks. Then a second Excel is opened, which is a predetermined one, or you can also generate a new one from scratch. But in this case, I had one and it's just the content where I'm going to store it. I'm then activating a cell in Excel for that worksheet. So it's going to the one I just opened and selecting row 1, column 1 as the active cell, which is where I'm going to start pasting data. Then I'm going to close the browser, which is the original list, and I start the loop. The loop is going to read the first row, row 1, column 1, which is the original list here. Then it's going to go to a new Chrome window, browse to that URL that was extracted from here, extract the data from that page, close the page, write the data to the new Excel, the second Excel. And then select the next active cell, which I've done by a very easy function. I'll show you, it literally just goes down one. So that way when the next loop comes around, that's the active one and it'll paste it there, increases the row variable, variable, sorry. Then it'll go to row 2, go to that page, extract, drop it in the next active, go to the, go to the next cell, and so on until it gets to the last row, which was determined by the number of rows over here. So basically I'm just going to kick this off and then I'll stop it after just a couple so I can explain really what's going on. Since I'm starting a new, a new Chrome and a new Excel, I'm just going to hit the play button. At any point you can activate this. Now, for those of you that might want to do this as an app, it's actually pretty easy. You can, once you have a Power Automate desktop workflow set up, you can go into your automate on the cloud and generate an app, a Power App, that calls this script. So you can actually have literally your own app. And by the way, those apps— that's kind of what I'm going to be working on next here— those apps can do multiple things. It can start a workflow, it can alert someone, so it literally can generate various other actions in the cloud, and it can also call on applications and so on. So you're essentially stacking your workflow from Power Automate Desktop onto other apps using an online app. That means that that lets you connect it with Zapier or Azure or any of the others. So we'll talk a little bit more of that, about that in future examples, but the idea is basically it's a no-code app that you can create that launches your workflows and launches other apps. So makes it, you know, even one-click friendlier. Right now I just hit play and it started. And as you can see, what it's actually doing is it's browsing to each one of those pages where the job is and then extracting the data, putting it in Excel, and then closing that page. There's, uh, probably 100 or so. There's 105 rows. And right now it's only on number 10, so this could take a while, which means I'm going to have to put an end to it artificially. But if I let this run, it'll essentially go through this loop over and over again until it gets to the variable last row, which is 105, because it counted that many rows in the extraction. So I'll show you the results. This spreadsheet is the spreadsheet that has all of the URLs of the jobs, beginning with the main page, and then here's all of the URLs of the jobs. It's counting the last row, which is 105, and setting that variable. Then it's opening up this other spreadsheet and it is pasting. Because it's just pasting and it's not doing any kind of formatting, which by the way you actually could do, It's not doing any of the wrapping or anything like that. So let me shrink this here. So we got about, looks like 10 deep and it's pasted it exactly as I expected. There's the job title, there's the extra header text, location, the paragraph of like the description. Then there's the must-haves and the nice-to-haves and it's all in here. If you're wondering why it only imported one row, it actually does have carriage returns. So it does have multiple rows. It just looks like just one row because I just shrink it down to 14 pixels or whatever. So anyway, that's the data. So this would now have 105 of them and they would all be in here had I let it run. So real quick, close this. Close that and just show you some of the guts of what we were doing here. So you can see how all this got put together. The first part of that process was to go in and launch the original page, which is just a straight up open a browser and go to this page. That's it. Then Extract the data. And this was also very straightforward, like what we've done before, where you right-click and look for the elements. And because they're all in here, all I had to do was just right-click. And in fact, I'll show you real quick. All I had to do was just right-click here. It's not letting me do it right now, of course. And then you would see the A, which is the hyperlink text, and then just extract the href from there. Stores that into the first— I'm sorry, it stores that into this Excel. It's now getting the first free column of this, which is counting all the way down to 105 so that we know how to set that variable. Setting a variable for the first row, setting a variable for the last row, then launching the other Excel file, which is just a blank sheet named jobs and activating the cell at the top of that. So to do that, that's inside of Excel here. So everything else we've already talked about before. I think we talked about Get First Free Row before. If not, um, that's also in the advanced here where you can see Get First Free Row on Column or First Free Row on Column from Excel. So that it does that. The other one that you see here, it launches Excel. You browse to a file so you can actually specify when you do this where you want to go, just direct, you know, launch there. If you're only reading it, you can use read-only so it doesn't write to it. But in this case, we're launching it, and if it's password protected, you can actually put your password in here. Pretty cool, right? Then the Activate a Cell is just going to say, okay, in this— basically in this Excel spreadsheet that we just created, go to the first column in the first row and make that the active one. That's so that when we start pasting, it pastes in row 1, column 1. Then it goes into read from Excel, which is now the list of jobs. That's the Excel created up here, and that's easy. Just click on Excel instance, which is the one that you created in the automation, extract the value of a single cell Column 1, and then go to row. The reason we're going to row is because row has been set as 1 at the very beginning, but later on we increase row by 1. So the next time it loops, row will be 2, and so on, 3 and 4, until it hits last row, in which case the loop starts— uh, stops. Sorry about that. So it grabs that job URL, goes to Chrome, same as before, launches it, extracts the data. Now we're looking at a jobs page, so it basically is pretty straightforward extraction. Then it closes the browser so that this doesn't stay open. That way I don't have 105 browser windows open like happened last time. Learned that the hard way. Then it writes that data to to that second spreadsheet, which is the job spreadsheet. And it writes it in column 1, row whatever is below active. That's the last piece here, which is to activate a cell in that Excel spreadsheet, to activate a cell relative to the currently active cell. So at the beginning, row 1, column 1, row 1 is active. Then the next time around, it's going to go below row 1, column 1, and it's going to increase— in other words, go down by 1. So now column 1, row 2. Next time around, column 1, row 3. And I don't even have to set a variable for this because it's literally just going 1 down, 1 down, 1 down, 1 down until the loop stops. And that's it. So that allows me then to extract all the jobs and grab all the text so that I can then send that over for some analysis and additional processing. The other thing I wanted to show you today— let me check and see real quick here if anybody has joined. I don't see anybody joining us here yet. So let me check on Facebook questions. No Facebook questions. Okay. Feel free to ask questions if you want, or come on board. Remember srcn.co/zoom if you want to join me live and go through an example. So the other thing I wanted to try is from the early days when I started talking about Power Automate, Desktop, one of the ideas that I gave you was that we can fill out a form. So repetitive forms, when you have to fill out information in a form over and over again, like for example, you are creating, you know, adding a job or something like that. So for that, I'm going to just use one of my own forms that I created. But this works for any form, and it works if you have to submit candidates through a portal and you have to create all the information in that portal, you know, around your company, your name, all that stuff. So it would work with that as well. Imagine anything that is a web page that has a, um, that has a bunch of, you know, fields and dropdowns that you have to select. For this, we're going to create a brand new workflow. And this is a page that is a request for sourcing. So when someone on my team in the company wants to request the assistance of sourcing, they have to complete this form. And it's a pretty quick form, but it does take a little bit of time. So here's a flow. Sourcing request form completion. You know what, I forgot to start video sharing again. Sorry about that. Let me grab that video sharing. Okey-dokey, there we go. So all I did is just I started a new one, and that's this one here. It's a blank, it's a blank, um, flow. That's, that's all I did, just created one called Request Form Completion, and the form is on the left-hand side. So for this, we're going to use web automation, but now we're going to be doing web form filling, which we haven't talked about. So for this one, there are segments like focus text field on web page, populate text field on web page, set a checkbox, select a radio button or a dropdown, or push a button. These basically, these are all the things that you would normally do in a form. Obviously, we have to tell the browser, tell sorry, the Automator where we're, where we're going to go. So the first thing we really need to do is to open a new Chrome and either attach to running— trying to drag this and it's not— there we go. Okay. Either browse directly to the page or just— I'm going to use attach to existing because it's already open. So foreground window, that's basically this. So now Power Automate Desktop knows where it's going. Now we can actually complete the form. The first thing here is it's asking for your name. A lot of these are going to be repetitious— your name, your email address, and so on. So we're going to focus on a text field and the UI element is going to be— this is similar to the extractor. It's a little interface. Now you just Instead of right-clicking, what you do is you actually Ctrl+left-click, and you see it come up here, and that's the one that we want. So now it says— wait a minute, I just added it. Mouse over the UI element to capture it and Ctrl, left-click to add it here. There we go. Okay. It's not registering. Last time I did this, it would just bring over that UI element. I'm not really sure why it's doing that. Maybe I need to get the details. No, I don't think I need to do that. Okay, interesting. Well, let's use an alternative. Hover the mouse over an element, see if that pulls up. Still doesn't register. Okay, I think I know what might be going on here. I'm going to close out all the others. Here and see if that makes a difference, and maybe even close this. I think it might be getting confused. There we go. Should no longer be confused. Let's try this again. Focus text field on a web page. Add to element. It selected it. That's the right one. Confirming it. Ah, okay. This is frustrating. I'm sorry, guys. It literally should just appear right here and it's not for some reason. Hmm. Not sure what to do. I'm not even able to like browse to this here. See if I can do it under form filling. Now, this is going to be— this is going to be for a window on your computer. But let me see if for some reason it'll do it that way. Text field. Well, they're in here. Don't ask me how that happened, but they're in here. It shouldn't be in here because it's a website, but okay, whatever. So there it is. That's the first one. Then I can populate text field in a window here. And I'm going to input the text. Or I can actually have created this as a variable. I can do that as well. And then you would have that stored, so it would be in there. I think I hit it a little bit too early. Okay, there we go. Okay, then the next one should be my email address. Same thing, just another one here. And have to add a new one. There we go. Okay, did not select it. Try that again. Oh, it selected the whole thing. I just want to get this one right here. That's the one. This one right here. That's the one I want. Okey-dokey, finally. And then I should be able to select it here. Oh, that's frustrating. It's not showing up over here now. Ah, yeah, okay. See if it does it now. That is so weird. Okay, now it shows up over here where it wasn't showing up before. Whatever. All right. Chalet.stackroll@aspirant.com. Make sure I don't save it too soon this time. Then it should be able to drop down from here. So let's select— I'm going to try it with web, which is the way it's supposed to work, right? Select, select, set. Sorry, not select, set dropdown list value. It should work here. If it's not going to work here, then I'll do it with web UI. Add a UI element. And 37. Okay. Save. And last but not least, click the button. This one here. So that should also be just a simple press button on web page and it should recognize it very quickly. I've done this a few times already, so I don't know why the other one ended up being in the window, but there you have it. The mysteries. Oops. There we go. No, not the fabric. This one, this button. That's what I want. Button content. Done. It saved it. Yay. Okay, so now we can actually run the— run this. Now there's more to the form. When you go to the next page, there's more detail, but I just wanted to show you an example so you can see. So we're going to launch the Chrome, we're going to focus the view on this. Apparently we populate a text field in a window for the first one for some reason. Then we can switch to web page, I think, because it's— I don't know, I'm not— I'll research that and find out why. So focus on the window, then the web page. The first one, it fills this out. The second one, it fills this out. The third one, it chooses this choice. And then the fourth one, it presses the button. Let's test it out and see if it works. Success. Success. So it did not recognize that last one. Okay, so that was an error. Let's see if I can fix that error. It may be because it didn't recognize the option name. So let's see, 1, 2, 3, 4, 5. Let's try it based on index, which would be essentially the count. So we'll do 5 and see if it works now. And I'm wondering if I need to not include focusTextOnWindow, but let's just do it for now with that because I don't want it to break, but it may not need to focusTextOnWindow since we just launched the Chrome browser and we told it that that Chrome instance is the one that we want to use. So maybe focusing on that window is not necessary. There goes— it put in my name, put in my email, and it did not select the option. Okay, so how do we get this one to select? Let's see if we can do— I'm— if you're wondering what I'm doing, I'm looking at the source code to see if I can find Ah, can't find the element there. That's all right. All right, let's see. UI element, select option by name. Not letting me choose anything else other than the name. So I'm going to inspect this and see if I can actually pull it up that way. All right. Well, there's that one choice. Div. That's what I put in before, right? And it's not letting me do an index count from here. It's saying this is 5. Which we already know. That's the position, but it didn't let me do it by selecting that. Let's see if this actually works. It might not. Oh, now I can't unselect it, huh? Hmm. Okay, well. Maybe it'll let me clear it next time. So other than getting stuck in here, everything else seems to have worked. It just doesn't want to select this option. So we'll solve that next time. But now you see how easy it would be to create a form. And of course, some forms may be a lot longer than this. They might have radio buttons or they might have checkboxes. I'll solve for the dropdown and we'll talk about that next time. Because it is time to go. That's it for our session today for Shelly's Alley and Power Automate Desktop. Hopefully you got some benefit out of this, at least with the finalizing the frame extraction and multi-page extraction into a spreadsheet, which is pretty cool. A lot of times you see things out there that are in frames, unfortunately. And now you also know how to start filling out a form, which would be useful if we could figure out the dropdown, but we'll have that solved for next time. All right, everybody, have a good weekend. Take care. Bye-bye.
More from Shally



Scaling Talent at Hypergrowth: Leadership, AI, and Hiring Excellence with Cindy Nicola