2024 Frontal Secrets | Hair Tips & Tricks ft West Kiss Hair💆🏽♀️
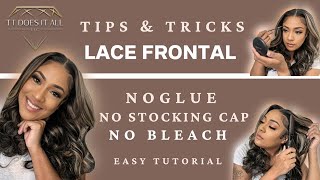
LaToya Kelly installs a West Kiss Hair lace frontal and shares styling tricks: using a rotating curling iron for waves, a makeup powder technique to hide knots without bleaching, and a powder-fill method for thick hairlines. She rates the wig five stars for softness, color, and lace blend.
Chapters
Hey everyone, it's your girl TT Does It All, and today we're going to install this lace frontal wig. And this is from West Kiss Hair. It came pre-colored, pre-plucked, and ready to go. This wig did come pre-plucked. Those tiny knots are one strand per knot, and that's what makes super nice knots on front bundles. This came with 3 combs already installed, and it does have an elastic band already attached to it. The curls were super, super bouncy, and I actually did not style the back of the hair at all. The curls were already given. But this is the one trick that I use so that I do not have to bleach knots. The foundation is super, super important to use a particular kind because of the texture of that foundation. It really, really makes a difference. As far as it blending with your skin and also looking like scalp. So drop a comment if you want to know which brand this is, where it came from, if you don't already know. But drop a comment if you want the details for that, and I will respond with that information. I cut a jagged line across the lace just to make sure that it's not a blunt line across my head, and we are going to cut off those extra flaps above the ear and then get to molding back my edges because I've had these braids in underneath for like a week, and I was like, okay, got the wig, let's just go ahead and make this work. Plus it's a middle part, so I combed out the section that I want to use for my baby hairs, and since I didn't have anyone else to hold it, I just went ahead and rubber banded under my chin. Since I am not using any adhesive, I'm going to go ahead and use my baby hair cream just to lay the hair and the edges of the lace temporarily down. Now don't judge me for using these huge scissors. I could not find my small ones, so I had to use what I had. Okay, you got to use what you got to get what you want, boo-boo. As you saw earlier, I did cut the lace a little bit ahead of the hairline, so that gives me the flexibility of customizing where I cut it off while it's on my head. So after putting on my West Kiss headband, I am going to just use my hot comb to mold my hair the way I want it, and I want it to kind of go up over towards my face. So I manipulate the hairs basically with the heat, um, from the hot comb. I use my blow dryer to just get it to stay where I want it, and then of course use those hot combs to get it where you want it to stay. Now this curling iron is a game changer because it lets you rotate it without actually having to twist your finger. So if you are like a horrible curler, which a lot of my customers are like, hey, I do not get it, I cannot curl my own hair, this curling iron pretty much does the job for you. So if you want that, I'll add that link in the description so you can go ahead and get you one. I am only styling the front of it because I want my hair to kind of lay a little forward and have that kind of water wave look. But the curls in the back, I really didn't have to do anything at all to because they were perfect. So chopped a little layer into the front just to give me that sexy beach wave. Yes. And then I am cutting the front of that baby hair off because I would like that hair not to be styled, and the rest of it because it's getting cut off anyway. So I'm gonna go ahead and see what these edges are looking like. Let's look at how this lace is lacing, okay? Because I know when I probably was laying it down, y'all was probably like, uh-uh. This is not gonna look okay, but slow motion for you. Let's see what it's looking like. It's giving, it's giving, it's giving scalp. Drop a heart if you still watching and you see that scalp. I'm not done making it look like a scalp, okay, because this is not the final touches. I am gonna go ahead and continue these baby hairs because Lord Jesus, they are so tedious, and you really have to look into the mirror from a distance and up close because sometimes you can look at it up close and it could look amazing, and then you look in a further mirror and it could look super, super thick. So you kind of want to take your time with this. Baby hairs are just— they're a genre of their own, okay? But I am going to blow dry those, and then I'm finished. I think I'm finished, and Not quite finished. I still want to make those finishing touches. Y'all want to see the finishing touches because there's more of a way to make this part look like a part. I'm gonna get some interaction with you guys. How do you like the hair? It's soft. You see my fingers are going through it. I have not washed this hair. I have not bleached the knots. I literally just put it in and you saw the entire process. Like, I didn't have to do anything extra to it. The color, the layers are all just laying in a perfect spots like the sun. I'm sun-kissed, like, mwah! So now I'm going to show you the difference between the makeup trick versus before. So on the left you'll see before, on the right you'll see me doing it. And as I'm doing it, you can slowly see the scalp sneaking in. But this is one of my tricks that I do so that I do not have to bleach the knots It's so fast, it's so easy, and it is very inexpensive because your powder lasts forever. If you are caramel or chocolate, drop a comment, let me know, and I will send you a link for the shade that matches you best. We all may be different complexions, but our scalp doesn't get a lot of sun, so a couple of shades match for a lot of people. So this is definitely something that is not required. I just wanted to see what it looked like on camera, one side with it and one side without it. And then I have another, um, couple of tricks just in case your hairline is looking kind of thick and you don't feel like doing all the tweezing, or you're afraid you'll over-tweeze, or you just really don't know how to use the bleach and you need something simpler like makeup. This is for you. So this makeup trick is basically me adding in little gaps that kind of make it look more natural. So I am going to again do the comparison side by side so you can see what it looked like before I put anything on it versus afterwards. And y'all know I'm gonna keep it real with you and just be honest. I like it before the makeup better than after in the parts. Now the middle part, yes, I feel like it definitely needed it, but for the baby hairs and stuff. I really don't think it was necessary on this particular install. It looked good, don't get me wrong, but I don't think it was necessary. And then there is one more trick that I have not shown you yet. Right now I'm just kind of playing with it. I'm playing with those layers. I'm looking at the color. I'm just kind of messing with the movement and running my fingers through it and making sure the look is giving. And y'all let me know what y'all think. I think it's giving, but you know, y'all could be like, eh, no. So this is the final tip slash trick. If you are like, I don't want to tweeze this, but I do think that it's looking kind of thick, you can add a little bit of that powder to the inside of where that thickness is showing, and it definitely makes a difference. So if you look at it from the side, it just kind of stops that line from being so thick. And then this part, I am just going through here with my comb to kind of straighten it out. Now that part all the way at the tip of it, I'm not even going to try to do it because my forehead will be melted off, sweetheart. But for the other parts, it does smooth it out and make it look a little bit better. I am such a perfectionist when it comes to these type of things, and it will take me like 6 hours to do a frontal and really slay it how I want to slay it, which is why I really don't be offering them anymore. So, um, I love this look of it going forward, so I'm just gonna apply a little bit more heat to some certain sections just so it can give what I wanted to give. I really just loved this look overall, if you can't tell already, because the video could have been over, but I was still sitting here playing in my dang on hair. The wig is amazing. I got to give it 5 stars, and I give it that because number 1, it's soft. Number 2, it came already styled. Number 3, it's pre-plucked, so I didn't have to do anything to that hairline. Number 4, the color is on point. And number 5, just overall, like, the lace melted right into my skin. So 5-star wig right here. I hope you guys enjoyed this. Make sure you thumbs up this video and drop a comment for me. I know it's been a while, but I am back and better. Okay, no, but seriously, thank you all for watching so much. I love y'all. I appreciate y'all throughout all these freaking years. See you on the next video.
More from LaToya






St. Louis, Missouri - Lasts 4–6 months - Takes 4–6 hours - Investment: $3,000 www.TTDoesitall.ai


What are #ktips? Here’s your answer! Schedule at www.TTDoesitall.ai 🩷 #extensions #ktipextensions

4-6 hours install and last 4-6 months #ktipextensions done by the right stylist the right way 💕

Located in St Louis Missouri 💝 Consultations available www.TTDoesitall.ai 💕#ktips #natural

K Tips take 4-6 hours to install and last for 4-6 months with proper care! #ktipextensions