2024 Tape-In Tips & Tricks ft YWigs
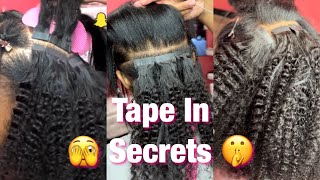
LaToya Kelly walks through Y Wigs tape-in installation for stylists. She covers sectioning (2 cm max), exact placement with a rat-tail comb, sandwiching technique, and custom-cutting uneven rows. She stresses thin partings to prevent separation and angling side pieces toward the face instead of a horseshoe shape.
Chapters
I love how soft it is too. It's so— the hair is so soft. Hey everyone, it's your girl TT Does It All, and I'm going to share with you these free tips and tricks that I have learned through trial and error doing tape-in extensions using Y wigs tape-ins. So you might be asking yourself, is she really going to give us the tips and tricks, or is she going to tell us to go pay for something somewhere? No, I'm not gonna charge you for this because I didn't pay to learn this myself. I learned through trial and error, and I have said since 2006, the beginning of my YouTube channel, that if I learn something for free and I'm watching YouTube videos learning it from everybody else I will share it with you all, and I will share with you what I learned through trial and error. So I didn't pay for these tips. I learned it on YouTube and trial and error. So why should you have to pay, right? Right. So stay tuned, keep watching, because I'm going to go into detail. And this is an advanced video. If you do not do hair extensions, this video is not for you. This is for people who already do hair extensions. They already know what tape-ins are, because I'm not going to go through the ins and outs unless you drop a comment, tell me, hey, I need you to start from scratch for me. Okay, so this will be not beginner friendly. This is for people who know extensions, okay? So this is the canvas that I'm working with here in the middle. This is what she came with, and she is natural, obviously. So I did straighten her hair out and clip her ends because you have to in order to do the tape-ins. All right, you guys, so we are starting with some tape-in extensions. We have 3 packs from Y Wigs, and we have an 18-inch, a 20-inch, and a 20-inch. And it looks like these are packs of 40, which I love. Um, so I am going to show you what all I am using and why. This is a clamp to make sure that that tape-in is super, super, super secure. These are to hold the hair out of your way once you're parting. You know, you get those little strands, and those are pretty tedious when it comes to tape-ins to have out of your way. You really, really, really want to have a rat tail comb with a metal tip because it is very important when placing your tape-ins. It just makes it a lot easier and smoother. And you want to have your clips to to hold some of the hair out of your way. So yeah, we are going to get started. So the way you part these sections out is you want to make sure that you have enough hair to cover whatever is inside of it. So I sectioned out the bottom half, left and right side, and the front. And then I take about a— about 2 centimeters thick of her hair, and I part that section out at the bottom. So this video is really, um, going to be really detailed about placement of your tape-ins. So don't be afraid to cut the tape-ins if you need a custom piece, because I'll show that here as well. This is why it's important to have that metal rat tail comb. As you see, I stick it at the very bottom of that tape-in, and that makes it so much easier to place a tape-in underneath the client's hair when you're applying it. And you want it to be just at that bottom part. See how I'm measuring? I put the tape-in up to her hair and I measure like how wide is it, and then I section the other side off and away. And this— I'm sorry, this is a bad view, but you'll see how I place it right up under there. And I place it right at the part. And that rat tail comb, I then take it off. I use the rat tail comb to smooth her hair into the adhesive on the tape-in. And then you kind of sandwich the hair in with another tape-in on top of it. You want to make sure that you clamp your tape-in using the tool that I did link in the description and I showed earlier. You want to make sure that you clamp the hair in it to make sure that the hair is really fused into those tape-ins. And, um, another really, really, really important tip is you don't want to make your parting too wide because if it is too wide, then the tape-ins won't stick to each other and they'll come off. So you want to make sure that the parting space that you have is thin but not too thin. So I would say 2 centimeters at max. So you see I'm placing it, I'm using that rat tail comb to smooth it in again, and then I'm going to make sure I section off that extra hair, and then I'm going to sandwich it in, just making sure her hair is in it. And you don't want your parting too thick, because if her hair is too thick between there, no matter how much you clamp it, her tapings are going to come right out. All right, so, so far, y'all learning anything? If so, drop a comment and let me know. Make sure you thumbs up this video too, because YouTube, you know, they messing with the algorithm. So the more you comment, the more you thumbs up this video, the more my videos will show up at the forefront for you. All right, all right. So I'm just speeding through this next one, and then I'm going to lift them up and show you what it looks like underneath the tape ends. And this is, of course, the first row. So you, if you're like me, and you probably are if you came across my video, you like clean cut smooth, just crisp hair. And if you see when I lift these up, look at how clean the part is. There's no pain for her. I'm always asking my clients, is your head okay? Are you hurting? And everything. So I make sure— just make sure that you place that tape in right at that bottom part. Okay, so here I'm showing you what I mean by how far up to make your part. When I say how wide your part is, I mean from top to bottom, how much you're parting out for those tape-in extensions. And remember, you can watch this video over and over and over to see exactly how much I sectioned out. But those True Barber strips, this is what it's good for— those little flyaway hairs. It's perfect to keep every single strand out of your way because you do not want the tape-ins to have other random strands of hair in your way. When you're doing your hair extensions. So one more tape-in, and then we're going to go to the next. So you see me placing the metal comb at the end of the tape-in. I'm placing it right where the part is, placing her hair right on top of it, smoothing her hair into the adhesive. I'm going to use the end of my rat tail comb to just make sure all of the extra hairs are not sandwiched in, and then I'm going to use that next piece sandwich it on top of it. We're going to clamp it in, and after we clamp it in, we're going to just finish off that row. And I'm going to show you all what it looks like after those rows are finished. And it's so pretty. Again, their hair has to be straightened out, and I didn't explain that at the beginning. It has to be straightened out in order for the tape-ins to be placed nice and smooth on the root. So one thing that I learned was that you do not go in a horseshoe. So what I thought was you kind of go in a U-shape with them so that some can face the front, but no. Once you get about this far up in the back, you want to start directing your side tape-ins to be over the ear and kind of towards the face a little bit. So when it does lift up and lift back, it is all the way up. So you see how I angled these? I didn't go in a horseshoe. I literally just started a new part to the side, and this is a trick, okay? So there will come a time when you find that your row is not even, so you can't put a full tape in there. So you will have to cut a tape in, and that's easy peasy. So this is what you do. You basically will cut— you'll sandwich your tape in while the tape is still on it, and you'll cut it, measure it and cut it, and then you'll just use that little piece there. And use the extra piece that you sandwiched before cutting that tape. So there is a little white strip of tape that comes on them. Before you cut that white strip off, measure it up to the client's head and then cut it, and then use that sandwiched piece. And I use the left edge while I'm on this left side of her head. I use the left edge of that piece, and you see how it just perfectly completes that row. So sometimes when you come across a row that has not enough space for you to put a full tape-in, you'll just leave that hair. Don't leave that hair. Just custom cut you some tape-ins to fit that piece. And here's a closer view, and you can see that I used it on both sides. That front piece closer to her face on our right, that is a cut piece as well. So don't be afraid to cut your tape-ins to make them custom fit your install because, um, they're flexible. So I'm going to go ahead and show you how I cut those pieces. So make sure you take 2 tape-ins, keep the tape on them, have them sandwiched together, and just put it up to the client's head to see how much you need to cut off. And use that measurement, take both tape-ins because you need the sandwich piece. So take 2 tape-ins, just cut them where you did. And then there you have it. And you see the row underneath it was custom cut as well. So that is how you would deal with a row that stops before you need it to. Okay, so there's another tip. What y'all think? Did y'all know that? Would you have done that? Have you already done that? Um, drop a comment, let me know. Keep, keep me updated with how y'all thinking. And you see the different directions now that I'm raising it up. Um, so I am going to go up a little bit further on this side, and then you start back in the middle. So you don't continue up the sides the entire time. You want to do it just enough and kind of just gauge it with your eyes and look at how, um, a ponytail would look. You don't want the sides to go too far up because you want some to go straight back for that ponytail as well. So I'm just going to keep going up the center now that I'm done with each of those sides. And yeah, I'm just gonna keep going. So drop a comment, ask
More from LaToya






St. Louis, Missouri - Lasts 4–6 months - Takes 4–6 hours - Investment: $3,000 www.TTDoesitall.ai


What are #ktips? Here’s your answer! Schedule at www.TTDoesitall.ai 🩷 #extensions #ktipextensions

4-6 hours install and last 4-6 months #ktipextensions done by the right stylist the right way 💕

Located in St Louis Missouri 💝 Consultations available www.TTDoesitall.ai 💕#ktips #natural

K Tips take 4-6 hours to install and last for 4-6 months with proper care! #ktipextensions