2024 The Correct ✅ vs Wrong Way ❌ to Curl Extensions
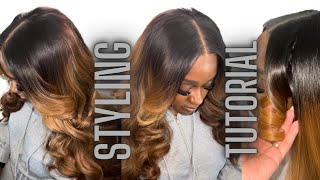
LaToya Kelly shows how to curl hair extensions with a lace closure using a curling iron or flat iron. The key: curl away from the face, not toward it. Proper layering and cutting matter for volume, and your dominant hand affects which tool works best for you.
Chapters
Hey everyone, it's your girl TT, and this video is being brought to you because of an Instagram video I made. And this will be a full sew-in with a lace closure, and, um, I am using my dome cap method, which I have other videos and details on. But I created this video because a lot of people had questions about styling hair, and I'm gonna be extremely transparent with you. This video was an accident. I am about 7 months pregnant— well, I'm almost 8 months pregnant now at the time of this recording. Pregnancy brain is real, and sometimes I do things backwards or I do things out of order. So when I went to curl one side of her hair um, I just start curling it the wrong way, and I was like, oh my God, no. But then I was like, oh, this is good content. I can make a video of the right way versus the wrong way to curl somebody's hair. And, um, a lot of people had questions, so I created this video. I actually recorded a lot more than I uploaded. So, you know, the, the objective is record a bunch of content and make clips of content out of that material. So all of this was recorded, but all I had uploaded was me doing the wrong way versus the right way of curling somebody's hair. So a lot of this was recorded either for my Dome Cap Method class that I have online or just content to upload. So I'm doing all of this, and then I realized that styling was something that a lot of people aren't showing anymore, and how to style. Like, I have a lot of videos up of installs, but how often do I teach how to style? So here's where the first part of the accident happened. I thought I was recording that first curl to show how I turned my curling iron, and I found that I wasn't curling. And she's like, let's just go to the other side, you can start fresh over the other side. I'm like, I don't want to because this is perfect, it's right here. And then I'm like, you know what, you right, I'm gonna turn you around and we're gonna go to the other side and I'm gonna try this again. But then that's when the pregnancy brain kicked in and I curled the first curl the wrong way. And I'm like, what am I doing? And I looked at the curl and I'm like, this curl is not the way it's supposed to be done. But I kept the material. I mean, there was no point in stopping or deleting because like I said, it was like, wait, this is a learning moment because this— and the intention of this video is to show how to style or how to curl for this particular style. So what better way to teach that than to also show the wrong way? So I'm curling this, and there is a way to curl with the part that's hanging towards your face. My curling iron should have just been the opposite direction, like an X. So the curling iron is facing one way, just imagine making an X with the curling iron the opposite way. If I did it the opposite way, facing her away from her face, it would have been perfect. But this is completely wrong. It's facing towards her face, so the curl would be facing towards her face. And when you see I take the curling iron off, the curl is just all kinds of wrong. Like, it's just— it should have been the opposite arm of the X, if that makes sense. So as you see here, the curl is going to be facing her face. The direction of the curl spirals towards her face, which is— we want it to spiral away from her face to our left. So if you see now, I'm going to do the X, the other arm of the X, right? So I'm going that other route and I'm curling away from the face. This is the correct way to style hair away from the face. So I got a lot of comments that were like, there is no right or wrong way, it depends on the style. The only way I could see curling towards your face going in your favor is if you're doing, um, waves. If you're doing the beach waves, that's about it. And usually that's kind of curling like a wand curl type. So this is the way to get that curl uniform away from your face. So again, the video was originally recorded to be a styling video, and with that I wanted to show different irons and different, um, ways to get that same curl. So I used a 1-inch flat iron and I curl away from her face, and I'm going, going to achieve a similar curl going away from her face, except this time I'll just be using a flat iron instead of a curling iron. So in the process of editing this video, I can easily have cropped this part out with the curl, but I want you to see that not every time you put a curling iron or a flat iron to the hair will it come out right. Sometimes you have to extend your curling iron or your flat iron outward instead of downward. So when I was going down with that curl with the flat iron, the hair kept coming out the top. Once I extended the flat iron out away from the customer's head instead of down, it went right. And you see, these are two different methods to curl the same way, and they just coiled right in together. So on this next piece in A difference with curling with a flat iron versus a, um, curling iron— the curling iron curls don't get as tight as a flat iron to me. Um, no matter how much hairspray you use or how long you leave the curling iron on, the flat iron curls just last longer. So if you're someone who doesn't know how to style your own hair at home, you would opt for something that is tighter up front so that it has time to fall. So this way I'm curling exactly the way I curled with a curling iron. So at first I was extending it out, but then I decided, you know what, let me just curl under like I did with a curling iron, except this time with a flat iron. And you see the curl came out the same. And a lot of times you will not see the bounce you want or the layer you want until you cut. So I'll show you a little bit of me cutting some layer into the front to give it that, um, wave to the back that we want. But you will have to add some layers into it. So if you have a customer who has like 26, 24-inch bundles and they want this look but they don't want to cut their hair,— it's going to be a no because the curls are just going to lay flat. They're not going to have any type of volume.
I'll do another video on cutting if you all want me to.
Drop a comment and let me know. But for now, this one was really, really geared solely for the styling with a curling iron versus a flat iron. So you see how it lays differently than the first time simply because I added some layer to it.
So now I'm on the right side of her head, and I'm going to show you some underhand curling with a flat iron. This time I'm using a smaller section, and I'm going to curl the same way I curled that front piece, except I'm using a flat iron. In the other piece, I use the curling iron. So I'm curling down, I'm making sure the hair that feeds into it is straight and not tangled. That way when the curl comes out, it's nice and smooth. And I go all the way down to the end. The end I curl faster than I would the root of the hair because the end is thinner than the base. So Now I'm showing you an overhand curl. I'm still going to the right— or I'm sorry, to the left now because I'm going away from her face and I'm on the right side of her face. So since I'm on her right side, I'm going to the left away from her face. Either way, if I curl overhand or underhand, I'm still going to go the direction not facing her face.
So that curl I just pulled is curled with a curling iron. The rest of these are the flat iron. And I am right-handed, so it is a lot easier for me to curl the right side of someone's head with a flat iron than it is for me to curl with the left. So sometimes I can make the identical curls on both sides, but sometimes I can't., and it's easier for me to use the barrel curling iron on the left side so I can get the exact same look as the right side. Since I'm right-handed, it's so easy for me to curl overhand or underhand on the right side of someone's head. The left-hand side of their head, sometimes I will use the curling iron so I don't have to use so much technique with my wrist. So everything except for that first curl at the front is curled with a flat iron. And now I'm going to show you another curl with the curling iron. And I'm still going underhand, and I'm bringing the, the end of her hair away from— I'm sorry, towards her face. So you see the hair that is feeding in is in front of the hair, and it will make everything just fall away from her face. I know that's weird, but if you direct the hair and feed it into the curling iron towards her face, it will fall away from her face. But you're still curling underhand away from her face. The curls are still going to the left while you're on the right side of her face. So watch how it falls out. You'll see that it just curls the same way as the rest of the curls. The pattern is the exact same as the ones underneath it. It's just a curling iron versus a flat iron. And you see how it lays the exact same. The end of that hair was just fed into the curling iron towards her face.
So again, this was her initial install, and I am just going to repeat the curls until I'm finished. But at the end of styling her hair, I wanted to show how sometimes after you finish curling it, you see some spots that didn't comb out the way you wanted it to, aren't laying the way you wanted it to, and it's okay to go over that section, that piece, until you get it right. A customer would rather leave with everything like on point and laid than out of place. So if it takes you a little bit longer because you're a perfectionist and you want every curl to lay the right way, your clients will end up loving you for it in the long run. So, um, The second part of this video is actually going to be of me, and this is just me finding pieces that needed to be re-curled that I didn't like how they were curled. But the second part after this piece will be of me showing and talking while I'm doing the touch-up I didn't show any of the process of the touch-up because this was a follow-up video to the styling curling left versus right side of the head. So in the touch-up video, since I already had that first curl done on the right side, I was able to show the first curl on the right side, um, and then I'll be able to talk with you through it. So again, don't be afraid to brush, brush, brush, comb, comb, comb, spray curl again because your client will be happier if the end result is perfect versus, um, you took your time— or they wanted to be perfect and you took your time versus rushed.
So after all is said and done, let me know what you guys think, if this is helping you or if it's like, okay, you talking too much and not showing enough.
Um, let me know what your thoughts are.
Okay, so since my last video, everybody wants to see how I curl the right side. So she is back for her touch-up for her lace closure, and, um, I am going to show you how to get this right side together. So when I say the wrong way to do it, you always want your curls to go this way. You never want your curls to start spiraling facing this way and start curling that way. That's just not right. So you always want them to start your— start the direction of this way, right? So not this way because that's stupid. It really is, it's just stupid. And they're not uniform, so you want them to go this way. Just gives it that pretty wave look. So to curl her hair the wrong way, I would literally have to start curling this way.
So this is the right side of her head.
So if I was to take the direction of this curling iron to the right, it would be wrong. I want to take her curling iron to the left. So that's my right hand curling this to the left. So this works so that when everything is good and curled, her curls flow that way. Out of her face, away from her face, all uniform. So I'm gonna curl the second one wrong and you're gonna see how it lays. This is gonna be so dumb. It's hard for my arm to even do this, right? Uh, okay, this will be the wrong way.
Which a lot of people do because it's so easy.
It's so easy for your arm to just go towards your face, but it's wrong. So curl is beautiful.. But this is wrong. Like, why would a curl go this way? It just doesn't make sense. So now I'm going to curl it the right way, away from her face. My curling iron is spinning to the left on the right side of her head. And I'm turning the curling iron to the left. Don't be sniffing. I'm joking.
I think—
can I breathe? All right, so you see how this flows. So when all of this side is done it'll just have a pretty flow. That's how it's supposed to flow.
All right, you all, so drop a comment, let me know what you think. If you really enjoyed this video or learned something new, please thumbs up this video. Y'all know how YouTube is messing with this algorithm, so just make sure I stay at the top of your feed by dropping a comment, thumbs up this video, and share it with a friend if you feel like there's a friend who curls her own hair at home and needs help. Hopefully this video can help you or her.
And, um, yeah, what's next?
What's new with y'all?
I'm about to be taking a K-tip course.
I'm so excited for that because if y'all been following me since the beginning, y'all know I used to do micros.
So K-tips are small and tedious, and I can't wait to do them.
But yes, hopefully you all are enjoying this and learning something from it. Um, the way you can tell the difference between this video and the last video is that band that's laying, um, her lace while I style. But again, I hope you all enjoyed this video and learned something. If there's something that I missed, do not hesitate to drop a comment because I do read each and every comment. And I will catch y'all in the next one.
More from LaToya






St. Louis, Missouri - Lasts 4–6 months - Takes 4–6 hours - Investment: $3,000 www.TTDoesitall.ai


What are #ktips? Here’s your answer! Schedule at www.TTDoesitall.ai 🩷 #extensions #ktipextensions

4-6 hours install and last 4-6 months #ktipextensions done by the right stylist the right way 💕

Located in St Louis Missouri 💝 Consultations available www.TTDoesitall.ai 💕#ktips #natural

K Tips take 4-6 hours to install and last for 4-6 months with proper care! #ktipextensions