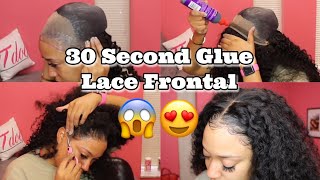
LaToya Kelly installs a quick-weave lace frontal on herself using only adhesive, no thread. She uses a tan stocking cap, black and clear glue, 24-inch bundles, and a 20-inch frontal, finishing with Got2b Glued spray. The whole install lasts about a month and costs less than traditional methods.
Chapters
Hey everyone, it's your girl TT Does It All, and this is going to show you how I do my quick weave frontal install on myself. And this is part 2 of 2 videos, so check out the first one before this one just to kind of get some details on the frontal and everything that I did before this video, and also to see how I slayed those baby hairs. So for this video, I used a tan stocking cap, and I am going to use black in the back and clear in the front. And this is both by the same company. This is what I put under my quick weaves to protect my hair. Basically, when I remove it, it allows me to run hot water over my hair and it slide right off. And it slides off of the, um, it stays on the cap but the cap slides off my head because the cap is coated with this product. So I use the black on the side of the back and then I use the clear on my hairline and then I use my adhesive over that. And again, this is so I can run hot water over it and remove it if need be, but this can last you a month with maintenance after a month.. And if you want to get the frontal reapplied, you can do that and leave this same install up. So you let that dry until it's completely dry. Oh my God, this cap was so tight, so I was so relieved. Okay, so I'm finished cutting the rest of the cap off, any of the extra, and cut where I want my hairline to start. And of course, you all know with frontals, this is up to you. If you have a 5 head like me and you want to make it a forehead head, then this is where you determine where your forehead is going to start with your new frontal. And everybody drop a comment if— do you think a frontal is the same way as me? Because that's how I feel. Like, I feel like I'm able to make my own forehead instead of it being a 5-headed forehead. Y'all agree? I know y'all agree. Okay, so I am using what I use on all my YouTube videos, which is cling adhesive that I bought on Instagram years ago. I'm using 3 24-inch bundles and I am doubling them up. So I measure the back of my head to see, okay, I wanted to go from A to B, measure it, and then I cut 2 strips that length. And then I put adhesive on both of those. I kind of stagger the, the 2 wefts, put adhesive on both of those, put them together, and then glue them to my head. Okay, easy peasy. So I'm gonna do that about halfway up, and then I'm going to put my frontal on. And I'm using the 30-second glue. I did put that up. Sometimes I would use like spritz or something between them, but for this I'm really not going to. I don't know why, really no clue. So, um, this is a 20-inch lace frontal, and again, the bundles, bundles are 24-inch. I did tweeze it and everything. I showed the before and after on the previous video. And then I'm just cutting the lace, and then I'm going to put it on and comb it into that adhesive because it has set while I put the back bundles in. And then I'm using a Got2b Glued spray and a neck strip in black just to set it. I don't know why, because I'm going to change the baby hairs anyway. So if you want to skip that step, you can. It is not important to the end result of this look. So I use glue to glue on the back of the frontal. And no, this does not change where I part the frontal because I can still change the part. It's just on the hairline or on the back line of the frontal, which is exactly where you stitch if you were doing a sew-in. So, um, if you wanted to sew that part, you could, but I'm doing a quick weave, so— and it's quick, sewing takes longer— so I just glued it down and it doesn't have any impact. If you want to do a touch-up on this frontal, you still can. And then just glue, glue, glue. Let's fast forward right up to the tippy top for the last track when you are done. And then After I glue that lash track down, I'm going to flip all of it over. Okay, okay, so now that I got that in, I'm coming back to the front so I can see what I'm doing. Then I'm going to take my next strip off, and again, the next strip is a step that you could skip. It is not required, but now I am cutting off the lace that covers my ears. Because if you all know, the lace frontals are usually 13 inches long. So that means that if your hairline does not measure 13 inches across, then you're going to have some extra lace, which I always do and my customers always do. So now I am doing the middle part. Why? I don't know, because you guys know I love my SSS, which means Sexy Signature Swoop.. But for this one, I was like, let's do middle. I like middle with the baby hairs with this curly kind of hair. So I'm taking apart and I'm parting it over the back tracks because you don't want that to show. You don't want your tracks to be showing. So I take a little, like a half an inch, and I part it back and use my wand curling iron to just flatten it back. And some people use a curling iron. You can use whatever you have to make it flat. It doesn't have to be a wand. And that is the quickest quick weave ever. It doesn't even have to take you— it could take you an hour to do this install. Isn't that like the most cost-efficient way ever in life? I know, right? I know. So have you, have you had a quick weave frontal? Have you even heard of a quick weave lace frontal? Because as you see, it looks like a sew-in. No one would know that it was all glued in unless I told them. But here's your end result. If you want to see how I did those baby hairs, be sure to check out the first video. And leave me an emoji, drop me a thumbs up emoji if you've made it to the end of this video and you like what you see. Let me know if you all would try this. If you think like, oh no, that's not for me, let me know what you all think. If you think of it, the, the quick weave frontal, if you want to take it out after a month, you can., or you can get a touch-up. And you have to get touch-ups on frontals anyway, so either you can touch it up or you can take it out and try some new hair. And me as a stylist, I take my hair down all the time, so this works for me. So again, drop me a thumbs up in the comment if you like this, or drop me a heart, a red heart, because some people may not have the thumbs up. So if you don't have the thumbs up, drop me a heart. And make sure you are subscribed if you you don't, because I'm uploading bomb hairstyles like this all the time. And I'll see y'all in the next video.