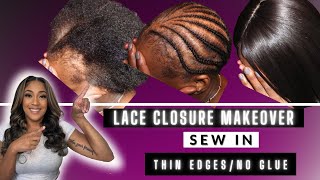
LaToya Kelly gives a client with thinned edges from quick weaves a makeover using low-tension braiding, a sewn net base, and a needle-and-thread closure instead of adhesive. She covers the sparse areas and adds Brazilian deep-wave hair for volume, keeping everything flat and tension-free to protect the hairline.
Chapters
Hey everybody, I just wanted to share with you something that I did on a client that I was so fascinated by. She wanted a middle part, she wanted to cover up the damaged parts of her hair which were caused from quick weaves and age, of course. So the older you get, the more— let's say this again— the older you get, the less stress you want on your hair because it is easier for your hair to come out your hair is more delicate. So, um, as you see, I braided it down, less tension away from her hairline, and I actually used the net as a guide to kind of sew where the hair is not. So you see the middle of her hair, there's more hair towards the front of her hairline, and then as you go down towards the ear, the hair kind of goes back a little bit and then it comes forward a little bit. So at that space where there's not hair, I'm actually adding that net right there so that she can have hair sewn onto that net and not have to worry about her edges showing where the, where the hair has kind of fallen out. I also did it on the other side, so you see the net is in front of her actual braid. It's not in front of her hairline because, as you can see towards the bottom of the screen, Her hairline is still forward, it's just the, the tension and all of the stress being on her old edges. She just needs somewhere to sew onto and not have to worry about adhesive or worry about something tearing her hair out. So you'll see where I'll lay the closure, and in this particular closure I'm not going to use adhesive. I am strictly going to use needle and thread. And I'm just going to apply a lot of tension so that the left side and right side of the closure is so tied down that it won't lift or anything. So she's going to get a great wear, she's going to get a lot of volume in her face, and she's also going to get that middle part that she wanted without showing her edges. So remember, this is YouTube, so you can go forward and backwards as much as you'd like to kind of compare the before and after pictures.. But I'm going to show you now me sewing down the closure and, um, not me sewing it down, but the closure sewn down. And you can see that it's in front of that line, in front of that braid, and it's completely undetectable. Of course, that outer braid, um, is where I'm going to put that hair towards her face so she doesn't have to worry about her edges showing at all. Um, so I sew from closure to— from one side of the closure all the way around her head, all the way around the bottom of the back to the next side of the closure. But I'm not going to do that completely throughout because if you do, when her closure lays flat, there'll be those lumps from when you fold it over those tracks to go back down. I do not cut tracks, so if you do cut the wefts, this would be something you don't have to worry about because it'll be flat regardless. But because she's using virgin hair, This is actually my Brazilian deep wave hair. For her particularly, I don't have to worry about it laying flat because I am going to sew it a different way so that it will lay flat and I don't have to cut the tracks. This is actually her second time using this hair, so we want to continue using this hair throughout her experience with me. So the next picture, I'll go ahead and move on to that. As you can see, I'm sewing left to right. So as in all of my videos, I do tell you all I sew all the way up to the closure. So as you see, there's no lumps, no humps, no bumps. Everything is completely flat. And her hair is laid. She doesn't have to worry about her edges showing. She doesn't have to worry about her hair being thin and not covering the tracks since she used a closure, and she's good to go. It's bone straight. And again, this was the Brazilian deep wave hair. But isn't weave awesome? I know. So go ahead and rate, comment, subscribe, and, uh, comment any questions you have or anything you want to see, and I will definitely work on making it happen.