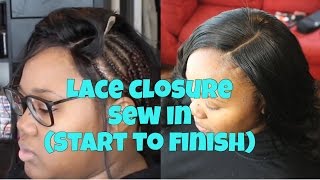
Stylist LaToya Kelly shows how to install a lace closure sew-in from start to finish. She covers part placement with KeraCare Edge Tamer, her braiding sequence, customizing the closure to blend with the scalp, and her layering strategy: longest hair at the bottom, shortest at the top. The full install takes roughly 90 minutes between braiding and sewing.
Chapters
Hey everyone, it's TT Does It All, and I'm going to show you start to finish this lace closure sew-in. I have videos on stitching, laying the lace closure, and everything, but this video is just kind of showing you a run-through of how my lace closures look and how the install goes. This particular client brought her own hair, so I do not have the specifics on where it came from or what type of hair it is. I just am working with it and putting it in her head. So first I ask her, where do you want your hair parted? Do you want it in your face or do you want it to the side, just out of your face? And then I go from there. I do use KeraCare Edge Tamer if my client has a little breakage or damaged edges or something like that. I just want to be able to have a really crisp part when I'm working, so I'll use the KeraCare to kind of lay everything exactly where I want it, which is what I'm doing right here. So once I get everything parted exactly how I want it, I start always with the right braid and I braid that down and then I connect the braid from the left side to the right side. And I have a braiding video on how to braid for a full sew-in, so I don't need to go too in detail with that because there's already a really detailed video. About that already posted. But I am just braiding the extension hair into her hair, and I use braiding hair as anchor braids on my outer braids, which is also in detail on my braiding video for full sew-ins. But yeah, I'll let you watch the braiding, and then I will come back with a little more information. As far as the grease I use, I do have a video on everything I use for a sew-in. So that's what kind of iron I use to curl, what kind of braiding hair, or what kind of clips and everything. So make sure you check that video out because it does have the information as far as the things that I'm using for this client as well as my other clients. So now that the braids are about done, I am not going to use a net. And I only need a net if I'm doing a deep side part sew-in with hair left out and the hair in your face. But other than that, I don't need a closure— I'm sorry, I don't need a net. But I have another video in the description below as to how I customized this lace closure to make it look like already it's already coming out of her scalp. And just ways that I customize it once it's on my client's head as well. I do have a video on how I install my lace closures too, so this video is just for all of my regular subscribers who see my work time and time again and love to see it. So I'm just kind of giving you some of my clients and just showing my work. I have a complete video coming on how I'm sewing underneath the braid and in this and how it is important to some hairstyles, but that description and the link to that video is in the description. It takes me 2 hours to install and style a full sew-in with the lace closure. It takes about 45 minutes to braid, about, depending on if I'm styling as I go or if I style when I finish, how long to install. Usually takes me about 45 minutes to install as well, and then I can use the rest of the time to style. For this particular client, I actually did style her hair as I installed it, which I do sometimes just to kind of make it as when I'm done, I'm done. I don't have to go back and curl the entire head. Again, this video is for people who've already seen my work. This is just a run-through of some of the things that I do on a daily basis with my clients. I have videos on the styling, I have videos on curling, I have videos on everything you see in this video. So yeah, make sure you check those out after this video. Whatever length my clients bring to me, I start with the longest at the bottom and then the shortest at the top, so it gives it a layered look. If this were curly hair and they wanted kind of a big look, I would start with the shortest and use the longest up at the top. So typically the average sew-in is the longest at the bottom and the shortest at the top. So yeah, that's to answer some of your questions that I do get on my other videos. I hope you all enjoyed this video. Make sure you let me know, thumbs up this video and comment below. I'm going to ask a question and see what you guys think. If you enjoyed this video, please subscribe. Don't forget to comment, rate, and share this video with fellow stylists or clients that you want to see my work.