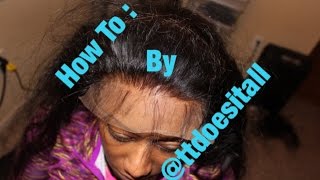
TT shows how to customize a lace frontal hairline without glue or tape. She plucks the frontal to match your natural hairline, attaches an elastic band from Joann's, and creates baby hairs with a razor comb and flat iron for a seamless fit.
Chapters
Hey you guys, it's your girl TT with a DIY lace frontal customizing video. And if you guys want to learn how to pluck the hair, it's going to be by trial and error, but you do want to make sure you have two sets of tweezers on hand and some scissors so that you can cut from ear to ear wherever that closure is going to lay. And you'll see those two slits right there. And you also see the bleached knots, which is another video on how I bleach those knots, so visit that link in the bio. But you'll see how I slip those closures to her sides on the next slide. But right here, it doesn't really help to watch me pluck the hairs because everyone's hairline is different and you want to customize the plucking of their frontal to their hairline. So, um, here's just a quick run-through of me customizing my client's frontal, and then I'll come back with how I customized her baby hairs and everything else. This video is not showing you how to actually install the frontal, but it's showing you how to get the frontal to a point where once you know how to install it, it's already custom and it's ready to go. You know how to style it, um, which is another video as well. So this video is customizing. We'll customize that hairline by plucking. We'll customize the frontal as to how we're going to put it in, and I'll show you my number one secret on how I get my frontals to lay flat with no glue or tape or using any adhesive., and it's very simple. So when you guys realize you're gonna be like, oh my God, I should have thought of that. But go ahead and keep watching, and then I'll come back with how to customize this hairline once you're done plucking. At the end of this video, I want you all to go ahead and submit any questions down below that you may have, because I do want to answer your questions. And if you want a different video or seeing something different specifically, go ahead and let me know and I will make sure I get that video for you soon. So this right here is actually how I got those two slits showing where exactly her frontal would stop from ear to ear. And I am actually measuring this because I want to make sure everything looks good according to her hairline. And I tell her to look at it, and I want her to make sure that it fits as well. Now here is my secret tool to making the closure lay super flat without using any adhesive. I measure the band from the front of each ear and I pull it with tension enough that it's not too tight, and I do ask the client a number of times if it's too tight, and I tie the band right at where I cut that slit. The slit is only going up to the hairline, it's not going all the way through until after I have, um, attached the elastic band. So I go across the elastic band once one way, then I start sewing back over that the other way, and then I sew over it one more time, and then I cut it. I don't knot it or anything because after sewing it so many times it's not going to come down, but I do reinforce it with the third, um, stitching. So the other side, you see the slit only goes to that hairline, but behind the hairline is where I'm actually attaching my elastic band. And I went to Joann's, um, it's a local fabric store, and got this elastic band. They do have thinner ones, but I think the, the ones that are about a thumb width wide are more comfortable. The thinner they are, the just the more tension they cause, and it kind of feels like it's cutting off your circulation. So I like something a little bit thicker where if I want to pull it up into the back of the sew-in, I can. So excuse my socks and that little ball of hair from the plucking, but that's actually all of the hair that I plucked out. Um, and I am going to ask her to hold it, but I won't show you guys how I install it, but I'm going to continue on to after that frontal is installed how I customize that, that front section. And I actually— all those hairs that are plucked, it's kind of sparse on the front of the hairline now. So you see it's not just a straight across hairline. Those hairs that I'm combing out are what is used to be the baby hairs, and which is what a lot of people love about frontals, that they can finally have the edges or the baby hairs as they would call them. So you see, like, even now you can't tell that the front of that is a closure, but I always braid this to get it out of the way of me customizing the frontal and also of me sewing the back. But the back is already sewn, the band is already on there, and you can visit that installation video on how to see how I did that. But you will still need this particular step after you've installed it, so it's always good to continue watching. So I use actually a razor comb, and it's by Paul Mitchell, but any razor comb will work. You don't want to get a blunt straight across cut with scissors, so you want to use a razor comb and just cut to her desired length and flat iron those out with my little Babyliss. And then I get to sewing everything else. Don't forget to subscribe so you can see the end result of this look and so you can see the bleaching of the knots and the install. Thanks for watching, guys.