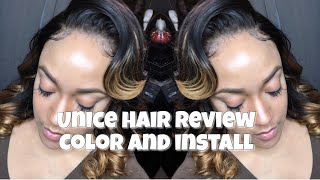
DIY ombre tutorial on a lace frontal wig using UNice hair from Aliexpress. The host bleaches 12 to 16-inch bundles with 40-volume developer, applies Pravana dye for exactly 10 minutes, then sews the frontal and back bundles together with an elastic band for a secure fit.
Chapters
This video will show me coloring the hair and how I got to this color, me actually sewing this onto a wig. The frontal did come completely dark. I used 2 bundles in shorter lengths because I wanted to show a little diversity with my channel. I do usually do a lot of long hair, um, wigs and sew-ins, so I wanted to show something for people who like shorter hair. So It's a 12 and 14 inch, and, um, after I bleached the frontal, I did notice a little bit of shedding from it, but I use 40 developer and that's the highest you can use. And I had a previous company send me hair and I did not do the video because the hair literally just started tearing apart after I bleached it. So for this hair to bleach and it to still be curling and it to still have movement, um, that's a very good thing. Um, the 2 bundles had just enough in it for a frontal, and it's perfect. I mean, I love it. This is something that I could do if I'm wanting more of an everyday look. For me, this would be something simpler compared to what I usually wear.
All right, so let's hop right into the color. You all see I'm using Pravana 40 developer, and I am showing my application process. The products only stayed on this hair for— can you guess how long? 10 minutes. 10 minutes to get it exactly where that bundle is at the top of the video. You see those bundles? I wanted to get it to look just like that. So 10 minutes later, I checked on it and it was right where I wanted it. I did the 3 little highlights in the front because I wanted that color to blend with the back once I actually combed it and curled it through. So as you see, I did 3 chunky highlights, and you'll see when I style it the idea I was going for. But I sew my frontal on first, and then I sew my bundles behind it, and then I sew my elastic band on the inside of it. From ear to ear, and I am ready to put it on after I do that. My bundles in the back are two 16-inch bundles. My frontal is 14 inches, and I am not doubling up my tracks in the back. But for any of you all who really want to know, I have videos in the description below on my sewing technique behind frontals So if you are interested, check that out. If not, keep watching. Oh, have you all subscribed yet? Okay, I'm gonna need y'all to hit that subscribe button. You can do it while you watch. And if you haven't already, check out the link in the description showing me putting on the wig and actually styling it.