Full Lace Closure Sew in (Middle Part)
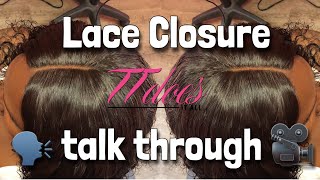
LaToya Kelly shows how to sew in a full lace closure with a middle part, starting with braids treated with KeraCare grease and Wild Grow oil. She uses dark brown thread for stitching, removes the cap wire for comfort, and customizes placement for clients with thin edges or forward hairlines.
Chapters
Hey everyone, it's your girl TT Does It All, and this is the look that we're going to be finishing. And I say finishing because I'm so sorry, I already started. I started midway through braiding and I was like, oh my gosh, I have to record. Do you mind if I record? And she's like, girl, no, I don't mind. So I'm like, okay, thank you. So I started out with the braid pattern She wanted a middle part, which is perfect. And I'm going to go ahead and give you guys a tip and a trick about middle part closures. When a client's hairline is like this, where the very center of it is more forward than the outsides, you should use a wig cap. Now I have a video showing where I did not— oh my gosh, okay, I have a video showing where I did not use a wig cap and I kind of made it work with the net, but a wig cap is so much easier. So this is showing how I use that method, and I'm using my KeraCare grease between each braid. And then afterwards, I use my Wild Grow oil between each braid just to give her some extra moisture for protection during her sew-in. And if you all follow me— and if you don't, you need to go ahead and do so— but But if you all are already followers or subscribers of mine, you know that I do this for every client. I put grease on every client and I put the oil between every braid. I take pride in taking care of my client's hair. I am tender-headed myself, so I don't play when it comes to hurting or braiding tight or stitching too tight. I don't play with any of that stuff, so Um, yes, I, I, I give my clients a lot of TLC. And so this client actually drove a few hours to come to me today from the military base, so I appreciate her for letting me record. Um, yeah, so after I do my braiding, I will show you how to put on that cap, and I will give you also an insider about these caps so that if you put it on a client, they won't be coming back suing you, threatening you, cussing you out, or anything like that. And you'll see why I'm saying that. But if you're not already, please subscribe to my channel and follow me on Instagram, Twitter, Snapchat, Facebook. TT Does It All is the username all over the place, so look me up, say hi, inbox me. All right, and here's the Wild Grow Oil. And I put it between each braid, and every client like just stops when I do it, and they close their eyes, and they're like, oh my God, this feels so good. And I'm like, I know, I wish it was my head instead of yours. But, um, yes, I really do love catering to my clients. I love giving them an experience that they don't usually have when it comes to sew-ins. Most people— well, some people who do sew-ins just are in it for the money and do it to get it in and stay for the moment, and they don't care what happens when you leave. But I am not that person, okay? Okay. So here I'm just kind of rubbing in the oil, making sure that it's not just sitting in one spot. I want it to be absorbed. Look at her, she's like, okay. So here's the part where I tell you your clients are going to love you for doing this. You see that wire? It is in every wig cap you buy from the hair stores, and it is on the sides to prevent it from flapping up. Before a sew-in, you don't need it, and I don't actually use it for my wigs either. The longer you wear your wigs and your sew-in, it will eventually kind of start poking through the lace of the cap, and it'll start poking you in your head. And ever since that one time, I have taken them out ever since. So here I am sewing on the cap, and, um, if you all have been following— if you have not, I use brown thread for every client. It is dark brown, and that is for myself and my client. For myself, I use it so that if there's any loop while I'm sewing that is, is not, um, that is kind of not tight or kind of leaves a loop where if they comb through it, it can get hit a snag and they'll like mess up their entire sewing, or maybe they they can't comb through it because that loop was there. That's one of the reasons. And the second reason is for when they take their sew-in down, it is the most annoying thing in the world to almost cut your hair out trying to take your sew-in down because the thread is black, the net is black, your hair is black. Like, it's just, it's just ridiculous. So this is a way to save time, energy, stress. Make sure when you use the back of this— some clients have small heads, some clients have larger heads— just make sure that you pull the cap down in the back and sew wherever the cap lands on that outer braid, and then just cut the extra cap off. And you'll see me do that as well. So this is for her hairline. Since you see where I'm— where those brown stitches are, how it kind of goes back the closure. I could have cut the closure to match her hairline, but since I don't use adhesive on the closures and I only stitch them down, this cap adds an extra layer of support for me to make sure that her middle part is right in front of her hairline. It also gives her room for growth. So in a month, as her hair has grown out, this closure will be laying a little bit forward thanks to that extra cap space in the front on the sides. So once her hair starts growing, it won't be showing her new growth. She'll have room to grow. So you see I cut out the centerpiece where her part will be because it is transparent. Um, I want the lace to be transparent, and it is a better look if you can see the part through it because it's scalp and it, it kind of camouflages into her complexion. So her friend and one of my previous customers— thank you, girlfriend— she bleached her knots for her and she sealed the wefts on her closure. I do not— bleaching the knots is perfectly fine. It is an individual— what's the word I'm looking for? It's an individual I cannot think of the word. It's, it's what you want. It's based off of you. I cannot think of the word. Y'all gonna leave it in the comments, I'm sure. But it is based off of what you want. Um, so I particularly don't bleach the knots unless I was doing something where I glue it down and I change the parts a lot. But since it's only one part, um, I don't. But this one's bleached knots and it looks very good. So, um, I am sewing it down and I do have videos on that, you all. So don't think like, oh my God, you're going too fast, I can't see. Just, just watch. This is just a start to finish video for you. It is not a tutorial because it would say that in the description or in the title. I would say that. I don't do— that's another thing about me, you guys. I don't do like clickbaits. I hate clickbaits. I treat people how I want to be treated. I treat my clients how I want to be treated, and I also treat my subscribers how I want to be treated. I don't want to click on a video and hear 30 minutes of talking about something that does not have anything to do with the title of the video. Okay, okay. So yes, I— my titles say exactly what they are, and I may even add— well, not may, I do add extra into what you you're gonna see. So always watch the full video, especially if I'm talking through them, because that's why people love my commentary videos, because I give so much information. Okay, so now that I have stitched the closure down, I'm going to clip it up and start sewing in the back. And I'm going to speed up because I didn't turn her around or anything so you could see me stitching, so it's no use of me going like super slow. Another thing that I will give you as far as a tip, if you're a hairstylist or even a customer, I gave my customer the option to have that flap on the side stay there. So you see on this, on the left and the right side, right in front of her ears, there's that flap that is not attached to a braid, and that's also the piece where that wire is that I cut out. So I asked her, either you want me to cut that off so it's not a flap, or I can stitch on it and it will not flap up, and it's up to you, but it won't be sewn onto a braid. Most clients who I do this to have very, very thin edges and damaged edges, and I do this for them so that they can have hair where there is not hair on their head, and their extensions can look like everyone else's extensions. So this is also a good thing to do for clients with really thin hair or, um, or very thin edges. All right, so her friend is here to pick her up, but I am not done, not just yet. So I just put in 2 bundles of her hair, and I put in a 16-inch and a 14-inch, and that is what she wanted. She had another bundle, and I told her, hey, if you want 10 bundles in, I can put them in. So it's up to what you tell me. And she said, no, just single the wefts and however much you fit in, you fit in. I don't want a lot of hair. So that's why I just singled the wefts. I did not double anything. Um, and voilà, we have her end result. I do not know where she got this hair from, so if you are interested, I told her, hey, if you want to leave it in the comments, you can leave it in the comments and they will be sure to soak up that information. But she brought her hair with her, and I'm just spraying it with water. And as you see, it's pretty much done. Sorry about that. It's pretty much done. I'm spraying it with the water and just finger combing through it just like I do my Brazilian deep wave. If you just watched that video, I uploaded right before this one. So that is all you do. Oh, this is my CuraCare wax stick, and that's for flyaways that are on every closure. You cannot avoid it. It's on frontals and closures. Acura Care Wax Stick works wonders. And this is her end result. Tell me what you guys think. Would you wear it? Would you rock it? Do you love it? Do you like it? Okay. All right, guys, well, I really, really, really appreciate you all, and I love the support, and I love you all. And I will see you in the next video.
More from LaToya






St. Louis, Missouri - Lasts 4–6 months - Takes 4–6 hours - Investment: $3,000 www.TTDoesitall.ai


What are #ktips? Here’s your answer! Schedule at www.TTDoesitall.ai 🩷 #extensions #ktipextensions

4-6 hours install and last 4-6 months #ktipextensions done by the right stylist the right way 💕

Located in St Louis Missouri 💝 Consultations available www.TTDoesitall.ai 💕#ktips #natural

K Tips take 4-6 hours to install and last for 4-6 months with proper care! #ktipextensions