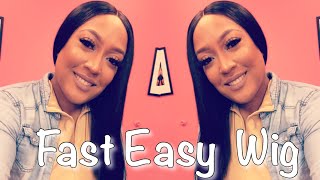
LaToya Kelly reviews an Elle Wigs 20-inch wig in natural brown, walking through unboxing, prep work, and installation step-by-step. The 180% density wig has front clips, a built-in part, and a half-inch lace hairline. She notes it's soft, silky, and sheds barely at all.
Chapters
Hopefully you like this look because if you do, that's what this video is going to be covering. And oh my God, this— I don't even know where to start. How about we start with where this wig came from? It came from Elle Wigs, and this is the box it came in. It was so pretty and secured into the box. Um, I took it out the box and it had a little net on it. This is the information: it's 20 inches, 1B, which is the natural brown, 180% density, medium brown lace, and 22-inch cap size. And let's just start with me getting my head ready. Now, long story short, I got my hair straightened yesterday and after working out and being in 100-degree humid weather, this is what it looked like, which I needed to make this wig review anyway, so worked out perfect for me. And it was so easy to braid. So, um, I had that quarter shaved a while back and I'm growing it out, so that's why it looks crazy over there. But the wig has clips in it, and I'll show you the inside of it in a second, but the wig has clips in it, which is why I'm braiding my hair the way I am. The front braid is really, really loose, still flat to the scalp, but it is a really loose braid for the clip. And I am only going to do enough braids in the front to where that part is really defined when I put the wig on. So I am using the Got2b Glue just to smooth my hair down in the back, and while that dries is how— where I will, you know, fix the wig. So I am pulling that back in a ponytail, slicking the ends down. My hair is cut in a bob, by the way, so it was the perfect length for this.
And this is the inside of the wig. It has clips in the front. It has like, um, a half an inch of hairline across the front of the head, and it has about 2 to 3, about 3 inches back of a part. And it does have a clip in the bottom of the back to clip that in if you want to wear like a low ponytail.
This wig would be perfect for that. I am going to go ahead and perfect this straight hair. It came straight, but since it was all curled up in that box, I just want to make sure that it is bone straight for me to rock it. It was very easy to straighten. I'm using a 2-inch Babyliss flat iron, no product. I will use products in the end, and you'll see that. So So here's where I'm using my wand and my carbon heat-free comb, and I'm flattening the top of it down. And you can see the difference already with me flattening that. And you see that hairline right there, and I didn't tweeze or anything because if you want to, it looks perfect already. It's like pre-plucked up there, so you just cut the lace off, put those clips up in your in your hairline, and it's good to go. You don't need any extra straps, and usually I do put a, a strap in my wig, but this did not need anything other than what is already built into the wig. So here I am cutting the lace from across the hairline, and then I'm going to show you what the hairline looks like. So you see that half an inch of lace up there and those clips that'll go right on your hairline, and then there's also a clip in right behind the part So now that my hair is dry and you can see the back of it, I am going to go ahead and put the middle clip in first. So I'm lining it up with my middle part that I've already defined in my head, and there I'm pushing the clip into my hair back there. And then I'm going to clip the side one where my little mini fro is, and then I will clip the other side under that loose braid. And the braid again is very loose. So that this isn't tearing my hair trying to get it in there. So I'm just going to adjust and make sure that the part on the wig matches up with the part that's on my head and then comb it out. And I noticed right here, and that was me putting the clip in the back that secured Care Wax Stick, and I noticed that it wasn't tight enough. So here is where I am putting those adjustable straps that come with it. I'm tightening it up, and oh my God, it is so flat to my head. It is. And this is just for the flyaways— some kind of hairspray. Not everyone likes Spritz, but I love it. Um, so you can use any kind of hairspray for this, and it just keeps those flyaway hairs that are in the front of this wig out of your face. And from going haywire. The ends, of course, are still nice and free. But, um, you see with the clips that come in here, this wig does not budge, y'all. Like, it did not go anywhere. The hair had no smell to it. It's so silky and straight, and it's so soft. The density is like perfect. You see the length, it was perfect. If you want something where you don't have to worry about shedding a lot and tangling, this wig will be awesome for you. So go ahead and watch me take my selfies and drop a comment. Drop me a blue heart if you enjoyed this look for the makeup and the blue eyes, and I'll see y'all in the next video.