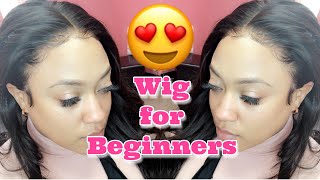
LaToya Kelly unboxes and installs a glueless full lace wig from My First Wig, showing how to prep natural hair, cut the lace, and secure it with built-in clips. She praises the curl retention and transparent lace, calling it a solid choice for beginners.
Chapters
Hey everyone, it's your girl TT Does It All, and this is a glueless full lace wig.
Yes, there is no adhesive used for this look. So this is from a company called My First Wig, and it comes with all the essentials to get you started with your first wig. And it comes with a stand. A stand was the first thing outside of the box, and then I opened up the box and there was a little pouch to hold all your little necessities in, two clips that were very sturdy. It also came with bobby pins, and it also came with a wig cap, which was too dark for me. I did not use it, but it also came with a carbon comb, which are my favorite type of combs to use ever because they're heat resistant. It also came with the flyaway tamer, which is similar to the Care Care wax stick, and it came with instructions as to how to put it on, how to make it look natural, and it came with instructions as to how to use the different items that it um, put in the packaging. And of course, the last thing but not least, an adjustable band, which I did not need either. So here's a description of what is in the hair, and it's also in the description below. I'm sorry, what the wig is all about, the specifics, and it's also in the description below. And I first started looking at the wig and I'm like, hmm, okay, okay. I will be honest with you all, the lace It says light brown, but to me it looks like transparent lace. So I also noticed that it is very, very lightweight. It does have the adjustable straps in the back, and the knots are already bleached. You see those? You see that brown-like tint? That means that the, the knots were bleached. And you see, if you look at, look at it against my skin, you could tell you don't see any black dots. And look how how small the knots are. That's what helps make this look very, very natural. Those knots are so tiny, and that is beautiful. So here's my rough head. I am somewhat natural. My ends are still relaxed, and I am going to mold my hair back. And I do have a quarter of the side of my head that, if you are not familiar with my videos, I have been growing that out. So that is a portion that you see that's really, really short. But I am using my baby hair cream. Yes, this is mine, made by me, sold by me. It's called Baby Hair Cream and it's available in the description below. But I am molding my hair back with that into a ponytail and I just part it in the middle. There's that little short spot, but I am molding it back using my baby hair cream., and then I'm going to let that dry as I style the unit. So just kind of making sure everything is done, setting that blow dryer on cool and letting that— I was drying that short side to make sure that it stayed back. But I put a little bit more baby hair cream on the end of my ponytail, slicked it down, and then I'm going to use two neck strips to hold that down, get those out of my face. And there's the back. All right, so while that dries, I am going to go ahead and style the wig. And you see there's 2 inches, or there's like 1 inch above that clip that's like right above your ear. So there's an inch of lace, and then there's the middle of that wig, which is a different material. And, um, that is usually in full lace wigs. So there's the inside part, and then that's how much is actual lace. Okay, so, and then I'm going to show that for you too. There's a horseshoe. So although there's that 1 inch on the sides of the hairline, the middle— so the entire top part of your head has like 6 inches back to part. So you know how you can part like a horseshoe shape on the top of your head? That entire amount is a horseshoe of lace, and it's just free part anywhere you want.
And I did a middle part because I'm not sure why, but that's the look I was going for.
So I'm just kind of seeing how much hair I have at the top for that free lace part, and it's a pretty good amount of hair if you see it. So I'm going to go ahead and finish and then styling it, and then I will go to show how I put it in.
So as I'm styling it, I'm kind of, you know, getting a feel for the hair. And honestly, you guys, this hair is beautiful. It took the curl very easily and it held the curl throughout the wear, throughout the install, throughout me tweezing it, throughout everything I was doing to it. It held the curl very well. And I haven't put any products in this hair whatsoever, okay? That says a lot. So I'm going ahead and cutting the lace that's above the adjustable straps in the back, or below, I should, I should say. And then I will go ahead and cut the lace along the hairline. Mind you, those knots are so tiny, it was so hard. So of course this, of course this is sped up. However, it took me a long time. All right, so this is before I tweezed the hairline, and you see it already looked very good. So this is after I tweeze it, and I'll show that close-up next to the before so you get a feel of it. And I'm just kind of finger combing those tweezed hairs out, and I'm going to add a little bit of volume in it by putting some layer in the front just to kind of face frame and bring more volume. And as you see, the right side— your right—
is—
oh my God, it's just gorgeous. It has a lot more volume. So I'm going to go ahead and do the same thing to the other side and then give that some some volume as well. So now that it is flowing how I want it to, I want to do a little something additional to my part. Since my real hair is only parted a small ways back, I am going to add some concealer underneath the part in the back just to make it look a little bit more transparent. And the way I put it on, I put it on the back first. I put that clip that's already built into the wig underneath my ponytail, and then I pulled the— pull the wig up. And as you see, the middle looks a lot more defined further back, and that's all I was trying to do by putting the concealer underneath the wig. So now that that is the look, we're good to go. And I'm going to show you before I tweeze the hairline because the hairline is pre-plucked. Fluffed, but to my liking, I needed it to look a little bit more thin. So this is after I tweezed it, and then on our right— so you're right— you'll see before I tweezed it. They both look good, but before I tweezed, it was a little bit too thick for me. So this is the finished look. You all let me know what you think, and let me know if you all liked the video, if you all have worked with this hair company before. I highly recommend it. If you have never worn a wig, this video and this company together can get you all the way there. If you haven't already, make sure you check me out on my social medias. I always tell when I'm going to upload on there first. And drop a heart eye emoji if you like this video. All right, I'll see you on the next one.