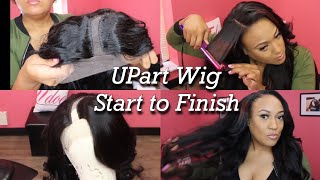
LaToya Kelly shows how to create and install a U-part wig using four IShowHair body wave bundles. She walks through preparing the lace cap, sewing it in, braiding her natural hair underneath, and styling with a Chi flat iron. The whole setup costs less than most pre-made wigs.
Chapters
Hey everyone, it's your girl TT Does It All, and this is the look we're going to be achieving today with IShowHair. And I really love that this box came double boxed, so the box that it came in wasn't actually bent all out of shape. But that's neither here nor there. It came with a little thank you note and their contact information on like a little postcard, and it did come with like a little pamphlet showing everything that the company offers and how to take care of the hair, which I also really loved. And they sent me 4 bundles of their body wave hair. And the 4 bundles were very full. It had a nice natural look, so it wasn't big and bulky like you would think. And the back of the box has other cultures— other textures, lengths, and colors that they offer on their website. So let's get into how I installed this. I use this curved part lace wig cap And the part is like that, and then there's this plastic in it, and the plastic really had to go, okay? Like, I don't know why anybody would manufacture a wig with plastic in it, but I had to cut the plastic out because I didn't want my wig to sound like this, okay? Like, seriously, who wants their wig to sound like that? So I cut mine out. And I'm going to sew more towards one side than the other. And you all will see that I sew just like I do in my videos of my deep side part sew-in, and that's how I did this wig. So this is the finished look of the wig, and I'm going to go ahead and cut the middle out and then show you how I actually install it, which was kind of a time-consuming process. Okay, so So I'm going to cut the little lace off and cut that part out. And don't mind my gum chewing. I really wanted— before I started styling it, I wanted you all to see the natural texture of it before I curled it, um, because I did style it for the end of this video. But this hair, I'm actually just parting it in the middle, and one side I'm going to curl one way and the other side I curl the other way. And I do have tutorials on that as well. For everyone who's going to ask what the heck type of flat iron is that, it is a Chi flat iron. I got it like over 10 years ago from Amazon. It's been impossible to find an awesome Chi like it, so sorry I don't have a link for you. But, um, while I am styling, I wanted to talk to you about the hair. The hair is very, very, very affordable. So if you are on a budget or you don't have a lot of money to to spend and you need something really fast, this is an excellent type of hair for you. It is very, very, very affordable. If you go to the website, all the links of course are in the description, the information is there. But if you've, um, checked out the website and checked out the prices, you'll see that it's very, very affordable hair. Um, I went ahead and made it something as a wig that I can take off, and wash and style it again as needed. Um, so yeah, I'm still curling that same side, and then I'm going to curl the other side the other way, and then I'm gonna figure out how to put this thing in. Now some of you might use like clips to put it in. Um, me, I don't want anything that may slide, and clips, if you only use them around the part, can be very heavy on your part. So for me, I went ahead and did, um, I stitched it in and I stitched it in the inside as well. So here are the bangs that I'm going to go ahead and cut and style so that when I put it on, the style is pretty much there. I just have to blend my hair.
So for some reason, I got my hair cut into a bob right before this video and actually recut. It's already been a bob, but I'm just braiding my hair straight back, greasing in between like I do my customers. And if you all remember, I did shave a quarter of my head on that front side right there, and it is growing back, and I'm going to let it grow back. So for now, bear with that piece. My arms were hurting. Oh my God, I was so tired. So I am just cutting the lace out of that part so that I can measure where on my head the part will be, how much of my hair to not braid and leave out. And then I will braid the rest of my hair and start stitching it on.
Now let's face it, this will look so much better if my hair were just black or brown or off-brown or off-black, whatever you want to call it. This would look so much better if that were the case, but it's not, so I just had to make it work. I used my KeraCare Edge Tamer for my edges, did a little bit more trimming, trying to darken up my hair a little bit. But this was the outcome, and I end up darkening my hair even more after I recorded this. But I did my own makeup. Oh my God, you guys, like, it's been so long since I did my makeup. And the girl who usually does my makeup, I did a one-on-one with her, Miss Keisha Marie, and she taught me some more techniques. And tell me what you guys think about the U-part wig, and, um, let me know in the comments if you guys have worked with this hair company before, if you like the look, if you don't like the look. And make sure you all subscribe, okay? Hit that button, and I will see y'all in the next video with another jam.