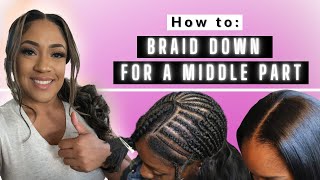
LaToya Kelly shows how to braid a middle-part sew-in with four anchor braids and thread for strength. She explains how much hair to leave out, why you don't need a sewing net for this pattern, and how to keep the leave-out section flat and crisp.
Chapters
Hello everyone, it is Titi with another tutorial. This is the middle part leave out braid pattern for you, and you all have been requesting this for a while, so here is the outcome of what this will look like if you follow my steps. This is another one where the client leaves her front hairline out as well, but that will not be what I'm showing in this video. But this is again the finished outcome of leaving her hairline out in the front. So this right here is the braid pattern we will be doing in the video, and you see her edges are braided in unlike the last one. I have a video on how to determine how much to leave out, so make sure you visit that link in the description. But for now, I will show you the first outer braids. And if you have watched my previous braid pattern videos, you know that the first, or actually the outer braids, always have extensions braided into them. In this video, this was actually my first client when I came to Kansas City for 2 weeks to do hair after moving. So the one thing that I did leave back home in St. Louis was braiding hair, and this was an 8 AM client, so I had to actually braid in using thread. So just like all of my natural part leave-out videos, the first 4 braids that I do have braiding hair in them, and that's because these are my anchor braids. This is, this is what makes it a lot more sturdy. So now I'm on the second braid, which is what goes around the leave-out, and I do braid a very small braid around the section that is to be left out because I want that leave-out to be flat and clean and laying nice and crisp across the extensions, and I don't want anything to be visible or any humps or anything. This is the third braid in which I connect to the fourth braid at the corner in the back, and you'll see that here in a second. Um, and you all, I am actually in Reno, Nevada right now. I am here for a Ms. and Mrs. USA Universal Pageant, and I'm not a pageant girl, so I'm trying to get the lingo together, but, um, Mrs. Kansas is actually one of my regular clients, and, um, I will be filming the entire process. So you guys make sure you subscribe to my channel and turn on those notifications because I will be posting my week out here. But she's actually in a bunch of, uh, interviews and things like that right now. So while she's doing that, I will be Recording my videos and doing my voiceovers, in which you all like. I, I did a couple videos without the voiceover and everyone hated it. Oh, this grease, by the way, I'll be showing what it is in the description because I've already posted it in a previous video braid pattern. So yeah, anywho, I am here to do hair and makeup, and, um, if you all want to see the looks that I've done for her, she's done 2 evening gowns, interview looks, swimsuit look, and we've been at Lake Tahoe out here. So yeah, that will be a video to stay tuned for. But the braid pattern for this is very much like my deep, um, side part sew-in video. So if you have not checked that out already, that video is available. Um, and as you all, if you've watched that video, you know that on one side I do not go all the way down to the bottom And this is that side. It tends— since I'm right-handed and I like to start on the right, the left side usually is the side that I don't go all the way to the bottom of the back. Um, you'll have to watch a previous video for me to explain all that in detail because it's just a lot of repetition here, and who likes that? Anywho, um, oh, let me tell you guys about my nails. So when I came to Kansas City, I had all bedazzled nails, okay? And I mean like all of my nails had stones on them. And they were square, and I cut the first 3 down so I could braid my clients. So one actually I took off, and the other 3 on each hand, I just took those and clipped them down. And I'll show you what they look like before I clipped them down. But yeah, so here's what they look like before I cut them down, and they got ratchet in this video. But anywho, I'm still braiding, still greasing, of course, and Yeah, this braid pattern is fairly simple if you've seen my other tutorials, so, um, just keep following along and I will finish it off. And this sew-in, I actually do not need a net for. Now, I could have recorded a video on how I sew on a net, but you honestly don't need a net for this particular sew-in. The only sew-in I absolutely have to use a net for is the deep side part sew-in, and that is because for the deep side part and the hair to be in the face, it has to, um, the net has to be there so that I can sew in a direction that the braids aren't even going, and I need the braids to go that particular way so the sewing can be flat in the— and, you know, so you get it. But, um, yeah, you guys have been, um, very nice and sweet on my previous videos, which encourages me upload more and more. So I'm glad you all appreciate the videos because it just pushes me to want to give you guys new information and new tips and tricks that I find useful when I'm working. So thank you all for watching and everything. But this is the finished product of the braid pattern, and again, this is with no edges left out, nothing around the back left out, and For this particular client, I did not do an after picture of hers because I was simply focused on doing the video that I forgot to even do the after. But this is where another client left her edges out. But as you see, one side of the braid is sewn higher than the other, but— and one side of the braid stops higher than the other, but it's all equal. And this is the finished look if you all follow my step-by-step instructions on how to sew it in, which is another video, and, and how to braid for it, this is the exact outcome you'll get because I use this on every flawless leave-out. If you enjoyed this video, please subscribe. Don't forget to comment, rate, and share this video with fellow stylists or clients that you want to see my work.