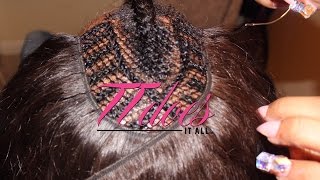
LaToya Kelly shows how to end and start threads in sew-in extensions without tying knots. Backtrack a few loops, cut the thread, and restart exactly where you cut. Pass the needle through the weft at the start and end of each new thread and bundle to keep the weft flat.
Chapters
Hey everybody, it's your girl Titi, and I just wanted to show you all an important video with sew-ins. So that's how to start and stop thread with a new needle, and also how to attach a new weft to your sew-in. So I've already recorded a video on how to fold over the tracks, so make sure you guys check that out. But on this one, I'm going to show you when you run low on thread, it's so annoying. And one thing you want to think of is when people are taking their extensions out, They don't want to have to go through hell and high water just to get it out. So I backtrack a little instead of tying a new knot. So I was sewing from the right to the left, now I'm sewing from the left to the right just to backtrack like maybe 3 loops, and then I'll cut that thread. And then the next thing I'll do is start right where I cut that thread, and this is one of two instances where I go through the weft. So You want to keep that to a minimum, but I do it at the start and the end of new thread and the start and the end of new weft. So right here, I put it through the weft and then I'm going to continue as I started out, going from the right side to the left side and stitching with the traditional stitch. So again, I am going to backtrack and I'm just going to slow it down for you all who didn't catch it. Just go from left to right. To backtrack it. So of course, if you were sewing the other direction, you would just backtrack and go in the opposite direction. And you're running a long thread, so you just cut it. You don't knot it. And when you use your new thread, your new thread on that needle is already knotted at the end. So I knot all of my needles when I thread them, and I do pre-thread all of my needles. So I just cut that. I don't tie it, and I just go through the weft, and I continue as I was going before, going going from the right to the left. So here's another important detail. You don't want any lumps or any humps or any bumps, as Kiva the Hair Diva would say. So when attaching a new bundle, you want to just reinforce the end of your last bundle just by going over it a couple of times extra, more than you normally would. And then when you attach that new bundle I actually go through the weft again, and this is one of two times that I go through the weft. The other one is at the very end of the thread. In this one, I go through the weft when attaching a new bundle. So I do my loop, alright, and I do one more loop, so I reinforce it one more time. I pull the thread up and hold the hair down to reinforce that loc. I'll show you again. I loop around and I pull that needle and thread up as I hold the hair down. And I do it twice just to reinforce it. This is the only time I do a loc stitch. So we're back to the traditional stitching, and we're just going around the weft, not through it any longer. So the greatness about this being on YouTube is that you guys can play it over and over as many times as you need to, and that way you learn it. But that is it for this video, guys. Don't forget to subscribe, and my styling video of this same client's coming up, and you do not want to miss it because I teach a lot of my techniques See you soon!