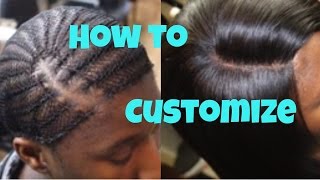
TT shows how to install a 4x4 body-wave lace closure so it looks natural. She covers parting, cutting excess lace, heat-styling, and blending your baby hair into the hairline. She compares three ways to hide the knots: bleached, tinted lace, or concealer.
Chapters
Hey everyone, it's TT and I'm back with another how-to video. And this is how to lay a lace closure, and I'm actually going to show you all how I part it and get it to be so precise. Hey guys, since I have moved, I have had a few questions on how to get an appointment with me, and it has been from regular clients. So this message came from a client and I'm like, Oh my God, I posted it everywhere, but obviously it's not working out too well. So I posted this on Instagram to see what should I do. And these are the comments that people gave me. I do have an app and it's just not working. So someone suggested a GroupMe and I thank you so much, girlfriend, for that idea because I am going to use it. I have created a GroupMe. The link is in the description. And everyone join it. There will be a lot more members once you see this video than there are today, but the link is in the description. It is a free application, so I will see you all soon with a better way of communication, hopefully. And still, don't forget the app. The app is still out there. It's TT Does It All or TT Does My Hair, but I will see you guys soon either way. So this is the way it comes. It's a body wave lace closure, 4x4 inches.
I did not bleach the knots and I did not tint the lace, but at the end of the video I will show you the difference in what it looks like to tint the lace, bleach the knots, or add concealer for a quicker finish.
So this is the braid pattern, and I lay the closure across her hairline where it would actually be, and I'm going to part it And this braid pattern is a separate video showing just how I do it and everything.
So if you want that, please click the description box below.
Unlike my previous videos, this video I'm doing a little bit of one-on-one training, so I'm going to let some of the audio from the background play and you can hear a lot more detailed tips that I do, do in my one-on-one training. So then I'm like, I won't usually do this on their head, but that's how I like to do it. I do show in depth how I sew on the net in a video that is in the description, so make sure you all check that out.
So after I kind of lay it flat with the wand curling iron so I can get the closest heat to it I will then take a flat iron, which I did post this in my list of items that I use for sew-ins, but this is my BaByliss Mini Pro flat iron. Sometimes I can use a bigger flat iron, um, but yeah, I just kind of comb it and lay it over. And then if I wanted her hair to face in the front, I would actually pull it more towards the front and flat iron it that way., but in my video on how to determine the braid pattern, this client decided that she wanted an interface with a little volume.
And there's a few questions that I ask before I start sewing or braiding, and that's in the braid pattern video, so make sure you check that out as well.
The next step is actually cutting off that excess piece of lace. And I cut that off right at the hairline because that's where I'm going to stitch. And you don't want any of that lace on her forehead or anything. Some people leave it there if they're doing like a wig or if they're laying some baby hairs, but for this particular lace closure and style, I never use baby hairs on lace closures. I always use the client's natural baby hair if there are any.
And this is from my Snapchat where I use the client's baby, her natural baby hair. So this is an example of what I'm talking about.
So you see how like my hand is under it, it looks like a scalp. Like, look in the camera. Like, you see it? So I can pluck some of this out and it'll look even better.
I pluck just like literally I do have a full video already uploaded a while back about how to actually stitch the closure down, so check that out. Everyone that has viewed it really loves it, so The link is in the description. So once you have installed the closure and you have it lined up with her part, then you can kind of customize the plucking of it and make it look more natural. But this is how I do it with tweezers, and I pin it up, sew in the rest. This is what the closure would look like with bleach knots. This is what it would look like with concealer. And this is what it looks like for this particular client. I did not bleach the knots and I did not use concealer. I only plucked a very tiny little bit and that was the outcome.
If you enjoyed this video, please subscribe. Don't forget to comment, rate, and share this video with fellow stylists or clients that you want to see my work.