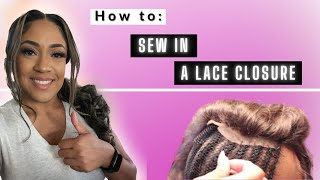
In this tutorial, stylist TT (channel “TT Does It All”) demonstrates a complete, adhesive‑free method for installing a silk lace closure in a sew‑in weave. She begins by emphasizing the importance of a precise braid pattern that aligns with the client’s natural part, then walks through fitting the closure, managing tension, and stitching the front line to secure the closure against movement. TT details the needle‑and‑thread technique for both sides of the front hairline, explains why reinforcing the first stitched line is critical, and proceeds to stitch the remaining sides and the back, ensuring the closure lies flat and natural. Throughout, she offers practical tips, references a separate braid tutorial, and encourages viewers to pause, replay, and ask questions via comments or her social media (TT Does It All). The video showcases a fourth‑time use of the closure, highlighting a flawless, damage‑free result without adhesive.
Chapters
Hey everybody, it's your girl TT, and this is how to slay a lace closure. So I have done many in my career, and it has taken years and years of experience and trial and error. But as you see, it can be done. This one's actually a silk closure, so it can be done. Um, and it's quite fascinating, the look you can get with it. I mean, it's— I mean, it's flawless. So I'm going to show you a few techniques and the things that are important to me, and hopefully this helps you all with getting started. First up is the braid pattern. Braid pattern is everything for lace closures. You want to make sure you part their natural hair exactly where you want to part the closure, and unless they're bonding it down, they only can use one closure with the way I sew it down. So the first braids must be very small. After everything's braided, you can see how I braid everything, and I do have a braid tutorial so you can see that. But the net just allows me to sew anywhere without using the braid as a base. But that is her part and where it's going to be. Now you want to fit the closure, um, you want to sit it down, see where you're going to lay it, and just kind of work it that way. So you see I'm kind of placing the closure where I want it to be. Now tension is the key when doing closures, so you want to sew this. And, and you see there's a couple holes there because this one has already been used, but you want to start with the corner that is closest to the part. So how I actually style and lay the closure is a whole nother video, But stitching the closure is going to be this video. So you want to sew one side, you want to hold it with that pointer finger right at the part. And if it's a little closer to this side, that's okay, because once you add the tension to the other side, it's going to balance it out. So you see her part is right there, and I'm going to go to the other side and take a whole nother— a whole new— whole nother, ha— a new piece of needle and thread, and I'm going to start stitching the other side down. So again, this does take trial and error, so I'm showing it to you, but it will take you repetition to get it. So I sew down, of course, the next side, and I am placing the closure about a centimeter above her hairline. When I stitch it. So I am stitching to that first braid and I am pulling. You see that tension is not coming away from her hairline, so it's not pulling her hair out. It's pulling the closure flatter and flatter to her head. So it's pulling left to right versus front to back. So I am going to section out and I am going to line that again a centimeter in front of that braid. So I am parting out that centimeter that's in front of her braid, and you'll see how I stitch it down to make it look so, um, flat. I will stitch all the way up to the part, and you'll see me doing that. I mean, on the other side, I will also stitch up to the part, and that's the first step. So the first step is sewing each side down on the front of the hairline, I guess I would say. So you place the closure, you fit it, make sure everything's where you want it to be, and then you start stitching. So I go in, in front of the braid and then under the braid and out. So that centimeter that is in front of that braid, I am putting the needle through that piece. And I'm making sure that centimeter is just up against her braid, and I'm going through. So none of that is going to show, all of that is hidden by the rest of her hair. So I'm going in front of the braid closest to her forehead, I'm going underneath the braid, and I'm taking it right out right after the braid. And I'll stitch this way all the way up to the part. I will not stitch the part itself. So if you stitch and apply this tension all the way up to the hair or up to that part, you won't have any, any, any gaps or anything flip-flopping or anything lifting up at all. So after I stitch all the way up to the part, I bring the needle back down and do just one more little run over, just making sure I reinforce that thread, and go all the way back down to the side. And then I will not go all the way around the side. I am going to actually go back to the next side, and I'm going to sew right up to it. So you see right now that it's already looking good, but here I need to stitch this line down, and I'm going to tell you why. If you do not stitch this line down, when the sewing is, um, going in and you're sewing down those sides, the closure will move back. So you have to make sure that the front of each of these lines is tied down and secure to that first braid so once you start stitching the rest of her head down, this closure does not budge. So that is the importance of sewing down each one of these lines, because if you don't, the closure will shift the more tension you add throughout the sew-in. So now that I am done with this front line, or just about, I can go ahead and stitch the rest of the closure down. So the front line is the most important. You want to sew the side of this shorter end first So this side is what you would sew down first just to make sure that part still stays in place. And it's a simple loop technique, so just in and out, in and out, nothing spectacular. You're going to actually sew over that little piece of lace as you finish the sew-in. And you definitely want to sew all the way up to the closure and on top of that lace, so your last track needs to go all the way up to the line that, that hair for the closure starts. And that is important because you don't want her combing through any spaces in her head. You don't want the closure to attach to anything, or you don't want her to comb through anything like thread or whatever. So here I'm just sewing down the other side, and the tension's already applied to the other side, so you won't have to do much tension here other than just kind of stitching it down so that there's no lumps or humps in the closure. You want the closure to lay flat, look as natural as possible, and look just like her flesh. So, um, shout out to those nails! Look at those nails, Nisha Nails, y'all. She keeps me on point. Her name is Nisha Nails on Instagram. Y'all gotta check her out. But anywho, I'm gonna keep threading, keep threading, and now I'm gonna actually take it around the back. So you pull the tension on both sides so that when you get to the back, the back is already tension's already applied to it, so it doesn't need any extra tension other than just making sure you pull it away from the hairline so that it— there's no folds in it, because if there's a fold in it, it looks like a closure. So in my traditional stitching video where it shows how I actually sew in, I'll show you the backtrack information. But, um, as far as the closure, I will go over the closure a couple of times and then I'll just cut the thread. I won't actually tie anything because again, you're going to reinforce the closure laying flat by sewing those that last track of your bundled hair all the way up to the hairline of that closure. So I cut, and now she's ready to sew. But let me show you the front of what her closure looks like, and it looks great. This is a really easy technique, and it doesn't require adhesive, no damage to the hair, no breakage. And this is her 4th time using this closure, so You see it looks great, and this is the base of it before I start stitching. The closure hairline looks perfect. You can't tell it's even there. So again, of course, sew completely up to the closure. You see I have one more bundle left, and I'm going to sew over that lace. So you see I sew all the way up to the line of that, that hair, and this is the end result of her closure. I hope this helps you guys, and you guys should just remember that you can pause, replay, stop, back up, go forward, whatever you want to do. But if you have questions that have not been answered in this video, please leave a comment or send me a message. Again, you of course, you know, my social media is the TT Does It All on everything. So I hope to hear from you guys soon, and I hope you enjoy.