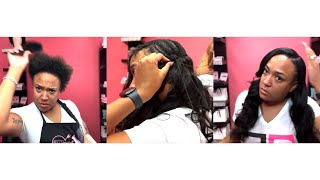
LaToya Kelly installs a sew-in on her own 4C short hair using just two 20-inch bundles instead of the usual three. She walks through her braiding and sewing technique, the physical challenges of doing it solo, and why the high-quality bundles made the process easier once the braid framework was set.
Chapters
I just did my own sewing and I'm exhausted. And I'm exhausted. Oh my God, y'all, it's been forever. Look at me. Curls Queen hair. Let's see what we got. Got bundles. I got 2 bundles. Okay, so we got 2 20-inch bundles, loose wave. Okay, let's do this. They gave me a cute little brush and a bonnet. Too cute. Well, I can actually use this right now. Actually feels good. Ouch, I'm so tender-headed. Hey y'all, it's your girl TT Does It All, and I'm back, and this is what I'm attempting to do. I'm going to show y'all some of the what it's supposed to look like versus what it looks like on me. I have not done my hair in probably like 6 years as far as a sew-in. I didn't put wigs on myself, but good Lord. So I am going to do this sew-in with these 2 bundles, and I will say these bundles were so long and full. They were so, so, so, so, so pretty. So, um, yeah, I was super surprised by that because I'm like, now listen, I do side part sew-ins all the time, and you usually need 3 bundles, but the fact that I use these 2 bundles and I had hair left over— yeah, that's some, that's some good hair. Like, that's some— a good quality bundle, especially for it to be 20 inches. When 20 inches, usually start telling people they need 3 bundles, but this is pretty cool because 2 bundles, you save money. So who doesn't want that? All right, so I am smoothing down these chicken edges, okay? You know, like chicken head. No, okay, but it really— this postpartum hair loss has really, really taken a toll on my edges, y'all. That's the reason why I took my sisterlocks down. If you all don't remember, I did have sisterlocks, and I removed those because I was losing so many locks, like in full, like the whole lock was just out, and I just felt like I looked crazy. Now it's been, um, 10 months since I took them down, and Oh my God, I miss them so much. I don't know how I could have still worn them. But anyway, back to me doing my own sew-in. So yeah, I am just going to do my side part, and usually my side part was like my go-to, and it still is really. I just haven't been able to do it myself. So with this, I feel like I really got back to The TT does it all. Before I moved to St. Louis, before I had a baby, like, this is me. So I was so happy with the outcome. Another thing about while I was making this video is I got more and more sick as I did my hair. So I know you probably hear my voice today and how kind of raspy it is. Um, literally the night of this, I started feeling terrible, and the next day I completely had no voice, and then it was downhill from there. So So yes, I, um, went through it to do this. Another thing was I bought this new mirror off Amazon and it's like to go over a door and, um, it helped me kind of see the back of my head so that I could do my own hair again comfortably. However, it was not comfortable because once I got to the top of my head, my eyes were killing me from having to look up there for so long. No, my arms weren't hurting. It was my eyes, and my nose started running, and I just— I don't know. I had the fan on me as I was doing my hair because of course you get hot while you're doing your own hair. So I don't know if it was a fan. I don't know if— I don't know what happened, but this doing my hair took me out, y'all. And then We get to the last braid, and I'm just gonna warn y'all, it's gonna be real big because I could have put it into two, but I told you I was feeling bad, so this is gonna be one big braid. I'm dead wrong for this one. However, if this was a customer, y'all know I would have split that into two, but it's just me. But I'm giving myself the luxury treatment. Yes, that oil feels so good. I probably went over a couple spots more than once, but hey, Oh my God, that oil, y'all, is something else. So to be honest, the easiest part of this entire process was sewing these bundles in. Okay, now mind you, I'm watching Real Housewives of Potomac, don't judge me, y'all, but it was very hard to braid. But sewing, I didn't have to physically look at what I was doing, so my eyes got to relax. I can just feel with my hands, and I can feel the distance between each braid with my fingers. So I got to use my, my touch a lot more than looking and trying to see what I'm doing and trying to part straight. So yes, I do have tutorials on my braid patterns and my sewing on the neck, because right here I'm creating a bridge between that top braid and that bottom braid. I'm creating a bridge with the thread so that I can use that bridge to sew onto. I know it's so— everything that I do with my installs is so, so, so detailed, and everything is for a reason. So I am going to finish sewing on this net, and then I'm going to get to sewing in these bundles. And wait till you see my expression about these bundles. I really could not hide how impressed I was I told y'all I cannot hide my excitement when I open the bundles up. Like, you can't even see my face through the bundle. That's how full that one bundle is. My fingers ran straight through it. It didn't have like split ends and all that stuff. Like, I was pleasantly surprised. And then I had to stand up and show you how long that bundle is. Like, I can't even extend my arms to straighten it. Like, you see, I'm still going. Like, wow, those bundles were so long. I love it. So yes, Curls Queen for the long bundles. So I am starting on the part where my bang will be. I'm childish. Um, started on the part where it's the longest, so I'm going to go from left to right just stitching. And you see, I don't have to turn around and look. Now, every now and then I can look and see where I am, but pretty much I can feel exactly where the track is laying and where it's going to be. The only time I have to look is at the edge. And, um, the rest was smooth sailing. I'm lying, the rest was not smooth sailing. The hardest part was the last row, and I think that's what killed my eyes too, y'all. So I am using this long thread because it's what I already have pre-threaded for my clients, and, um, It was not hard. It really wasn't hard. The hardest part was braiding and sewing in the very last row. I could have used some extra arms and eyes for that part, but we gonna get through it because I didn't show y'all the end result without there being an end result, right? Right. So let's keep watching. Let's keep going. Let's keep dancing to the vibes. So even though by the end of this video I was extremely sick, I still wore this look. The hair was beautiful. I actually still have it in, and it's over a month later. And, um, yeah, if you have seen me doing anything on social media within the past month, it's been the same hair. So thumbs up this video if y'all going to go ahead and check them out. Send me a heart in the description if you made it to the end of the video, and I'll see y'all real soon with the next one.