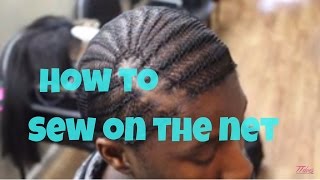
LaToya Kelly shows how to sew a net onto the scalp before installing a lace closure. She anchors at the corner, uses brown thread so it vanishes once extensions come out, and stitches an overhand straight line to keep the net removable and the final look realistic.
Chapters
Hey everyone, it's your girl TT with a lace closure sewing on the net video. And you saw the before, and this is actually the finished product of me sewing on a net. And this is the finished product of the lace closure sew-in with a flash and then without a flash. And I have a video on the braid pattern and how to lay the closure, but this particular one is about sewing on the net. If you watched all of my other Sewing on the Net videos, you know that I always start with the corner that I'm going to sew onto. And check out the braid pattern video to see exactly why or where I'm parting her hair and how I came up with the placement of everything. I do recommend you all looking at my other videos of braid patterns because I explain a lot in depth why I do things the way I do. So check those out. But I do still use my thumb as a guide when sewing on the net in every sew-in. And for this particular sew-in, the net is not required. If she had extremely short hair, it would be required, or if she was doing a deep side part leave-out sew-in, it would be required. And that video and why I require it is uploaded already as well. But for this one, some stylists use a net on every client, and some, some stylists need a net on every client. And this is just showing exactly how I do mine. So when I have a braider and I have back-to-back clients, I actually have her sew a net onto everyone. So just in case her braids aren't exactly how I would do them, I have the net as a guide, so it really doesn't matter. The outcome would still be the same. Hey guys, since I have moved, I have had a few questions on how to get an appointment with me, and it has been from regular clients. So this message came from a client, and I'm like, oh my God, I've posted it everywhere, but obviously it's not working out too well. So I posted this on Instagram to see what should I do, and these are the comments that people gave me. Um, I do have an app and it's just not working. So someone suggested a GroupMe, and I thank you so much, girlfriend, for that idea because I am going to use it. Um, I have created a GroupMe. The link is in the description, and everyone join it. There will be a lot more members once you see this video than there are today, but the link is in the description. It is a free application, so I will see you all soon with a better way of communication, hopefully. And still, don't forget the app. The app is still out there. It's TT Does It All or TT Does My Hair, but I will see you guys soon either way. So back to sewing on the net, um, I am actually using brown thread, which is in a previous video. So please, you guys, make sure you're keeping up with my videos because every question you have ever asked about any of my sew-ins, either the video is coming very soon or it's already been posted. So, um, I'm using brown thread because it makes it easier to see and. And me personally, when I have my extensions in and it's ready for it to come out, even if I need someone else to help me, it's a lot easier to have brown thread versus black thread. If your boyfriend is helping you or if your mom is helping you and that's all you have, even they will appreciate the fact that there is brown thread used, which will not show in the overall sew-in. It's just easier when it comes to me sewing it in, making sure each thread is, is woven correctly. Um, this particular line right here, I need it to be straight so that when I cut that out, it's exactly perfect. So I'm overhanding this as a line, and you can rewind, pause, fast forward to see exactly how I'm doing it again. And I'll slow motion this particular one for you, but I am going overhand and I am going to sew that straight line. So in that previous video or previous clip that you just saw, it'll be perfect. So when I cut it out, nothing will come apart. And for the lace closure, you want to see straight through the lace closure and see their scalp. And I personally feel like that looks more realistic, which is why I cut out the net right there. I know I have a lot of stylists who subscribe to my channel, but I get a lot of questions about the Apple Watch, and I personally love it. I've been wearing it for a little over a year now, and when I'm working and I'm super busy, it is so much more convenient to be able to just look at the watch, decide if I want to respond or not, versus having to stop, pick up your phone. So yes, I do love my Apple Watch. For all those who do want to get it or have questions about it, yes, I do enjoy it. So as you see, I stitched all the way around and I'm back at the point where I started, and I also have more thread left so that I can start exactly at the right placement where I would start stitching her bundles. With the exact same needle. So I'm going to cut the excess lace off, and then I will start sewing the closure on first. All right, so she is good to go. Her net is sewn on. She's ready for her lace closure to be installed and then her 3 bundles, and you will see her finished product here. And, um, don't forget to comment anything I may have missed I will answer it in the next video. If you enjoyed this video, please subscribe. Don't forget to comment, rate, and share this video with fellow stylists or clients that you want to see my work.