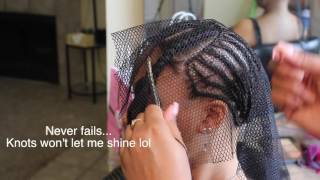
LaToya Kelly shows how to attach a net to a deep side-part sew-in, starting at the corner where the swoop will be. She stitches through the middle of French braids to avoid tension, reinforces corners twice, and uses thick brown thread for visibility. The stretchy net can be reused for 2-3 sew-ins.
Chapters
Hey everybody, it's your girl TT with a video of how to sew in a net for a deep side part sew-in. And if you all are subscribers that watch my other videos, you know that I am moving. And as of a couple days ago, I've officially moved. It's the 4th of July. But this is a client that was actually one of my last clients when I was living in Kansas City. And this video does not include the braid pattern. That video will be in the once it's complete. So if you guys are wondering what that pink bag is in the back, my client actually bought me a cupcake for my last day. She's so sweet. So of course I try not to put music in the background of my videos because it drowns me out. So you guys have some moments of silence, just bear with me. You prefer the silence and me talking, versus not being able to hear me talk. But, um, I do sew through the thread that first go-around which you just saw. And again, like I say in all of my videos, you can pause, rewind, fast forward throughout the entire video. It's YouTube, so, um, please keep that in mind while I'm talking. But, um, I am starting here, and I'll tell you why. I start with this corner basically because it's the side that the swoop goes on, and it's the side that I'll actually start sewing the bundles in when I start sewing her hair. And I have a video on how to exactly sew in a deep side part sew-in, and when I start sewing that, you'll see that this is the exact same side that I start on when their part is on the opposite side. So I do stitch the top first. The back is always the last part that I sew on because I want the net to be flat and fitted to her head. So I'll have to kind of fold it over a couple times just like I did in that corner. So here I am just stitching over that first braid, and then I am going to So that braid along with— and I'm sorry about the cameraman, it's just someone who was standing by who I just said, hey, record. So please do not comment on the quality of the job because they are not professional. Um, excuse me. And even with a tripod, it will not show you on top of her head, so It's just a lot easier to have someone else do it. And yeah, so here I am kind of pulling it through that braid, um, and I'm taking it through the middle and through— you see it's going— that one went over, but then the next one I actually stitch in the center of the French braid. See, it's going through the middle, and then I'm going through that, that braid underneath it. And that's just kind of to add, to pull that braid in place. Um, and if you see along this braid, um, that's closest to the leave-out where I just put my hand, you'll see it kind of move the braid to be just more in tune with the sew-in. Like, it actually pulls it more with the other braids. And you see the braid is pulling more in. Watch it just pull. In the next braid, you'll really see it with these next few. Um, I use this thread because it is really thick. Um, it's brown, so you can see it when you're trying to remove it, and I can see it while I'm sewing in. And then the spool comes with a lot of thread on it, so I buy them by the case, um, and I love them. But, um, here I'm still stitching in the middle of that braid, down through that braid, just to kind of pull that outer braid in place. And you can see the before and after. So of course, in your before, you see that outer braid closer to the leave-out is up, and once I stitch it down to your right side, you can see that the braid is just down and more with the sew-in. So as I continue sewing, I just keep doing the same thing around the whole braid. I don't do it around the tip because you don't really want to add tension on that part. So you see, I just went around the entire braid with that one. And the next one. And then I always reinforce these corners twice so that when I stitch, it's not on a really small piece of hair. So this knit, let's talk about the knit. I like the net for 3 reasons. Number 1, it is stretchy. Number 2, it is soft. It's easy for me to sew through and it's not scratchy for the client's head. Number 3, I can use this actual net for 2 to 3 sew-ins. So that excess that's in the back, with the way I fold it over, I can actually use this net for not just her but for the next client. I can use the excess piece and depending on the other sewing, I can use it on that one too. If you all watch my 50 facts, you met Harley. There he is in the background with his royal shirt on. He's tired. He's like, whatever, just get on with it. Anywho, oh my God, one of my subscribers said I say anywho in at least all of my videos. That's a bad habit. So yeah, I'm just stitching. I'm just folding over as I go just to make sure that the last, the last little leg of this sew-in is just completely flat. And you see that I'm basically— the net is flat to her head, so I won't have to fold it over anymore because it is fit it. So as you see, I am ending my stitches right where I started them off. That way I can use the last little piece of this thread to start my sew-in. So I'm going to show you guys how I cut it off as well. This is her finished look, and, um, I did style it, and I have a video on styling and everything. But next, I will show you me cutting off the net. So I never actually cut off the leave-out net. So that net that's covering the section that's going to be left out, I never cut that off until I'm actually finished with the entire sew-in. And again, just like I said earlier, I use my finger as a guide so that I don't cut any of the baby hairs or cut her braid or anything. So I use my finger as a guide, and these are actually cutting shears which are not used for a net traditionally. I just have a lot of shears from cosmetology school as well as just buying them. So these are an older pair that I could get sharpened and continue to use, but I just I have a better pair. So these are really sharp and I just like to use them for cutting off the net. So I'm going to continue cutting that net off along the front of the hairline as well and just making sure to leave the section section over that leave-out in there so that I have that excess to sew onto if I need to. And you'll see that. But I hope you all enjoyed this video. I am done. And, um, make sure you watch the video for the braid pattern. It is very important. Please comment and make sure you rate the video, thumbs up, and share it with other stylists you know or friends.