How To: SLAY Baby Hairs | 360 Lace Wig | ChinaLaceWig
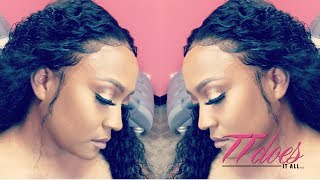
LaToya Kelly shows how to install and style a 360-lace wig from ChinaLaceWig, from prepping baby hairs with her cream to cutting lace, bleaching knots, and securing it with clips and adhesive. She demonstrates multiple parting styles, tinting the lace for darker skin tones, and removal with rubbing alcohol.
Chapters
Hey you guys, thank you for tuning into yet another TT Does It All video, and this is the look that I will be achieving for you. Okay, so keep watching. So if you just want the baby hair tutorial, look in the description, the direct timestamp of where that starts is there. But I'm going to show you all this 360 lace wig, how I put it on, how I secured it, and what came in the inside, and all the details about the hair first, and, and then I'll get into that. And you all know I don't like to sugarcoat or BS you in the beginning, so fast forward to there if that's what you want to see. So I've worked with this company before, it's chinalacewig.com, and this was the wig. It did not have combs in it, and this was the after. I asked for a wig without anything in it the last time. This time it has the adjustable strap in the back It has combs in the front, the sides, and the temple, the top of your head, the very top. And, um, it came with lace all the way around it, just like a 360 lace wig. So what I'm doing is molding my hair using my baby hair cream, and, um, I am just combing that up into a ponytail, and I'm going to mold it by sitting under the dryer. You all know that this is my baby hair cream that I sell at hairinkkansascity.com, which is my hair company. All right, so I tie that up. Good job. And I'm under the dryer, and we all know that's pretty boring. Okay, all right, so cut that off. And I'm using like those neck strips in black, and they're sold at every local beauty support— beauty supply store. All right, so I'm cutting the lace off with this wig. I did tweeze in addition to the tweezing or the pre-plucked hairline that it already had, so it was very easy to tweeze. And I also bleached the knots. So now that I've cut the lace off right up to the hairline, I am going to try it on. And I'm using that clip in the back, and I'm just kind of seeing how it fits. And you guys, guess what? I don't have my contacts in and I can't see. See in my mirror. So I'm going to put my handy dandy glasses on, and I'm fitting the sides because I'm going to have to cut those sides. And what I'm going to do is mark a little notch, but first I just kind of want to see what it looks like without bonding it down. Because it has so many clips in it, that should be an alternative to bonding it down, which to me, if I don't want it to be flip-floppy in the wind like that, I'm going to just go ahead and bond it down. So I'm measuring because I cut it only up to the hair, so I'm kind of measuring where my hairline stops right there, and I'm just cutting a little notch so that when I take it off I can actually cut it to where I need it as it's off of my head. So I cut a little notch there, and I'm going to take it off and show you that this is exactly how much I cut. All right, and I'm going to show you the other side before I cut it. You see that little notch on the right, right above my pointer finger? And that notch is right there. So I'm going to cut that whole little horseshoe off, and that is exactly how much I cut off. And then I'm going to go get my makeup done because I looked a hot mess. So now I have my little adhesive, and this is cling adhesive I bought off Instagram years ago. I use it whenever I'm like just doing something really quick because I don't really trust it. Um, I only share the adhesive I use with my frontal training customers, my one-on-one customers, and those who do the frontal online training with me, which is in the description below. But now I'm also putting it in the back, and I did not tweeze the back of the wig because this is something— the other video that I did for this company, um, China Lace Wig, is where I showed me tweezing the back of it and everything and what it looked like. This one, I didn't want to do all of that, so this is a quicker alternative to that method. And I stuck the comb in right at the back of my head, and you see that comb right there where I'm pointing. And then I'm just going to put the wig up and lay it on that adhesive. And I need a better hand on this wig. There you go. So I'm gonna just lay it right there on the adhesive, and I'm gonna kind of comb it in the adhesive. And I didn't put much adhesive. This is not to last forever. Um, the way that I actually lay it is only for my frontal training clients. So this is just a temporary lay. If you were a customer of mine, this is not what I would do to your hair because this is not something that you want for longevity. Me personally, when I wear wigs, I want to take them off, so I don't like something that's going to stay on for weeks. Um, if I want that, I'll just get a sew-in. All right, so I'm just combing that lace right into the adhesive and just feeling to make sure I'm pressed right into it. And as you see, it already looks super, super good. It already looks really natural. But I just put it up in a ponytail, and I'm going to tie my edges down while I pull it up into a really nice higher ponytail, just so you all can see what it looks like around. So this will set the lace and the adhesive as well. Um, so tie that up, pull my hair up higher as I want it. And it's so pretty and lightweight. The hair is really, really lightweight. It's, um, it's like feather. It's just very pretty. You see how it looks now, and then you'll see how it looks when I put water on it. It's just gorgeous. So, um, this is 22 inches of length. It's gorgeous and just perfect. So especially when it's curly, it shrinks. So 22 was perfect. But I got my little— clearly my arms are tired, but I got my little ponytail holder and I'm putting in a ponytail just so I can kind of see what it looks like up. Now I'm going to untie it and just do a little circle so you all can see as I'm going, you know, unedited. Well, of course I'm cutting down the nonsense, but I don't have baby hairs yet. And you see how good this hair really already looks. So if you are a darker complexion, just tint your lace. And, um, I share that in my training, online training, and as well as my one-on-one trainings in person, what I use and how to do that. Um, but for me, this lace, it just melted right into my skin. If you don't want to tint the lace, use makeup. But here's the back of it. It's just a really quick updo, and that was perfect. So I just kind of felt bad because I'm like, okay, what if it didn't look good? But clearly it did. And you see behind my ear, it just— it looks good. All right, another side, because I don't want you to say, well, she showed one side but she didn't show the other side, because that's how I look at videos. Like, I bet that other side look a mess because she showed and show it. Okay, so now I'm going to start parting around and, um, just parting it to see if I like it. And as I parted this middle part, I was like, wait a minute, what about the other parts? Let me check it out and look around. But I always use my wand curl, even on my clients, my wand curling iron. I don't use it for wand curls, I use it to actually mold the frontals and closures. So here I'm just kind of parting through, and I'm just parting to see how good it looks. And again, it's still still looks super, super, super great. Um, I can wear this in like a bun at the top if I wanted to. I can wear it in a deep side part. I can do so many things with it. But enough of that, let's try— let's see how a deeper side part looks. It looks really good, and I didn't tweeze throughout this frontal either, so it has an awesome density. It's 220% hair. So it's a lot of hair, but it looks really gorgeous with the tweezing of the hairline. It just flows right into the back, and you see how far back I can part it. And if you see with how far back I am parting it, this is one of the advantages of having a frontal that is 4 inches back. Some frontals are 4 inches back, but they're only 4 inches in the middle. This is actually 4 inches on the side too, which is very important when you're purchasing a frontal or a frontal wig. Sometimes the sides are like 2 inches back, and that is— I mean, you have no room for a deep part whatsoever. Here is where I'm going to start my baby hairs, and again, I'm using my baby hair cream, which is from hairinkkansascity.com, and I am just maneuvering through that And I don't personally wear my baby hairs like this, but I have a lot of customers who love this look. So I wanted to do a video for you all showing how I do it on myself so you guys can watch this at home over and over and over and over and finally get how I am doing it. Don't be afraid to use my baby hair cream. The more you use— when you use it, you want to make sure wherever you lay that hair, it stays. So there it didn't stay where I laid it, which is because I needed a little bit more baby hair cream. I used the leftover from the first swoop I did and thought that was enough, but clearly I'm gonna need a little bit more because you shouldn't have to— your hair should not lay. And if it doesn't lay, that means you don't have enough on it, which is why I'm putting more on it. See? So don't be afraid to use a lot. All right, so I'm kind of laying it like a finger wave. You see my fingers holding that part in place, and then the comb is just kind kind of swooping it backwards. And then I'm on to the next one, and I'm parting a very little bit of the hair. And that's the tweezed hair, of course. And as you all know, none of my hair is left out. You saw in the beginning of the video where I completely laid my hair up into a ponytail, so none of this is my hair. All right, so the next side I'm going to— and that was way too big, way too much hair. So you see how I'm doing it over? That's how much hair you want. You don't want a finger wave. You may swoop it like a finger wave, but you don't want a finger wave on your edges, okay? So you see how much baby hair cream I used in there? I am just going to comb it and lay it down. And as you see, it dries and it doesn't leave like a super white residue when it dries. Because I mean, if you're looking at it, I didn't put— I'm not wiping off that white or anything. It's just melting right in where I need it. And another thing is, if you see that the lace on the tip, it's kind of, it's kind of not really set into that adhesive, the baby hair cream gets hard, so it just locks everything right into place. You can tie your hair down with that scarf like I had and go to sleep and wake up and it'll be the exact same. And I'll actually show you a picture at the very, very end of this wig the next day, and I didn't even tie it down. But that's something you don't want to do, okay? Don't practice my bad habits. Tie your hair down every single night with these. All right, so I'm laying another another swoop here, and then I always leave like a little sideburn, which some people cut, some people don't. Um, for this video I'm not gonna cut it just because all the hair is curly and super long, and I think curly hair with baby hairs and those long sideburns is beautiful. So this is my little sideburn, and once I lay the baby hair cream on it, it's going to set everything nice and in place. And of course at the end I'll show you up close and personal what that looks like.. But, um, see, it just sits right there. Yeah, girl, you see me checking myself out. I'm so goofy. Wait till the end of the video, y'all. I'm just so goofy. All right, so I still have one swoop over here left to do, as well as a little sideburn piece. So I'm going to comb this comb it out, and then I'm gonna put my little baby hair cream on it and then swoop it back. And you guys, I would not— like, on people's natural hair, I love KeraCare, but for their, um, frontals, I would not use KeraCare. And I kind of went through mixing a lot of things together to formulate my baby hair cream but it lasts for longer than a week. Um, and with this video, you can do it yourself. To get this baby hair cream out, I just recommend using like warm water, a little wet towel, and just apply it on it, kind of comb it out, and then redo the baby hairs. Don't try to cake it up because just like any other baby hair product or edge product, you don't want to have it caked up, because once it gets caked up, it does start staying white, or, um, it's just your hairs just don't move. So make sure you have clean hair that you're putting it on. And of course, the adhesive always is removed with 91 or greater rubbing alcohol. That is how you can get this adhesive off of your head. And this is how I take all of my wigs off. So I'm just kind of combing, making sure everything is still set, and then I'm gonna lay that little sideburn right there. I don't know why I'm saying that, I guess because I live in St. Louis. But all of my information is in the description. The description does also have the information on this wig, how to buy it, and, um Make sure you all comment below. I want to know if you like this look. Do you wear your baby hairs like this, or would you, or how do you feel about them? Do you feel like it's excessive? Let me know. Um, as you all know, negativity is not allowed on this. I do ask for your opinion, but I didn't ask for, girl, you look like a clown, because you will not get approved. And yes, I moderate every comment, so And this is just water I'm putting on it, nothing special to it, just water in a little spray bottle. And I'm just running my fingers through the hair, and you see how pretty it's turning out. Look at the right side, your right, and then look at your left. Like, you see how it just tamed those curls and just brought them together? Oh, so I'm leaning my head because when I tell y'all, I sprayed so close to my root, it was all on my real hair, and I didn't want it to mess up my baby hairs, so I had to like lean back. What do you think about curly hair? Do you like curly hair? I like curly hair because curly hair you don't have to do nothing with, and it's like hot as I don't know what in the Midwest, so this is like the perfect look. I don't have to curl it, I don't have to straighten it, and it is on point. It's like 100 degrees. I don't want no hair in my face, okay? Y'all like my new place? Wait till y'all see it. It's so pretty. I'm no longer at home. This a cute selfie, huh? I'mma get it, I'mma get it, I'mma get it, I'mma get this selfie, I'mma get it. All right, so here's a closeup of what my baby hairs looked like in the wig up close. And as promised, I did take some pictures the next morning As you see, I'm half asleep still, but this is the finished look. So thank you all for tuning in. Make sure you check out my Instagram, my Snapchat, my Facebook. I'm always on there. So see y'all in the next video.
More from LaToya






St. Louis, Missouri - Lasts 4–6 months - Takes 4–6 hours - Investment: $3,000 www.TTDoesitall.ai


What are #ktips? Here’s your answer! Schedule at www.TTDoesitall.ai 🩷 #extensions #ktipextensions

4-6 hours install and last 4-6 months #ktipextensions done by the right stylist the right way 💕

Located in St Louis Missouri 💝 Consultations available www.TTDoesitall.ai 💕#ktips #natural

K Tips take 4-6 hours to install and last for 4-6 months with proper care! #ktipextensions