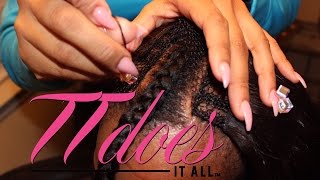
TT shows how to install sew-in hair extensions using a double loop lock stitch and folding wefts flat. She stitches around, not through, the wefts to reduce shedding, and a full install takes about 2.5 to 3 hours. Hand-holding tracks instead of clipping keeps them from pulling away from the hairline.
Chapters
Hey everybody, it is your girl TT and I am coming to you with a very important video about stitching and folding over wefts. I will not be showing the braid pattern and I also will not be showing me styling because that is a different video, two different videos actually. But in this video I will focus on how to do this, what you are seeing right now, how to fold over the track and have it flat and flawless, stitching, and how to just do a traditional stitch without interlocking each stitch, which causes the client a headache when it comes to taking the sew-in out. So I will be showing you more in detail about folding over the tracks and stitching, and I'll slow it down like I'm doing right now. So each time I fold over a track, I double lock the outside And I pull it up and hold down the hair to lock it in place. Don't worry, I'll show it a few more times. So when I say just traditional stitching, this is what I mean. I just go up through and not through the track. I go outside of the track. So I sew around the wefts, which is— which helps with like minimizing the shedding, because if you break the weft, that means that it's gonna start causing those hairs to kind of slide out easier. So I do a traditional stitch, which is so easy when the client goes to remove their extensions. And at the end of each row, I seal it with a, a double loop lock stitch. So here, you know, you get that one little piece of thread that always is hanging or is not level with the rest of them. You take both of those pieces of thread and you pull each side. See how I pull each side just to make sure that nothing is hanging, no thread. You don't want anything caught when they go to comb their hair. So here again is the double loop loc stitch. So I fold it over, I take the needle through the top weft that I'm folding over only. So my needle is going through the braid and then through the top weft to be folded flat. I double loop and I pull up to lock it in place. Then I begin with my traditional stitching, which is just up and down, not through the weft, underneath the weft. I hold the hair in place with my hand. I hold the tracks in place with my hand. Some people use clips at each end. It takes longer for me to stop, and my sew-ins generally take me between 2.5 to— there's extensions that can take me 2 hours just to sew it all in, so I am pretty fast., but I don't like things that slow me down, which would be clipping in the end of each weft as I sew. So again, you see the double loop lock stitch right there, which I kind of messed up on, so let's try that again. Pull the needle through, and I pull it up while holding the bottom of the hair, and then I'm back to my traditional stitching. So there is no way that anything can go on with the inside of my traditional stitching when the outer braids are reinforced with the double loop loc stitch. So there is no way that anything can go on with the inside of this because each thread is pulled thoroughly. Now I have another video with ending and starting new thread as well as tracks, so that will not be in this video, but I'm just going over stitching and how easy it can be and how easy it is to fold fold over a weft and have it flat. So starting and ending tracks, which I just did, will be another video. So again, we have the double loop loc stitch. I'm going to go ahead and fold over this weft, and then I took it only through the top one, hold the hair down. So here you go, the needle is going through the braid and through the top track. Double loop, pull through, and I hold the hair, and I pull the thread up and the hair down, and that just locks it in. So nothing between that first braid and the other side of her head is going anywhere because that lock stitch is not going anywhere. So I am back to my traditional stitching, and again, the stitching is what's important in this video and folding it over. Starting and ending tracks is a whole other video. Shout out to my nail tech, Nisha Nails. Alright, so we are at the top of her head just about. You see I'm going through, double loop loc stitch, hold the thread up and pull the hair down. This is another angle for you. You'll see me going through the first braid, only going around the top track. I'm not going through both of those. As you see, I went through the braid and I took it above that bottom track. So through the braid, above that bottom track, you see, and then up under the top one. Double loop, pull through. You'll see me hold the track down as I pull the thread up to lock it in place. Alright, so we are back to our traditional stitching and I hold it in place. So I don't want the tracks to pull against her edges, so I hold it. When my hand is laying on top of her head like that, I'm holding it so that the tracks do not pull away from her hairline. Alright, so traditional threading, going, I'm going. And of course all that lace up there, I'm going to cut it later. So if you all do hair, you'll see what I'm talking about when a client moves the track out of her face. Like, I needed it there. She tried it, but it goes back. So as I was saying, um, yeah, just your traditional stitching. And this is actually on the second to the last row, so the last one will be, um, this will be folding over onto the top And it's kind of hard to see with the angle we're working at and with where my cameraman is standing, but I'll slow it down a little bit so you can see me fold it over and do the, the locking stitch on the top. So you see, it is very flat, and we're on the last braid, which is that very fine, very small braid, and it's very flat up there. So I'm still doing my traditional stitching, no extra reinforcement needed up here either because you're going to lock each side. So my battery actually died here, so I'm going to go ahead and show you a little glimpse of me straightening out her hair with my Babyliss flat iron, which is a mini blue flat iron, not this one. I straightened out the ends first from being in that braid for so long. This was actually on my Snapchat, guys. My username is TTDoesItAll and I'm always on Snapchat recording. This is just me flat ironing her hair. I'm not going to show the styling in this video, but you all saw in the beginning and I'll show you at the end what the ultimate look was. I do have another video showing the styling. I hope you guys enjoyed. Don't forget to comment, ask any questions you need to, and also don't forget to subscribe. Thanks for watching, guys!