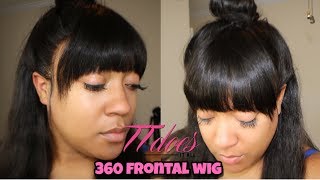
LaToya Kelly shows how to prep, cut, and glue a 360 frontal wig from start to finish. She bleaches the knots, plucks the hairline, custom-cuts the lace, braids the back, and uses Got2b glue to set it. She applies it with a stocking cap and double-sided tape for a seamless look that holds in wind.
Chapters
Hey everyone, it's your girl TT Does It All back with another video from Love Me Hair. This is a 360 frontal wig, a lace frontal wig, and this is the inside of the wig. I will put the details of the length and the density in the description below, but this was a very full wig for me and I loved it. I did bleach the knots and I also did have to customize the edges.. And you see I bleached all the way around the 360 frontal. There is an adjustable band in the back so you don't have to bind this down if you don't want to, but I personally wanted to because I didn't want it to move at all. And this is how the front needed to be plucked. You see that before and after. So I put the wig on first and parted it custom to my head. Some people can do this on a mannequin head, but for me personally, I chose to put it on and kind of see exactly where the hairline fit and cut it and cut based on my face since it is for me. I don't cut bangs for any wigs made for customers unless they are in person because I want it to be custom to your eyes, to your face, the shape that you want it. So I took it off and then I put it on my canvas head, pinned it down, and then wanted to just tweak everything that needed to be tweaked. And I saw a video on Instagram of this style, and it was a frontal, and I figured when they sent me this 360 frontal wig, this would be like perfect for it, um, because I could wear bangs if I wanted to. I could also pull the bangs up, um, I could pull the back up, um, so yeah. Right now I'm working on separating the bangs from the ponytail that I'm going to put at the top, and I am going to leave the back down just because that's the look I was going for. It looks more natural, it looks like your hair, it looks like an everyday wear. Doesn't like look like you tried to get like dolled up, but it also doesn't look like I'm basic as hell, you know what I'm saying? So it was just really, um, an everyday style that I was going for. So I sectioned the back off from the front and braided the back into little pigtails just to keep them out of my way. And then I will go ahead and mold the front into that ponytail, and after I section the bangs off, and that long piece I'll cut. But I used the Got2b Glue. There's a yellow and a black bottle. I used the yellow, but I did not realize how fast this stuff dries. So I'm over here just combing and customizing, and it's like literally drying. So I had to spray some water on it just to kind of loosen it up again so that I could keep combing and get it where I wanted it. All right, so after I get it into a ponytail I'm going to kind of pin it off to the side so that I can work more on the bangs. A lot of people ask, how do you cut your bangs, or can you show a tutorial of that? As you see here, it takes me forever to get it perfectly straight how I want it. I like it to slightly go down. I don't like blunt, straight across bangs. So it took me a while to get that perfectly how I wanted. So now I'm going to try it on and make sure the bangs look right, make sure the edges look right, and I think I like it. I think I like the way it's looking. And then I'll take it back off. The bangs even look good. Okay, so we're going to go ahead and take care of the back because this is soaking wet, so I'm going to blow dry the back straight. I was really— I got rushed as I was making this video, but here's me cutting the lace off. And I love this wig. As you see, I wore it multiple times, and it is really a go-to everyday wear. It is very lightweight, so it doesn't feel like you're wearing a hat on top of your head, and it's very breathable. I love this wig very much because it's perfect. As I make my YouTube videos, I try to answer questions that I think you all may ask, and a question you may ask here is, do you cut right up to the hairline or do you leave lace? I do not leave lace. Ever. I think it's tacky, I think it shows, and it shows in a tacky manner. It's ugly. Yeah, so no, I do not leave any lace in front of the hairline. I cut right up to the hairline. So for me, since I'm actually going to wear this after this video is done, I am going to show you me actually applying it to my head. I do put my little stocking cap on to keep my hair nice and flat around it, and I use double-sided tape for mine as well as something to lay my edges down, which also makes it stay flat to my head. So I put my double-sided tape on, mash it down really, really good, really, really good, and then I peel it off. And it's really clear and it's very strong. You don't have to worry about anything moving at all. So put my wig on, on top of it. As you see, you couldn't see anything. And I'm going to pause and go back to that. So slowing it down for you, you can see how I'm kind of adjusting where my frontal is laying in accordance to that tape. And if you see, when I finish placing it, you can't see anything shiny, you can't see anything under it. And I kind of place the hair onto it, kind of press the hair into the tape after I place it right there. So right there is placed where I want it, and I just kind of press the hair or the lace into that tape, and I am all set to go. I honestly did not have to do anything else to this wig, really. So at this point, you could really be done since it is laid with that tape. But of course, me being the extra hairstylist, I wanted to apply some extra stuff to make it actually stay when the wind blows. Some people like the messy look for it to move. But my custom edge cream is what I use for this frontal, and it actually makes it not move. So no matter how far the wind blows, it's not going anywhere. I'll start wearing them when you start wearing them. As well as my custom baby hair cream, um, the link to that is in the description below. A lot of people ask me what I use, um, and I put it on each side just on the corner because I want that little hair to stay down. And it dries clear. It comes on white, but it does dry clear. I sit my clients under the dryer for 15 minutes with it, but for me, I'm going to just blow dry it and then go. So this is as far as I'm gonna get today because I have somewhere to go, but I think that this will take me where I need to go for now. I feel like it looks good. I love it. I love it, and it's a wig. It comes off at night. I love it. Of course, I gotta take these pins out. So tell me what you all thought. Let me know if you had any questions. As you see, I kind of had to adjust my bangs because they were slightly off to me. Something was off about them. So yeah, at the end of the day, I love the wig. Tell me what you think. What would you have done differently? Would you have done another style? Comment below. Make sure you thumbs up this video and subscribe.