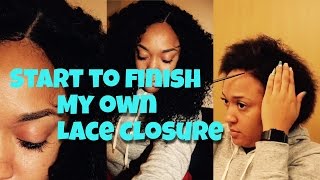
LaToya Kelly installs a lace closure sew-in on herself and gives an honest review of free hair that shed heavily within four days. She demonstrates low-tension braiding to protect thin edges and shares the physical toll of doing the work solo, refusing to hide the vendor's poor product quality.
Chapters
Hey everyone, this is your girl TT Does It All with a lace closure sew-in that I did on myself. And before you guys get to asking, I will not disclose the company that this hair came from because it was terrible. Although it looks good, it did not last.
So, so I am going to do my own lace closure, and I have never done lace closure on myself before. I've done a sew-in on myself, but not a lace closure. So here it is.
So in this video, you're going to hear a lot of me actually talking while I'm doing a sew-in because this was truly a task for me. And some of the stuff I say is kind of funny, it's crazy. I give a lot of tips as to how to do a closure, a lot of things that are important My arms hurt already.
Took way too long to do one braid. Oh my God, this whole sew-in is going to take forever.
I'll just be quick, but the company sent me this hair and they wanted me to do a review on it, which I agreed to do. The hair was free, 2018 16-inch bundles and a 14-inch lace closure. Um, did the sew-in and I loved it. It was so pretty, and like 4 days later it was a bird's nest. I couldn't comb it without hair shedding all over the floor. I could barely put my fingers through it. And yeah, I'm definitely— I let the company know that my review would not be good, and if they wanted me to post their name and post my review still, I would, but it would be honest bad review. So they did not want me to post that review, obviously, so I'm really not going to disclose their name. Um, this is just for everyone who's wanted to see me do my own sew-in. That's exactly what this is. So I hope you all enjoy my crazy commentary.
So the way I'm braiding right here is this is my weaker side on my edges. So no matter what style I have in, this edge stays full, but this side is weaker. So my part is further back and I am kind of pulling as I braid. So I'm just pulling the edge into it, but the edge part is not like tightly pulled in. So my video where I said how to braid for someone with thin edges, that's what I did. It's not tight right here. The edge control is what makes it look really nice and smooth, but it's, um, it's not tight, but it's in the braid, so I don't have to worry about slicking them down over and over throughout my sew-in. So that's another example of how to do a sew-in with someone with thin edges. I just don't like a lot of tension on that side, so again, I parted this side a lot further back and this side is coming right. You see the braid here stops here. This braid stops way above my ear.
See?
Okay, I know I grabbed some wrong hair, but oh well, it'll be underneath the net. So I don't know really how I'm gonna do this, but I'm gonna do it. I'm gonna put my needle in both sides first because I cannot see them on my head like I can with my customers. This is so difficult. Okay, all right, okay, all right, all right, okay. This is like so hard. Shout out to the YouTube gurus that do this on YouTube on a daily on themselves. Like, look at me. Oh my God. Okay, so if I do it over here, that's cool. All right, one stitch in, a million more to go. That's the mail. What? Why? Why did I sign myself up for this? Why? I got that piece right there, and I need to secure one more time. Okay, all right. And now for this side. Oh wait, let me tell you guys what time it is. Okay, so it's 3:33. And I am just starting the— I took a little break. I'm doing laundry. I actually need to go fold those clothes now that I'm thinking about it. Someone just texted me. They want to get a sew-in Thursday, and she said she will pay extra for the, the last-minute notice. The worst part about that is I'll be in Alabama on Thursday, so unless she wants to pay extra and come to Alabama I don't think I'll be an option for— this is gonna be cute, girl. This ain't, but it's gonna be cute already. So let's put you here, let's put you here. Okay. Really? Okay, you know the floor up is in. Okay. Oh, why did that take so long? So it ain't bad, but it ain't going. Okay. Ouch! I hope my customers are telling me when this stuff is too tight. This is one reason why I love to do my own sew-ins or do stuff to myself that I do on my clients. I don't love to do my own sewing, so straighten that up right now. But what was I saying? Jesus. Oh, a reason why I love to wear my work is because it lets me know what the client feels, how my sew-ins grow out, um, how they hold up, everything. So that is one thing that I do love about wearing it. I can tell if I stitch right here on a certain part that it really hurts, you know, or I can tell that if I stitch on this, I don't feel anything, you know. I can better see where the tension is on the closure. There's just so much stuff that it's just so much better to know yourself for a fact because sometimes, I mean, like clients sit in my chair all the time and I'm like, hey, how's your head? Oh, it's okay. They say it all the time. I'm like, okay, really? I can't fix anything if I don't know there's a problem.