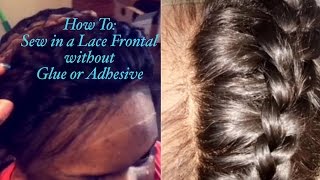
LaToya Kelly shows how to sew in a lace frontal without glue or tape. She starts from the ear side upward to prevent folds, keeps tension steady, and stitches the frontal hairline slightly above the natural line so it can pull back. She uses Brazilian deep-wave hair and installs bundles from longest to shortest for a seamless, natural look.
Chapters
Hey guys, thanks for tuning in once again. It is TT and this is another tutorial on how to install a lace frontal.
If you follow this video step by step, this is what your results will be. So keep watching as I teach you step by step how to get this look.
First, you want to have the client actually put it on And that's with the elastic band, which I showed you how to put on in my video showing how to customize the front. But you want to make sure that each side is equivalent to the other side. Enclosures are usually like 13 by 4 inches. No one's hairline is usually 13 inches wide, so you're going to have that extra piece of hair to cut off. The hairline needs to be up like maybe a centimeter ahead of their hairline because once you start stitching, it's going to come back. Now with her, she's like, hey, it's perfect, it's too far up actually. And I'm like, wait, once I start sewing in, it's going to be perfect, so hang tight. So I part a little section of the side because when you're sewing it down, you want to be able to pay close attention to right above her ears because those are the sides that tend to fold over. If you don't pay attention to them, you will get like rolls in your frontals. So that's a very important step. And other people teach to sew it from the center down. I sew from that ear side and then I go up.
I am so sorry, y'all gonna have to keep seeing this bubble because my tracks were showing and everything, and I literally was not paying attention to my hair. I was paying attention to her. So, uh, Yeah, that's a little, um, embarrassing.
So as you see here, I'm going to have my client holding that closure down with tension. But also I'm applying the tension myself so that way I know that the frontal is nice and secure in the back just like it is in the front with her holding it. And then you want to stitch it down from corner all the way up and just make sure that everything's secure and flat throughout the frontal as you're stitching it down. Now there's no pretty way in stitching this. All of this is going to get covered up by the tracks that we're sewing on top of this, um, back end. So just stitch it down, make sure it's secure and tight, and that's the most important thing. Now since you're not sewing the front of this down and you're not gluing it, you want to stitch up into the frontal. And you want to do that on parts that she's not going to part her hair. So she will never do a deep side part on the left side of her head, so I knew it would be okay to stitch a braid there. And then I may choose another spot if she says like, hey, I'm never wearing the middle part, I'll sew there too. But here you want to cut that excess off, and, um, I sewed onto that front braid, so all of the excess is not necessary. And I actually French braid it out of my way after I do the other side. I just pull up everything that's underneath that first braid, stitch it down, and then I cut off the excess. And then I French braid the frontal, which keeps the frontal hairs out of my way so that when I sew, all of the hair up front is just completely not bothered by the back sew-in. So what I'm about to do is customize her hairline now that the frontal's in, but I have an entirely separate video for that. So go ahead and click on that frontal customization video if you want to see how I do the exact hairline and how I trim the hairline to look more natural. As I said earlier, I French braid the frontal hairs out of my way so that, um, none of the hair is interacting with my sewing in the back. That's one thing that's important. The hairs are the frontal hairs are just all over the place. You just want to make sure that they are completely out of your way and that the sew-in and the frontal are completely separate so that the frontal hairs can go over that sew-in in the back. So everyone always asks in my frontal video of how to customize and how to bleach the knots, where did she get this hair from? This hair is actually from my extension line. It's called Hair Ink KC on Instagram, and on the website it's hairinkkansascity.com. She used the Brazilian deep wave. I straightened out the ends because I know we're gonna straighten it all out just to make it easier for when I get the bundle unraveled and installed. Um, and you can still see the roots are still deep wave because I couldn't get to them with the band on, but overall she wants a straight frontal. So, um, I put the links in the description below. But first, we're going to install the longest length, and then we're doing 3 bundles. And the frontal also is from my website, which is hairinkansascity.com.
So yes, again, the band is attached to the entire sew-in, and I am sewing onto the band as well as the braid. And I do have that video showing the braid pattern for this frontal, so make sure you guys click on the link for that in the description.
One thing that YouTube videos never show is how to sew in the back with the frontal and still make that back flat. I still go from side to side all the way up to the top, and you'll see exactly where I lay my tracks here, which I think is very important when installing a frontal.. But if you all see how to fold over a weft video in my, in my page, you'll notice that even on the hairline I can fold over the tracks and it be flat. So if you watch that video, I feel like it will be very helpful on the frontal because it is also important when she pulls that frontal out of that braid and lays it back over You want it to still be just as flat as a normal person's head because that is the whole purpose of a frontal. We want it to look natural. We don't want any lumps back there. We don't want it to look like a whole separate wig back there. We want it to look natural.
So I do use my flat iron as well as my heat protectant comb or heat resistant comb. As well as just any regular wand because you want a flat surface. So flattening this frontal out is your key to having it look natural. And you see that that wand is actually what gives it that flat look. And she can change her part, she can put the wand anywhere, and, you know, we just repart it. But I'll show you guys at the in and she can still part her hair any kind of way. So you see that section, I'm kind of pressing it to go backwards as well. And on the other side, you'll really see when I, um, my angles while I'm flattening it. Um, here I had her put her head up so I can see the middle of her head and know exactly where to part it because she did want a middle part, um, but I'm still going to go through and straighten it out really well. And make sure you're really quick with the wand because it is on the highest temperature. I always use the highest temperature and work fast. So you just want to make sure you're not holding it on her scalp, on that, um, part— not her scalp, it's just the frontal— but you want to make sure you're not holding it there. So I did go ahead and slow it down a little bit, um, after this part because I want you to see the different angles I'm taking. Like, I'm going to the back right there, and then I'm going down right there, and I'm going to the back again. So I am, um, I am making her frontal lay exactly where I want it to lay. So I'm going to the back with the next section, and then I'm going down because I wanted to cover up the back wefts as well. All right, so she is all done and installed, and I'm just going to show you here how she can part it different ways, comb it all the way back. She does have those baby hairs right there, so if she wanted to do the edge control and make a little baby hair look, she can, or she can just wear it all straight back like that. So again, she can part it left, right, in the middle, deep side part on either side, and none of the tracks will show. And again, I bleached these knots, and I did customize her hairline. So those videos are linked in the description, so make sure you go ahead and check that out. I do hope that this helped you all. If you are in the process of trying this on a client or a friend or yourself and you do have questions that you think of later on, please do not hesitate to leave those in the comments. So subscribe, make sure you turn those notifications on, and thanks for watching.