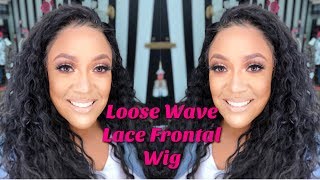
In this YouTube tutorial, TT Does It All (SPEAKER A) demonstrates how to install and style a lace frontal wig from YGwigs.com, sharing her detailed thought process throughout. She begins by showing the wig’s features—adjustable strap, pre‑tweezed and bleached knots, and included combs—then explains why she prefers cutting the lace on the canvas head for a cleaner finish. The video walks through her decision‑making about using adhesive versus no adhesive, highlighting tension issues that cause the wig to flop and how she uses baby‑hair cream to secure the front. TT discusses the pros and cons of the supplied combs, ultimately opting to bond the wig in sections after experimenting with placement. She then styles the wig, creating a natural, “just‑woke‑up” baby‑hair look using setting foam, neck strips, and careful trimming to avoid overly uniform baby hairs. Throughout, she comments on the wig’s color, texture, and the bleaching process, and she invites viewers to share their own experiences and preferences. The tutorial concludes with a final look, makeup application, and a call for audience feedback.
Chapters
Hey everyone, it's your girl TT Does It All with another sexy look. Okay, all right, so this is from YGwigs.com and this is the wig. Okay, and this is after I tweezed it, and on the bottom you could see one side tweezed and one side not. And there's tracks in the back and there's the lace frontal in the front. And there you go, you can see it., and it does have an adjustable strap already built into it, so you don't need anything else for it. And with me, I really wanted you all to kind of see my thought process that goes behind making these wigs or, um, putting them on, or what am I going to do? Am I going to use adhesive? Am I not going to use adhesive? So I really wanted you all to have an inside side view on that. And I really, really, really enjoy cutting the lace while on the canvas head. It makes for a cleaner cut. It's easier, it's faster to me. The hair is out of your way. It's just so much easier. So I want you guys to let me know if you all have tried this, if you all think that it is easier, if you think it's not that easy,, or if you think it's the same difference, let me know. But I am cutting it off now. I did bleach the knots to this wig and I tweezed it. Most wigs that do say pre-plucked, you still have to do a little bit of tweezing depending on how particular you are about your finished look, and I am very particular. So this was a finished look after cutting the lace off and after I bleached the knots., and it comes with 5 combs. 2 on the side, 1 in the middle, and 1 in the back. So there's the 2 on the side, there's that 2, 1 in the middle, and then there's the 1 in the bottom of the back. Hey y'all, so I want to explain something because in one of my previous videos I didn't really get to explain it, and that is putting on a lace wig or lace frontal wig and not sewing it down. So I personally feel like when you do something like that, if you don't bind right here down, then it's gonna flop because the band is usually about right here. So if there's nothing holding this from flopping, it's gonna flop. So that is the reason why I would leave this out and have this in the band so that the frontal kind of goes up and all of this has tension, but there's no tension here. So I'll leave my hair out right there. So that's something that I want to explain to you all before I actually put this wig on because in my previous video I didn't really have time to explain it. Okay, okay. Also, this hair, this side of my head is super, super, super short because I shaved it off and I'm trying to grow it back. So I molded my hair in a ponytail and I just slept on it. So this is like residue from whatever I'm— my baby hair cream that I molded my entire head with. So what I'm going to do this time is I'm going to try it without adhesive. I'm going to see how I feel about it, how it looks, and if I want to put adhesive on it, I'm going to put adhesive on it. Oh, and I have a bandaid on my finger because while tweezing, that hurts my finger and it created like a dent in my finger. So Yeah, didn't like that. All right, so here is where I am just tightening the adjustable straps on the back of the wig, and then I'm going to put it on. And bear with me throughout the next couple of minutes because this is where I'm going to kind of just let you all hear my thought process and how things work when I'm trying to figure out what I'm going to do. And again, in the beginning of the video, I'm like, I really don't want to, um, use adhesive, so I'm not going to use adhesive. But then as I kind of start filling those floppy pieces, I'm like, yeah, I'm probably going to use adhesive. So this is what I mean. You see this one piece flops up, so I could cut it to where This is there, but that part's cut, and the rest of that is my real hair. And then lay my baby hairs down, and it will be perfectly fine. If I leave it, I need to bond it down. I really don't want to bond it down. I just don't want to. Maybe if I just bond the sides down, but I don't really want that. Okay, so how about this? How about I put it on and I just used my baby hair cream. Where's the combs? Let's make sure the combs are in my head. There's combs here and then there's the comb here. I hate combs. I really don't like combs. Like, I don't have a problem if the wig comes with it because you don't have to put it in your head, but I typically don't use them because if there's tension on that wig you're gonna constantly have it moving back and it's gonna just constantly be pulling on your real hair. So I don't know what to do. If this was live, then I could like make a guess on camera, but it's not, and you all could help me. Is this straight to you? Yeah, that's straight. Okay, what do I want to do? I want to put this comb in there. Where's the comb? Crap, I don't know. I'm going to try and bond it. I like where it's sitting. I do like where it's sitting. So I'm going to have to do some very weird stuff to make this work. So since I decided to go ahead and bond it down, I just went ahead and started to dive in. So I'm going to fan it till it turns clear. And the weird— I've never done anything like this, and I would not do this on a client's head because it's just weird, but I did one side, bonded it and held it in place, and then did the other side. There's probably some stylist somewhere that's probably doing this on every single one of her clients, but it is not me. Okay, all right, so I'm cutting off the extra lace that comes above your ear, and I can do this with my eyes closed at this point because I do so much. And I did leave this on the regular time that I leave the bleach as far as bleaching the knots. I, I did it for the same amount of time that I do every single frontal, but This hair took really fast, so there is a little bit of overbleaching in the middle, but that's my fault. All right, so here's before I did any baby hairs. This is just with it bonded down and, um, no baby hair or anything, just the fresh it put on. I haven't even done what stylists call melting. I hadn't even done that, and it looks very good. It looks very good. I'm super yellow, so it's very hard to find lace as yellow as mine unless it's either transparent lace or it's like very, very, very light lace. So I am going to just fool around with it because it's so pretty. And now the look that I'm going for as far as the baby hairs with this is a really just natural messy look. Not messy messy, but like just I woke up like this, like this is my hair. It's not uniform baby hairs. So that is really the overall look that I'm going for. And I tried to put that heat on there and I was like, yeah, no, that's too close to my skin. So I'm going to use my foam and then I'm going to set it, um, lay it down with my neck strips in black. And so I'm just kind of just laying them there and then I'm gonna cut them because No one who naturally has baby hairs like this has them hanging down their eyelashes, okay? So I'm just trying to do a look that's very different but that just looks really natural and is really just not so uniform like the traditional baby hairs that you see on, on stylists' pages, okay? So I'm going to do the same thing to the other side. Which is just put that foam on there and then tie it down and see what it looks like. So of course I'm cutting those still, and you know I do the sideburn sometimes, and I'm not doing a sideburn or anything. I'm just doing just these little straggly hairs, and I'm gonna see how it comes out and how natural it looks. All right, so I'm tying it down, and once I have let that sit until I know that it is just completely dry, I am going to take it off and then see what that looks like. So you want to just let it dry, like seriously let it completely dry. And, uh, I'm just going to mess around with the other hairs because while I'm letting the baby hairs dry, I, I want my curls to still be defined in the entire wig. So I'm just using some of that setting foam to, um, define those curls a little bit more. And then I'm going to just play with it cuz I think I'm cute, girl. And that's really all I put on this. I didn't even use like my water spray bottle because it didn't need it. It really didn't need much of anything. This hair was really, really gorgeous. All right, so I'm gonna put this second, second one on just for extra protection. I don't know why really, but I just was like, let's just put two on because I want it to be super, super fleeky. Okay, do people still say that? I don't know. All right, so Here is the removal, and I really think it looks nice. But I am not the judge of this. I guess all of my subscribers are going to be the judge and tell me what it looks like, because I thought it looked really nice and natural. It looked like I just hurried up and got out of bed and was like, gotta go. That's really the look that I was trying to create with this. All right, so after this, I did get my makeup done, and you can see it with a little makeup on also. But it, it looks gorgeous the way it is. I added like 2 little swivels of baby hair at the top of it, and you'll see that. But for the most part, it looks great like this. Like, let me know what you all think, because this is— I just woke up, okay? The next look is I just got dolled up, I'm going out. Look at that, look at the close-up of that. Oh my goodness, I amaze myself sometimes. Like, how, how does this look like this? Like, it really looks good to me. Is it me? Like, come on. Let me know if it's me. Like, drop a star in the comment if you really, really, really like this. Then I went and got my makeup done. You could not tell me nothing, honey. So let me know what you all think. Drop a comment, and I will see y'all in the next video. And make sure you check out this hair. If you have experience with this hair, let me know. All right, see you later.