Natural FLATT Start to finish | U Part Wig | Lemoda Hair
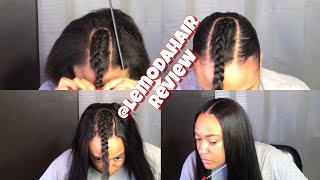
LaToya Kelly installs a natural-part U-part wig using four 24-inch Lamoda bundles, stitching them to a cap with dark brown thread and leaving out hair at the top. She skips the supplied wig cap, shampoos and styles the finished wig, then blends the leave-out with baby hair cream and KeraCare Edge Tamer for a flat, natural look.
Chapters
Hey guys, so my U-part wig is done. It's in, and I'm going to show you start to finish how I did it. So make sure you thumbs up this video if you learned anything, if you like what you saw. I did not cut any of the bundles. It is 24 inches, and, um, it is straight hair. I did not straighten it. It came in straight. Well, I straightened out a little bit, blended my hair with it, um, So yeah, tell me what you think. Make sure you drop a comment, and I will see you in the next video.
So this video here is with Lamoda hair, and it is beautiful hair. I got 4 bundles, no closure, no frontal. There are 4 bundles of 24-inch bundles, straight hair, and it came with this wig cap, which I didn't use for this wig because it is a natural part leave-out wig that I'm gonna do. So with this wig, I'm gonna start out with my wig cap. But let's show you the bundles. This is how the bundles look, very full bundles. They're beautiful full bundles. Like, you guys know I'm not gonna BS you, and honestly, this was some beautiful long hair. So let's get started. I'm gonna put one of my regular nets that I use on my regular sewing clients underneath the wig cap. And the wig cap and everything that I'm using is in the description below. It's a link that says all of the products I use in this video, and it's like little Amazon links. So I use my little push pins. This is a canvas mannequin head, that's what it's called, um, on Amazon. And I'm just going to start sewing left to right, right to left. I say this in all my little videos, but— but oh, I just want to add that my dear subscribers, you all are spoiled rotten because I cannot upload a video now with music because you all are spoiled by me talking and you're like, "I don't want to hear music. I don't want to listen to nothing. I want you to talk." So now I have to talk through all my videos. Excuse my sniffles. Okay. So I noticed I put a towel on this, on the clamp, because this wig was just moving, or the head was just moving way too much. But anyhow, anywho, I say anywho, y'all got me saying anyhow, okay, whatever. So I am stitching, stitching, stitching, and let's see, I'm gonna go through some stuff that I've already said in previous videos, but this may be some of your first time watching my channel. Welcome. But I do use dark brown thread. I do not use black thread because I hate it. I want it to be something that is easy for my sew-in clients to remove, and it's also easier for me to see if something gets tangled or if something needs to be pulled a little more. It's just a lot more visible. By the way, I am sewing through the wig cap to that net that I have under there, and I will cut the excess net out once I'm finished, but it just adds a little bit more stability to the wig so that if there, for some random reason, becomes a tear in the wig cap, then I have that net underneath there for extra protection. And all of the questions you all might possibly ask about stitching and threading needles, I have videos on everything you could possibly ask.. So please make sure you just skim through my videos because I have very detailed videos on everything. So moving right along, I do not stitch through the weft, I stitch above and under. I get that question a lot and I do have a video on that as well. All right, so I am on the second bundle at this point. And once I actually get to the third bundle is when I kind of start making sure that I go right up where that pin is, right in the middle, right where my finger was. I go all the way over. At this point, I'm still kind of behind the ear. Once I get to the next row on this side, I'll be above the ear where that push pin is, where you see So all right, I want to continue sewing. What do you guys want me to talk about? Hmm, um, I don't know what to talk about because you guys are just going to watch this video. Okay, but what I'm not going to do is sing. Okay, So this video, listen y'all, it took a lot out of me. I hurt my nail in this video. My nail actually like lifted from the nail bed. It hurts so bad. It'll be later on in the video, but yeah, I did a lot of injuring to myself. I dropped the mirror on my foot. So in the end of the video, you'll see a lot of frustration in my face, and it is because I was frustrated. This stuff takes a lot of work, so I just want to get the content out to you all and answer all your questions. As you see, I am above where the ear would be if this were actually on a person's head, and I'm still stitching left to right. And right now I'm going to make the marking with the pushpins where I will want to stop sewing. So it's just going to kind of give me a visual of where I want the kind of horseshoe shape, whereas if this was a regular person's head, I would have their leave-out to kind of show me, okay, stop sewing here, or start with a U-shape here around the leave-out. So I did that in the front, and then I'm going to do a middle— there you go, that'll be the back of what I want the leave-out to be. So that's as far back as I want it to be. And I do sew-ins for a living. I don't work, I do sew-ins 24/7. This is my full-time job and has been for the last— almost 6 years. So I kind of have an eyeball for things and how I want them to go. So it takes trial and error, um, and I've had a lot of trial and error over the past 6 years. So I'm still sewing. At this point, I'm on the last bundle, and this is the 4th bundle. I doubled them up, all wefts except for the 4th bundle. And the 4th bundle, I'm just going single until it runs out, very close together. Everything was very close together. And here's the end of that 4th bundle, and I'm still— I could have cut it there, but I'm just going to sew it right close to it just because I want every single piece of my hair in my head. I like full hair, as you all know. So at this point, you're going to remove all of the clips and pins from— that's holding the wig down to the, to the canvas head. And I, you know, you all know I spritz and clip the ends just to hold that fold over to being super flat. And I'm taking out all my push pins, and then I'm going to cut that excess lace off. And yes, you are not the only one. If you sewed a couple of pieces of the canvas into your wig, it's okay. The canvas will survive. You can cut the canvas part. The more you do it, the more you will get a little bit— I look at that, like, it's literally only like 3 pieces that I sewed down to the canvas, and the canvas will survive and it'll still be durable after this. So you're good to go. So here I'm just kind of showing you what it looks like on the inside, and I'm going to go ahead and cut out that excess lace that's around the outer perimeter of the wig because I don't need that. I just need the extra protection inside of it, and I have not cut the U-part out of the wig. So at this point, I flipped it inside out and I'm sewing on the, the, um, clips.
I am not one of those YouTubers who don't want to show her work, so I will show you where I stitched. I did not stitch in those holes that have that little thick thing in it, so I sew through each comb And as you see, I sew through each comb, through each one, through each comb, so that is not going anywhere. If you want to, you could put one here and here. I don't because this is stable enough.
And yeah, these are good.
So this is the inside of my wig. I did cut the inside out after I sewed on the clips. And yeah, this is the inside of it.
All right, so now I just shampooed and conditioned my hair. Put my little protective stuff on it, and I'm going to part where I want my leave-out to be. I have very thick hair, so I don't need a big leave-out, but, um, just for the video purpose and how much I actually had left to stitch around that leave-out on the wig, I left this amount out. I'm using my baby hair cream, which is also in the description below, and this is what I really use on frontals, but to mold your hair, it works perfect. So this is something that I do just because if my edges were to show, if the wind blows, I don't want them to see what it looks like on that other side that's not laid down, you know? Like, I just want it to be laid and fresh. And honestly, when I take my wig off at night, my hair will still be laid in a perfect ponytail. I can wrap my leave-out down around my sides that are already molded., and just my leave-out will be super, super flat the next morning. So of course my wig, I take it off every night to go to sleep, and it is perfect. Um, the U-part is perfect to tie down your leave-out right as you sleep, and it's just beautiful. So there you go. I blow-dried it on cool, and now I'm ready to put my wig on. I do the middle of the back first, and then I do my sides. And then I'm going to blend my leave-out with the unit. Now let me warn you guys, my hair is like a number 4, like it is very, very, very brown. This hair comes in a natural black, which is a 1B. So my hair is very, very brown. So, um, just because you see my hair I'm not your average. My hair is like a really dirty brown color, so I use my spritz to kind of lay down the flyaways, and then I use my hair oil to blend my hair in with the, with the extensions. The hair laid beautifully. I'm using my KeraCare Edge Tamer. To lay my edges down. Oh, and by the way, I'm just gonna add in there that I have like 4 lashes on each eye. I keep missing my appointment with my lash tech, we keep missing each other, and I didn't put a strip on. So yeah, so I'm just gonna straighten out the ends a little bit just from this wig kind of laying around. But honestly, this hair needed nothing. Like, it's so pretty, it didn't need anything. I curled the strip just to test it and straighten it back, and as you see, you can't tell where I curled it. And I curled a very big strip of it. It came out beautiful. So this is the ultimate end of me installing it. Let me know what you guys thought. I didn't realize that part was still tucked in, but let me know what you guys thought of the hair, of the U-part wig. Um, would you wear a U-part wig? Um, drop a comment below and leave me a thumbs up in the comments if you have listened to the entire video, because I know this is another long one.
All right, I love y'all. One day I'm gonna stop playing with these Snapchat filters, but this hair feels so great. This is my U-part wig.
More from LaToya






St. Louis, Missouri - Lasts 4–6 months - Takes 4–6 hours - Investment: $3,000 www.TTDoesitall.ai


What are #ktips? Here’s your answer! Schedule at www.TTDoesitall.ai 🩷 #extensions #ktipextensions

4-6 hours install and last 4-6 months #ktipextensions done by the right stylist the right way 💕

Located in St Louis Missouri 💝 Consultations available www.TTDoesitall.ai 💕#ktips #natural

K Tips take 4-6 hours to install and last for 4-6 months with proper care! #ktipextensions