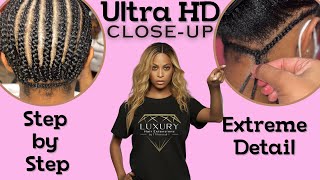
LaToya Kelly shows how to create a flat side-part sew-in with a leave-out, starting with four anchor braids and using clips and net stitching for a smooth finish. She covers adjustments for thick hair, minimal braiding hair, and stopping braids early on the sides.
I need to teach y'all them extensions and shit. The funny part—
I hope y'all see this video. Y'all need to pay attention. This is us sew in. This is skills, baby. We going to have you coming back, okay?
Hey y'all, it's your girl TT, and oh my God, my customers give me life. But I'm glad you guys are here cuz I'm going to take you through step by step on how to do this braid pattern. So of course, first I part for where I want her part to be, and then I part to the left and the right of that part, and I braid those forward. This is beginner friendly, so if you are starting out doing sew-ins, make sure you try this. If you're more advanced and you're trying to cut down time because you know everything, then you could just braid this into one braid. But you want to make sure that you cannot see through each side of that braid, because if you can see through it, that means your tracks will show. I'm going to leave a little bit out on this right side of her head just to cover the tracks as they go back, and you'll see that in video form at the end. My leave-out sew-ins always consist of 4 anchor braids. 2 will be around the leave-out and the other 2 will be around the side and back of the install. Let's be honest, we're entrepreneurs, we're creative, we don't care about the legal stuff. What you say? It will affect your business in the long run, and trust me, you want a lawyer on your side. I've used Rocket Lawyer myself, and trust me, it's a lifesaver. I didn't think I needed a lawyer until a customer came, paid in full on my website, and after she got her hair done, LaToya Kelly Kelly asked her butt home, and next thing you know, there's a chargeback on my account. Bruh. I needed legal help. The legal help would tell me what I could do, what I needed in the future to prevent these things from happening. Rocket Lawyer isn't just to help help you once you've gotten into something. It's preventative. Yeah, I know it's not as glamorous as talking about hair extensions and beauty, but you'll thank me in the long run. If you're juggling with your business, your side hustle, or even just trying to understand the legal side of your business, trust me, you need Rocket Lawyer. Double tap that link in the description and see if it's something that you need. They're always the smallest braids, so make sure you pay attention to the size. And if you're using braiding hair, which I do to make the braid stronger, you want to make sure that you're not using too much braiding hair because those braids are supposed to be small. I do leave a little bit of hair out in front of my anchor braids to make sure that there is coverage. So anchor braid 3 and anchor braid 4 do connect at the bottom of the back, and then they'll be braided into the top. You don't have to worry about the anchor braids being in any particular order, just as long as they connect where they're supposed to. And I braid the ends of each braid into the next. So I'll show you those as I continue to braid. I'm on the right side of the head, or wherever the part is not. So So if her part's on her right side, on her left side I stopped the braid a little shorter just to make sure there's room. If the client has thick hair, you really want to stop the braid on that side without the part a lot higher because their hair is super thick. And if you want thick hair to lay flat, you have to have a lot more braids. So these I cross over and I braid into the braid pattern, and you'll continue to see it as I'm doing it. That they'll be just braided in. Her install will be super, super flat. Um, I do not like the circle braid pattern. To me, it's kind of crazy to do it because you're just walking in circles around the client's head. So yeah, hopefully that sums up how I feel doing that braid pattern. This to me is just flatter, easier. You can stand in one space and just walk from the left side to the right side of the client's head. You don't have to go in circles around them. So anywho, we're using my luxury loose wave hair that is already giving life, okay? It's flat, super, super, super flat. And you see that piece I left out to the left, and then I'm sewing the bundles left to right, left to right. But you see the braids are going up and down. So with that net, I can stitch anywhere, and I have videos on how to stitch your net down. And you see it's super flat. The braids stop right in front of each other, so the tracks just lay nice and flat. And those clips are just a little trick if you try to fold over your weft and there's a little lump there. You can just use like some hairspray. I still use Spritz Smack Slips. And I also just use a clip, hold it down, and then you— by the time you take it off, it'll be nice and settled. So this is the end result of her sew-in. Of course, she always loves her hair. And if you like her hair and this was helpful to you, please make sure you thumbs up this video and drop a comment. Let's see, drop a comment of a baby bottle because This is a bottle of oil, and we don't have no bottles of oil, do we? So you got to drop a baby, baby bottle. Everybody gonna be like, what are they dropping baby bottles for? But we gonna know because we made it to this part of the video. So I always oil my client's scalp. That is some additional, um, tips if you have not seen it already. I use the Wild Girl Hair Oil, and, um, I styled her hair So she is good to go and she loves her hair. And you guys, drop a comment and let me know if there's something I missed, something I skipped over or went too fast over and you want to see, and I'll create the video on that next.